Custom Picture Styles on the Canon M50
Some links in this post are affiliate links, so if you purchase an item through one, I may receive a small commission at no extra cost to you. These credits go directly towards supporting this blog and my YouTube channel.
When recording video with the Canon M50, Picture Styles inside the camera control how much color saturation, contrast, and sharpness is applied to your footage. In this article, which is part three of a four-part series, I’m going to show you how to customize Picture Styles to get more dynamic range out of the camera and make footage look better and more professional.
Why not Standard?
In part one I recommended using the built-in Standard picture style for general use. Standard produces a decent looking image with sufficient contrast, saturation, and sharpness. Canon has always been recognized for its color science, so basic video out of the M50 looks pretty good for a budget, consumer camera.
Standard is convenient, but that convenience comes at a cost. Footage can be difficult or even impossible to edit thereafter. To use a food analogy, it’s the equivalent of trying to change the ingredients of a dish that has already been cooked.
What we need instead of Standard is a picture style without style. One that doesn’t add saturation, contrast, or sharpness. Also, a style that compresses luminosity values towards the center of the histogram to capture more detail in dark shadows and bright highlights.
This type of picture style in more expensive cameras is called LOG. But the Canon M50 is a budget consumer camera, so it doesn’t include LOG. However, LOG can be emulated by using a “flat” picture style. It’s not the same as LOG, but it’s the next best thing.
Custom Picture Styles
I will test three “flat” Picture Styles — FilmKit Flat, Technicolor Cinestyle, and Prolost Flat.
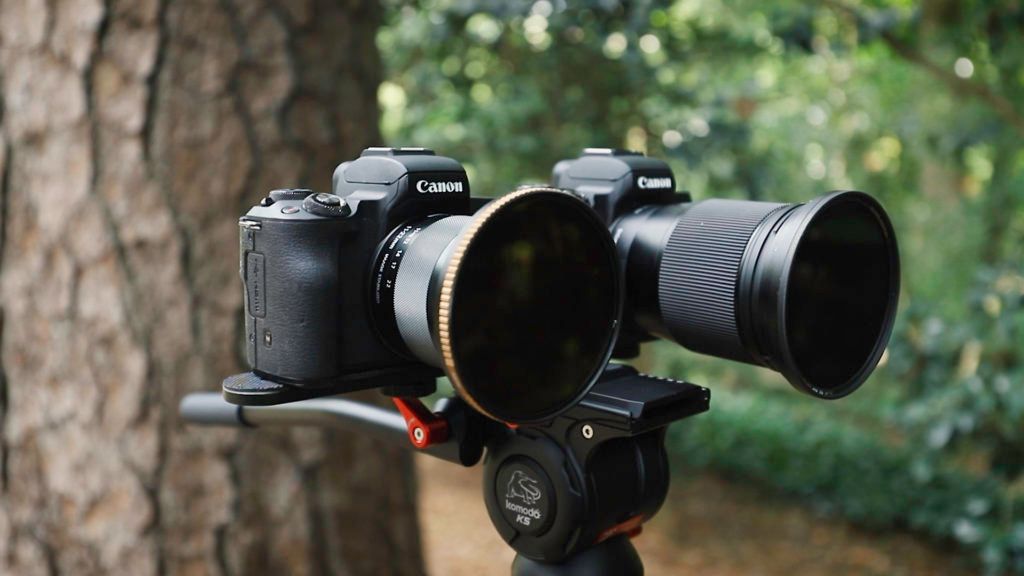
To test these styles, I will use two Canon M50s mounted side-by-side, each using the same exposure values and white balance. That way comparing footage is more accurate because both cameras are capturing the same thing at the same time.
FilmKit Flat
Let’s begin with the FilmKit Flat. This is a custom picture style created by a freelance filmmaker in the Netherlands named Gerben Schmidt. He created FilmKit specifically for the Canon M50 to emulate Canon C-LOG in the EOS R. So if you shoot LOG on the EOS R and FilmKit Flat on the M50, footage can be more easily combined. At the time of this writing, FilmKit Flat sells for 10 euros.
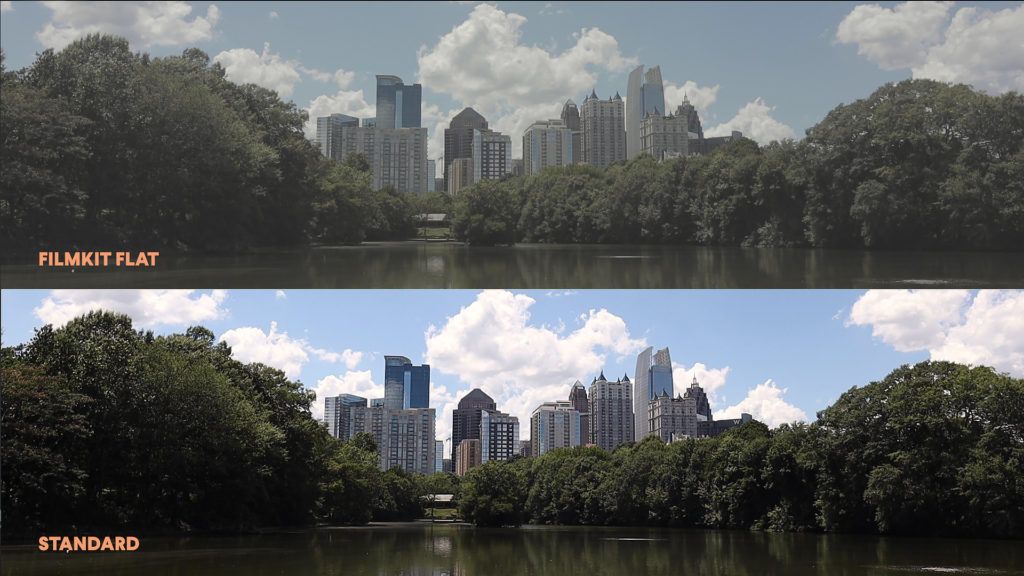
On the bottom of the image above is one M50 using the Standard Picture Style, and on top is the other M50 using FilmKit Flat. Both videos are using the same white balance, same exposure settings, straight out of camera without any processing.
You’ll notice that the FilmKit Flat footage looks gray and washed out. That’s good because we are increasing the dynamic range of the camera by squeezing luminosity values towards the center of the histogram. This protects blacks and whites against clipping, and produces more detail when the histogram is de-squeezed and stretched back out again.
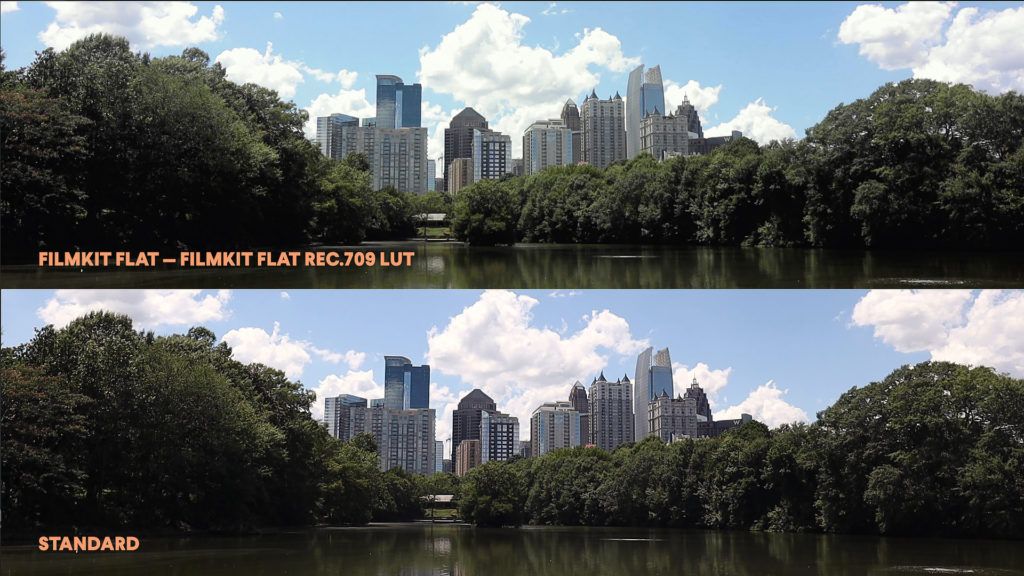
So let’s do that now by applying the Rec.709 Utility LUT included with FilmKit Flat. If using Premiere, you simply select your footage on the timeline, then go to the Basic Correction panel in Lumetri Color. Select Browse next to Input LUT, and then select the LUT file included with the FilmKit Flat download.
And what you get is footage that — to my eyes at least — looks better than Standard. The colors are more accurate, the sky is closer to true blue, and the highlights are warmer and creamier looking.
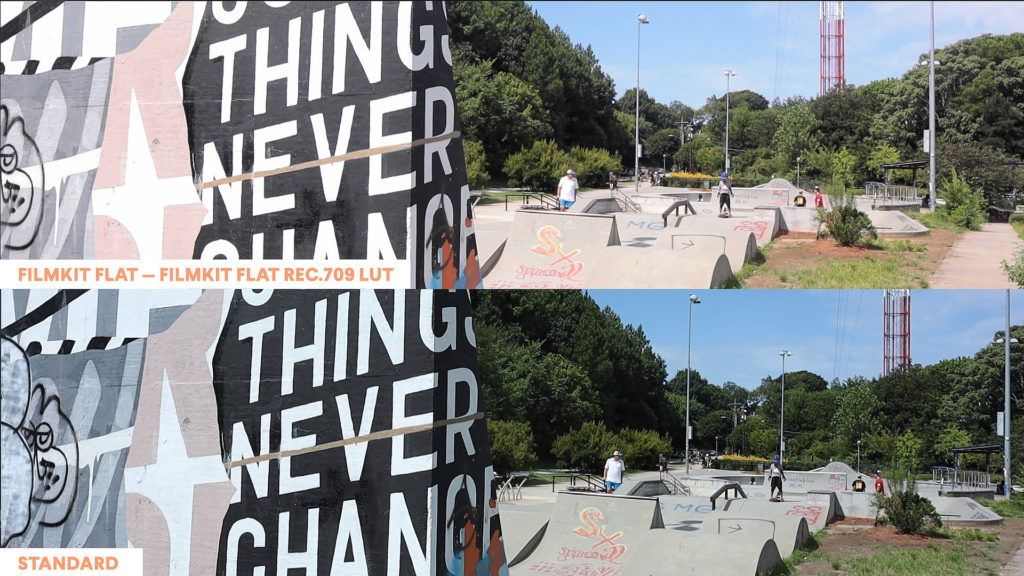
Here’s another example. Standard on the bottom, FilmKit Flat on top. Here again, the FilmKit Flat footage doesn’t appear as muddy and dark as the Standard footage.
Another example, this time to look at skin tones. Standard on the left, FilmKit Flat on the right.
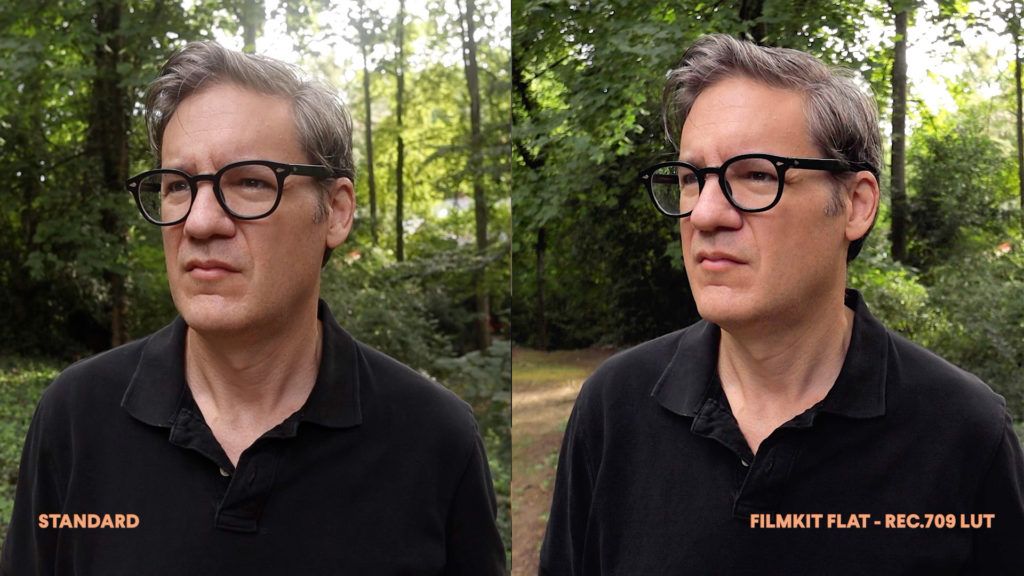
I think my skin tone looks warmer and not as gray or green as the Standard footage does. The footage also isn’t as crunchy and oversharpened. My skin tone may be a little too saturated, but that’s something that can be easily fixed in Premiere.
In addition to FilmKit Flat, the same developer sells an additional set of Rec.709 LUTs which includes a helpful “Wide DR” utility LUT.
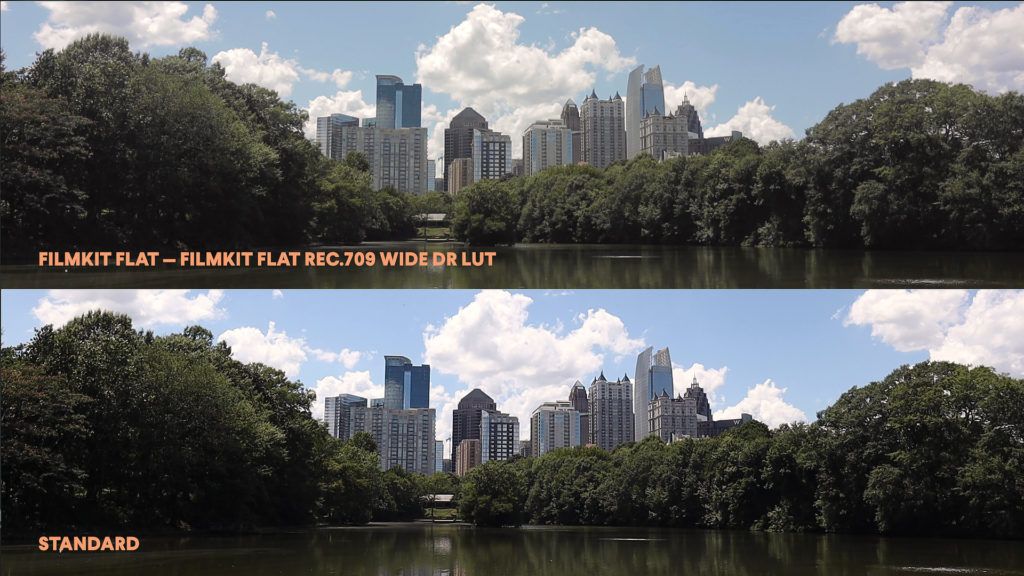
As you can see here, the effect is not as strong to create a better baseline for applying a second creative LUT or custom color grade on top.
Do you have to use LUTs?
Now, a couple of important points regarding LUTs. One, if a LUT doesn’t look exactly right, you can fine-tune appearance afterwards with basic corrections to Highlights, Shadows, whatever needs a little extra attention.
Two, you don’t have to use LUTs to grade footage. I like using LUTs because they’re fast and convenient. But if you have experience color grading, you can take flat footage and grade it without a LUT however you want.
I am not a professional colorist, but to prove this point, here are a couple of examples to show you how much creative latitude you have.
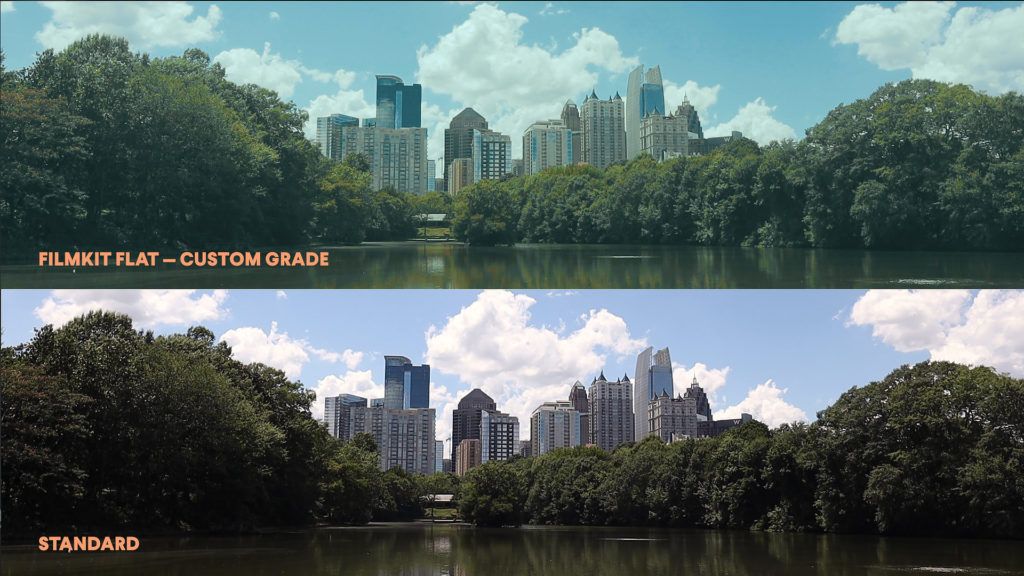
Here’s the same skyline footage from earlier, but this time I edited the contrast and colors myself to give it a blue/green filmic look. This footage is rather challenging because it was shot on a bright sunny afternoon, but I think you’ll agree that now this footage looks completely different from the Standard profile.
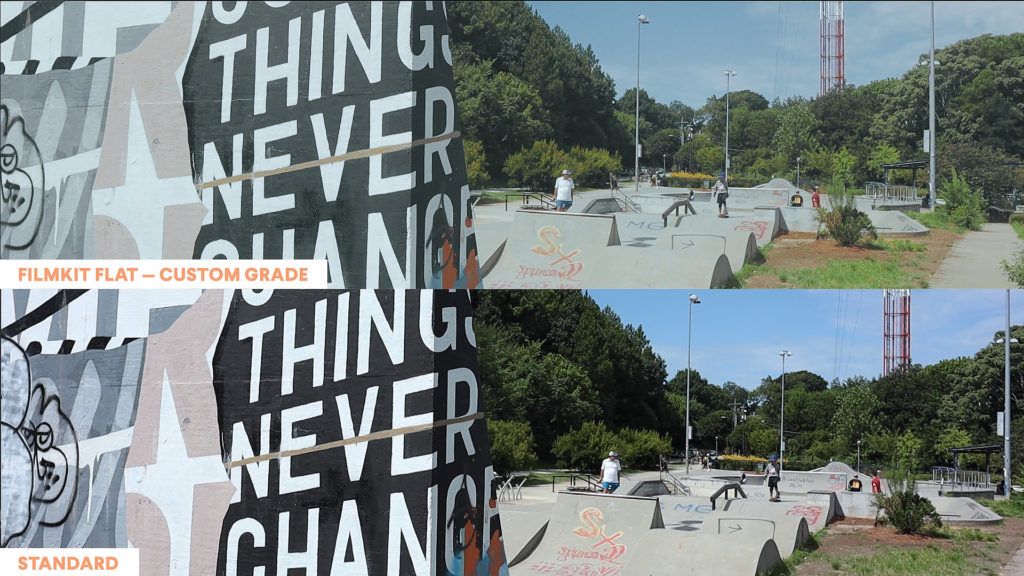
Here’s another custom color grade using the skate park footage again. Standard on the bottom, FilmKit Flat on top graded using my own settings in Premiere. Again, very different from Standard.
Cinestyle
Cinestyle is a free Picture Style created by Technicolor. You can install Cinestyle on any Canon camera which supports custom picture styles. Cinestyle was originally designed years ago for the Canon 5D Mark II.
I have tried using Cinestyle on two Canon DSLRs in addition to the M50, and my footage has never been usable. I’ve tried numerous third-party Cinestyle to Rec.709 utility LUTs, have tried grading Cinestyle footage myself, and the results are never good. Skin tones always turn out splotchy and uneven, and there is always a noticeable loss in clarity and detail which is pretty much impossible to bring back in post.

Prolost Flat
Unlike FilmKit Flat and Cinestyle, Prolost Flat is not a file you download and install, but rather a custom picture style you create by editing settings on the camera. These settings create flat footage that looks similar to FilmKit Flat and Cinestyle.
I’ve had far better luck using the Prolost Flat technique on my Canon 5D Mark IV. It’s actually the style I use when recording videos for my YouTube channel.
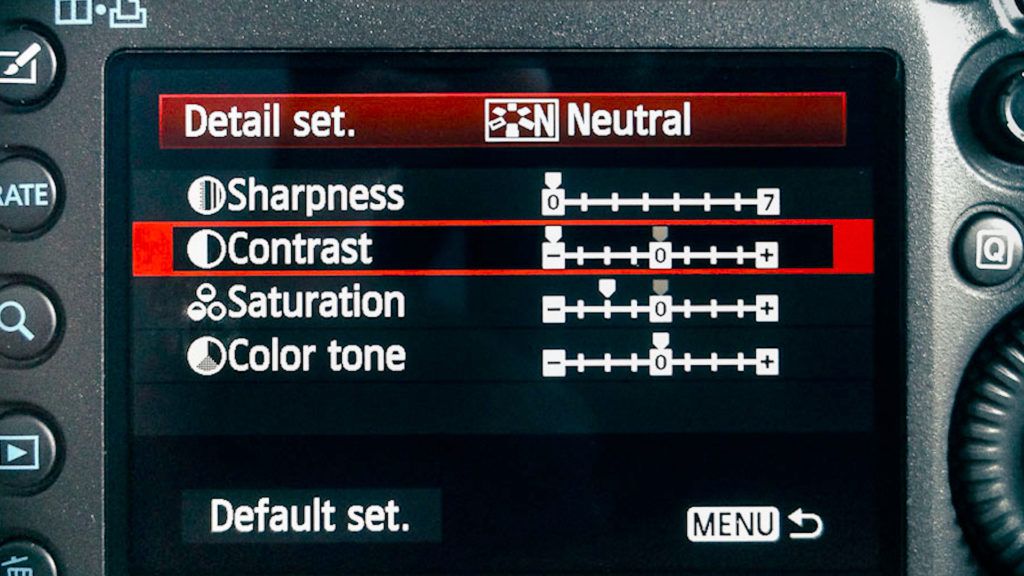
Here’s what the Prolost settings are. You can actually pick up your camera right now, go to Picture Styles, and edit one of the User Defined functions at the bottom with these values.
Generally speaking, I get better results using the Prolost Flat technique on the M50 than Cinestyle, but that’s not saying much. The footage still lacks clarity and detail.
I think overall the Prolost settings and Cinestyle have a more pronounced effect on M50 footage than they do on full-frame DSLRs which is what they were originally intended for.
The nice thing about the Prolost technique is that there’s nothing to purchase, nothing to install, and you can tweak the settings however you want.
Final Thoughts
I think ultimately what we’re getting to here is that the M50 is an 8-bit, crop-sensor consumer camera, and if you’re serious about color grading, then chances are you’re not going to use an M50. You’re going to purchase a more expensive camera that supports LOG, and not mess around with flat picture styles.
But that said, there’s a lot you can do with an M50, especially if you use a Picture Style like FilmKit Flat and edit your footage thereafter using software. I obviously like FilmKit Flat a lot, especially after all the tests I ran comparing it to other options, and would recommend it to anyone who’s interested in color grading their M50 footage.
Video
Watch the video version of this article below.
Canon M50 Video Guide
For more, check out the rest of the Canon M50 Video Guide.
- Part One: Best Settings for Video on the Canon M50
- Part Two: Best EF-M lenses for video
- Part Four: Better 4K Video