Dehancer Photo review: digitally emulating the look of film
Digitally recreating the look of classic film stocks from Kodak, Fujifilm, Polaroid, Agfa and more
Dehancer Photo gives digital images the look and feel of classic analogue film. Developed by the same company behind the popular Dehancer OFX video plugin for DaVinci Resolve, Dehancer Photo includes sixty-two film emulation profiles (including color negative, color positive, black and white and more), plus special effects that help make digital images look even more like film.
- Beautiful color film emulations
- Loads of configurable options that mimic analogue darkroom techniques
- Special effects including colorful grain and halation
- Plugin compatible with variety of photo editing apps
- Cannot edit RAW files
- Film emulation previews could be easier to see
- Could use better support for opening and saving files as a standalone application
Disclaimer: Dehancer provided me with a software license for Dehancer Photo, however they have not sponsored or paid for this review, nor have they had any editorial input.
Importing images
Dehancer Photo is installed as a plugin for Adobe Lightroom, Photoshop, Capture One and Affinity Photo. The plugin edits 16-bit sRGB TIFF images only (not raw). This is because images must be rasterized to apply special effects that aren’t technically possible in a raw processing workflow.
When opening a raw file from Lightroom, a 16-bit sRGB TIFF image is automatically created, then exported to Dehancer Photo. After editing, the same TIFF file is overwritten by Dehancer with changes.
Any edits made to the source raw image are used when the TIFF file is created. For best results, it’s a good idea then to “pre-process” raw files in preparation for film emulation. I recommend doing the following before exporting a raw file to Dehancer Photo:
- Create a virtual copy (if you don’t want to modify the source raw file)
- Correct any unwanted color cast (using Temperature / Tint or other tools)
- Adjust exposure if over or underexposed
- Crop if necessary
- Enable lens profile corrections (to remove optical vignette)
- Disable sharpening and noise reduction (set both to zero)
Dehancer also recommends the following Lightroom develop settings to bring the dynamic range and contrast of a raw image closer to the tonality of film prior to emulation. This effectively removes the contrast curve Lightroom applies to all raw images and creates more of a video log / linear tonality for Dehancer Photo to work its magic.
- Profile: Adobe Standard
- Exposure: –1
- Contrast: –40
- Blacks: +60
Overall, the general idea is optimizing the input for better output. A corrected image will look better when converted using a Dehancer Photo film profile. Some experimentation and trial and error may be required to get the look you’re after.
Dehancer Photo can also edit standalone 16-bit sRGB TIFF files exported from other raw editing software. Simply export a TIFF file, then drag and drop the TIFF onto the Dehancer Photo plugin app (installed in the local applications folder). Dehancer Photo will open and overwrite the TIFF with edits, so it may be a good idea to first duplicate the original TIFF for backup.
Editing images in Dehancer Photo
Dehancer Photo provides image editing tools designed around the unique characteristics of film and classic darkroom image processing techniques.
Selecting a film profile
First step in the film emulation process is choosing an appropriate film profile. At the time of this review, Dehancer Photo includes sixty-two profiles emulating color negative, color positive, black and white, and motion picture film stocks. Popular favorites including Kodak Portra 400, Kodak Ektar 100, Fuji Pro 400H, Fuji Velvia 50, Fuji Provia 100F, and Ilford HP5 are included, as well as less common film stocks from other manufacturers.
This is where some prior knowledge of each film stock and their unique characteristics can prove useful. For example, color negative film like Kodak Portra and Fuji Pro 400H are softer, less saturated, and more well suited for portraiture. Color positive film like Velvia and Ektachrome are richer, more saturated, and more well suited for landscape and travel photography.
Some film stocks are color balanced for daylight and others tungsten lighting. The latter is designed for use indoors, or outdoors at night. If colors look too blue or too orange, you may using a film stock that wasn’t intended for the type of light in your shot.
Adjusting exposure
Underneath Profile is the Push, Pull, EV slider. This emulates the behavior of film when over and underexposed (in camera and/or when developed). Meaning, instead of an image simply becoming brighter or darker like digital, Push, Pull, EV shifts color and contrast to more accurately emulate more or less light hitting real film emulsion.
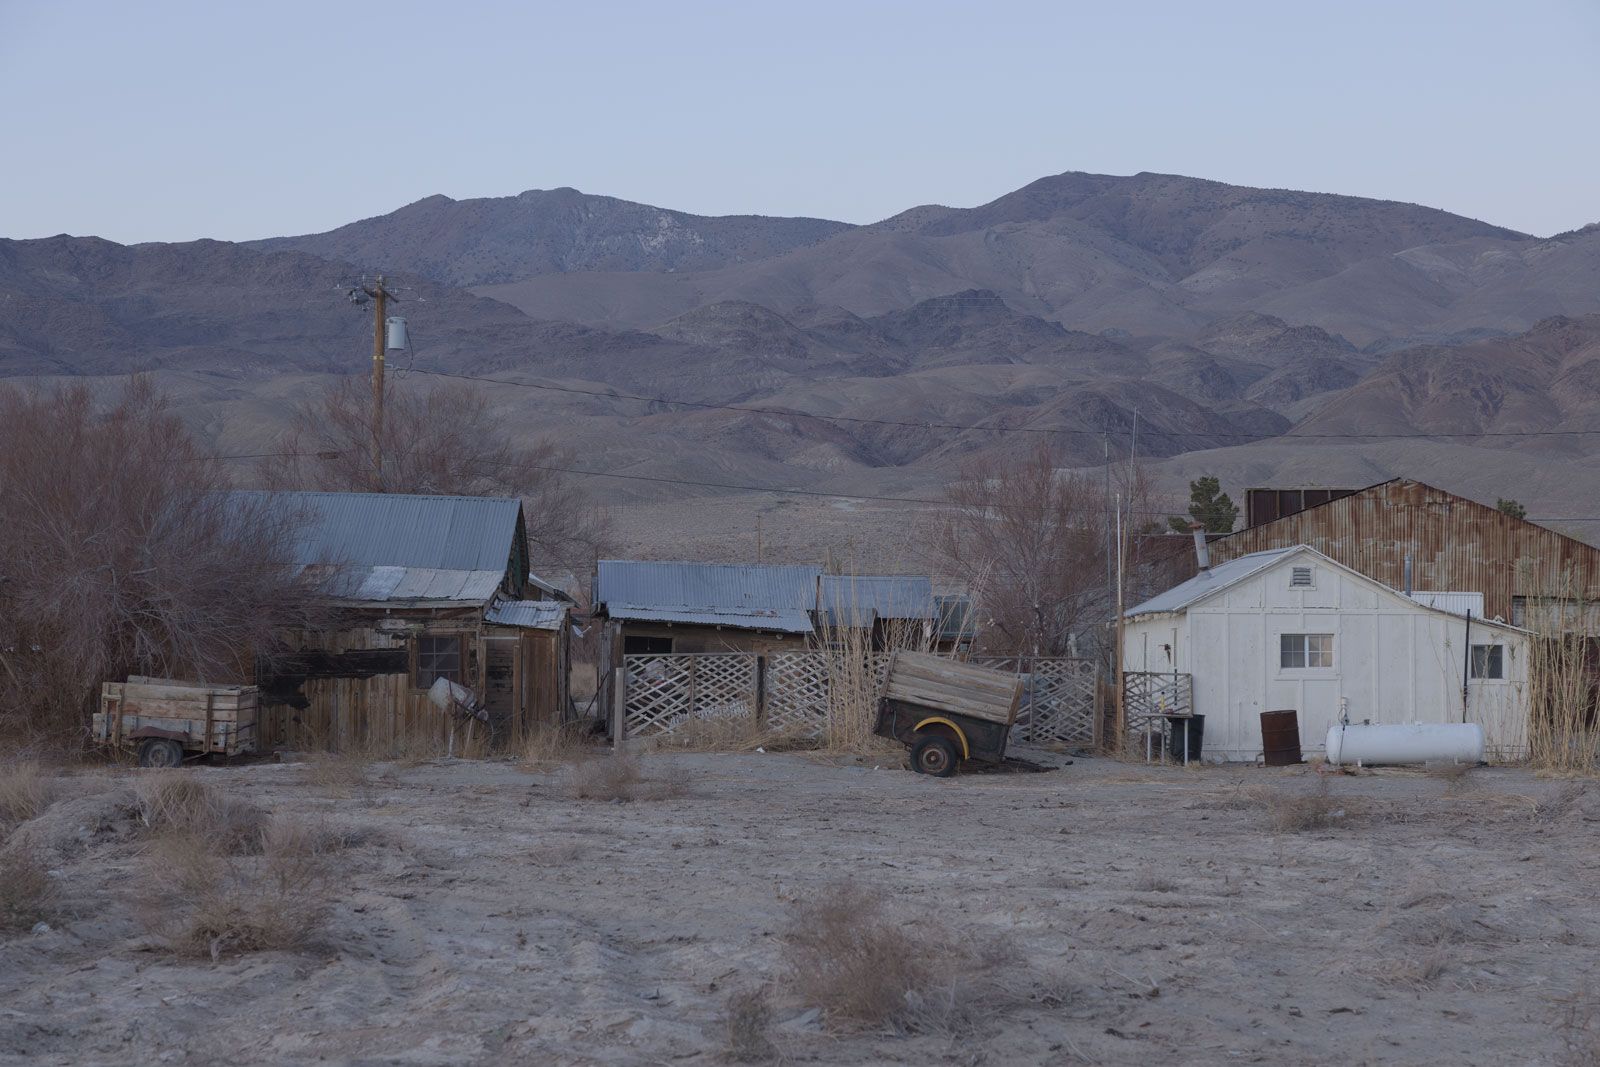
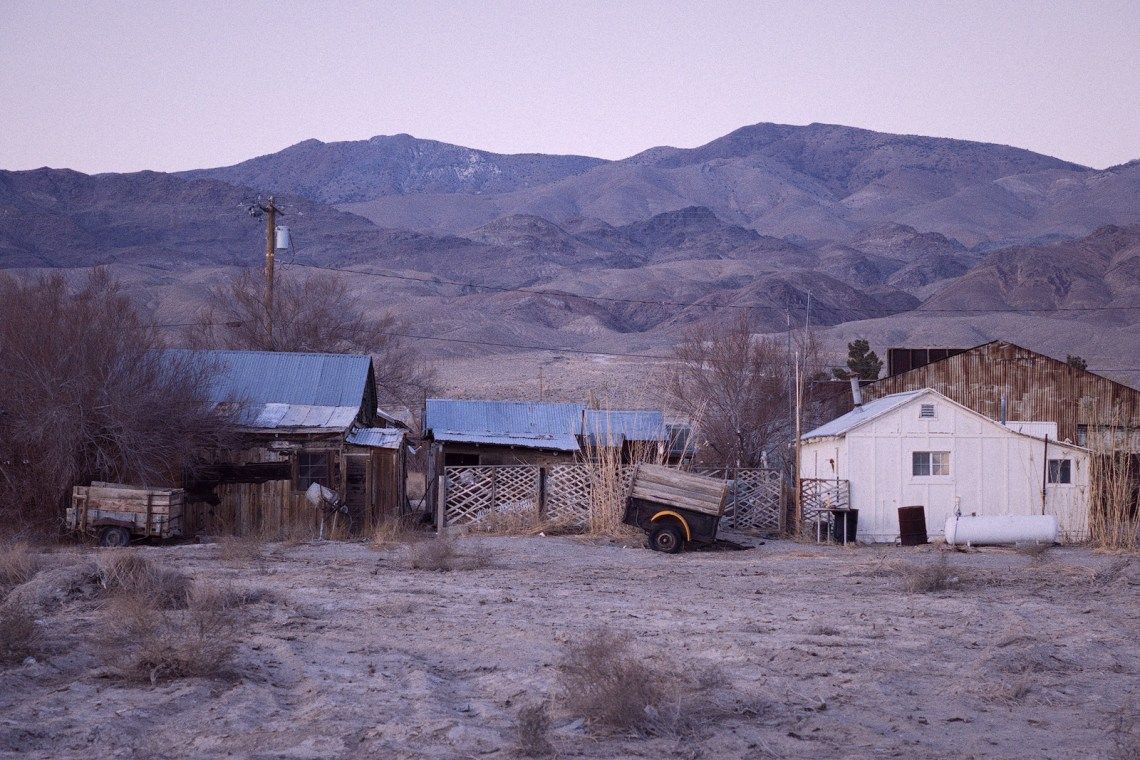
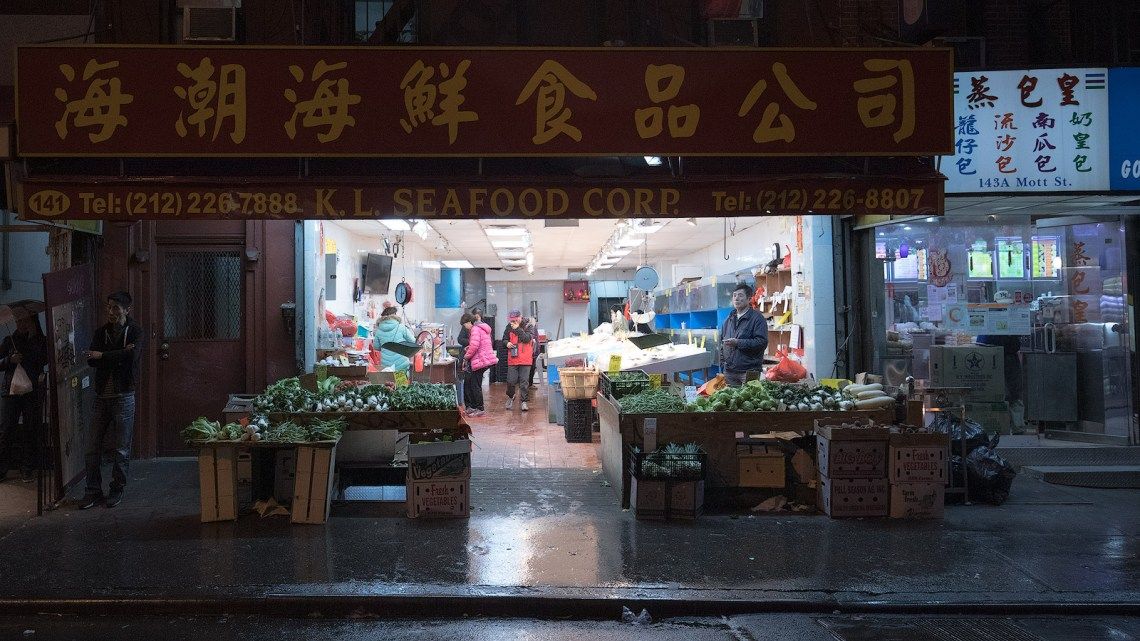
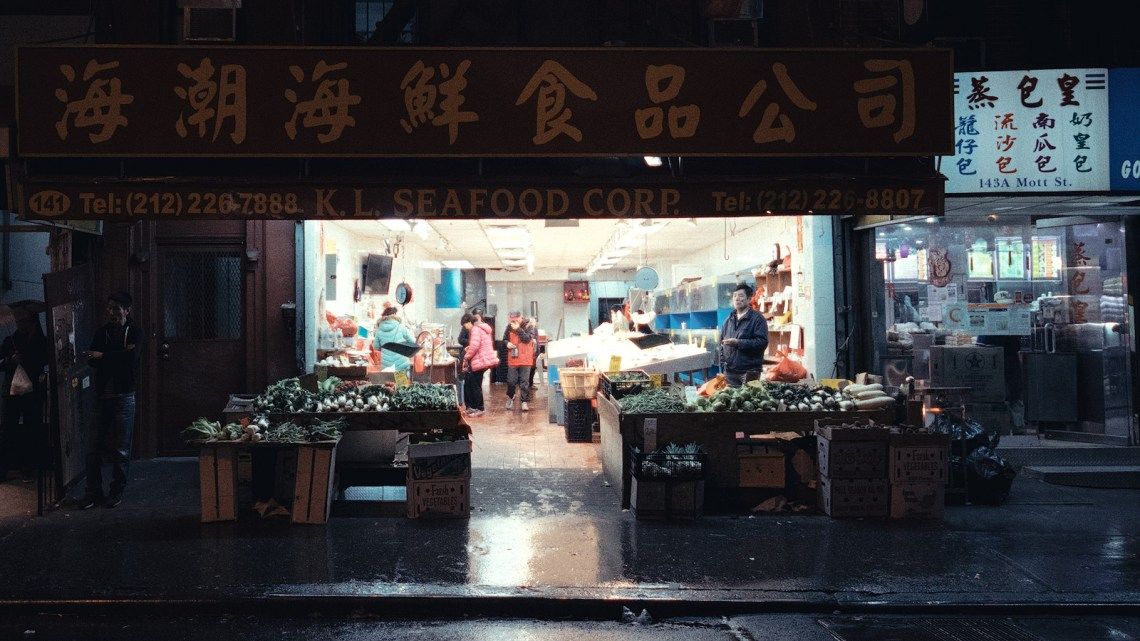
For example, in the comparison images below, both are using the Fuji Velvia 50 color positive film profile, but the second image has been pushed one stop. The second image is noticeably warmer, with less magenta and lifted shadows to mimic the actual, real-world behavior of Velvia 50.
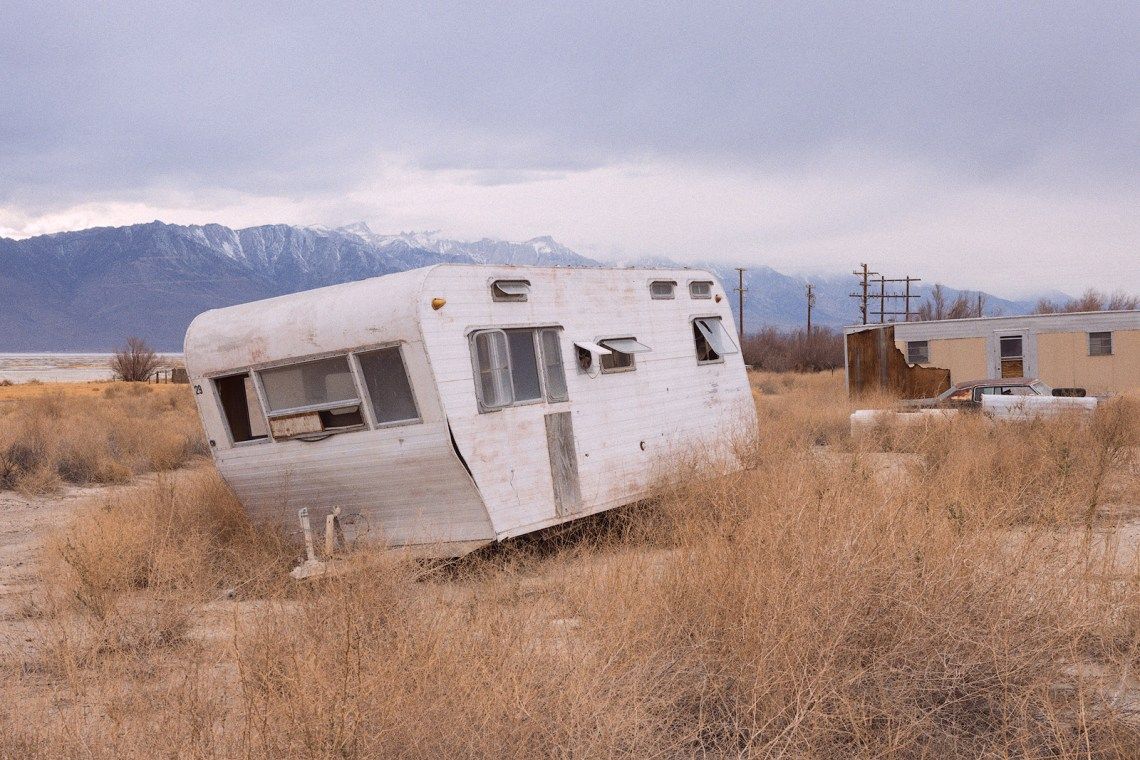

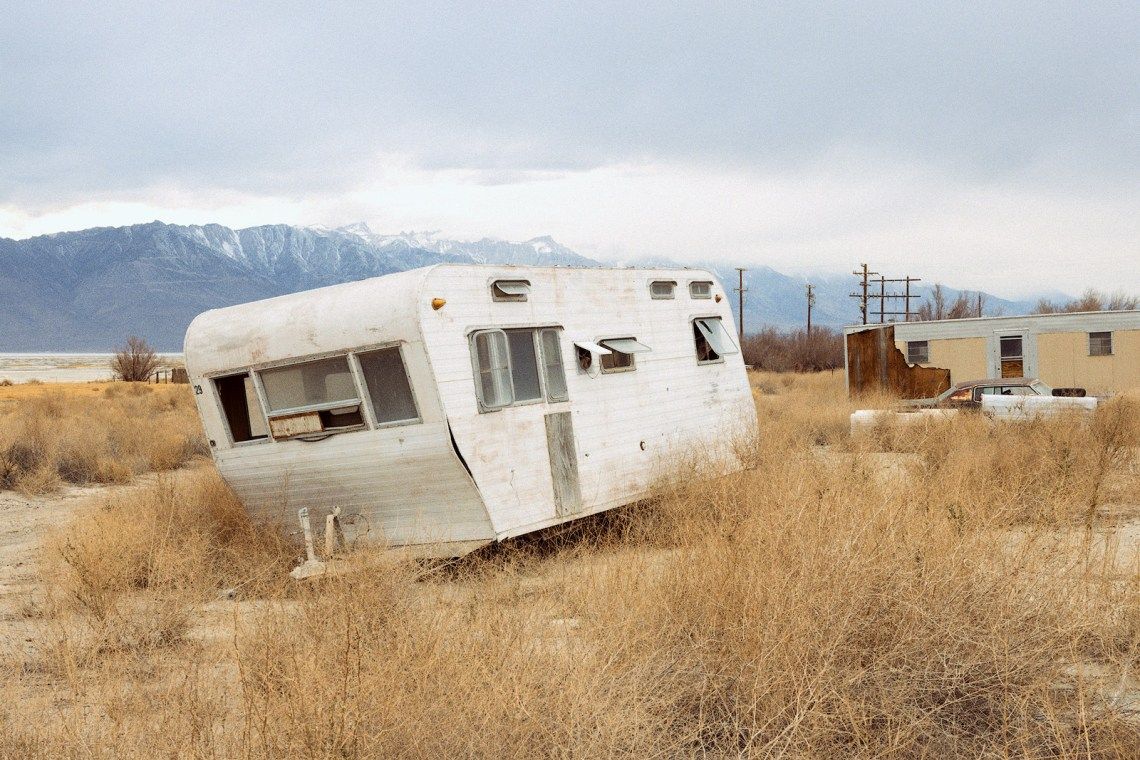
Color Positive film displays greater changes in brightness, contrast and color when pushed and pulled compared to color negative film which tends to be more subtle. Pushing and pulling film isn’t necessary, but can be useful if you’re going for a particular creative look.
Note that applying a film profile is not required. The plugin may simply be used to apply effects to an image that has already been color graded and edited. This is helpful for when you only want to use Dehancer Photo’s stylistic effects.
Assigning a print medium
Film emulation in Dehancer is a two step process. First there's the emulation of the film itself (how a photo looks in negative or positive form when scanned), then an emulation of how that film looks when printed on paper or positive film for screen projection. This is what the Print tool is designed for.
"Printing" in this context doesn't have anything to do with printing an actual photo on a printer, but rather emulating the changes that would occur if an image were printed and then scanned for digital delivery.
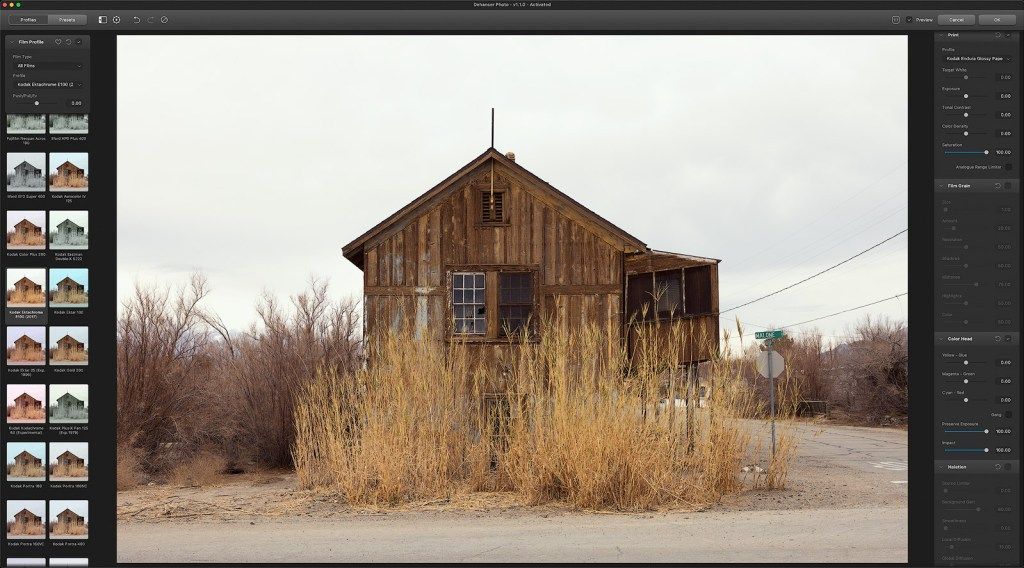
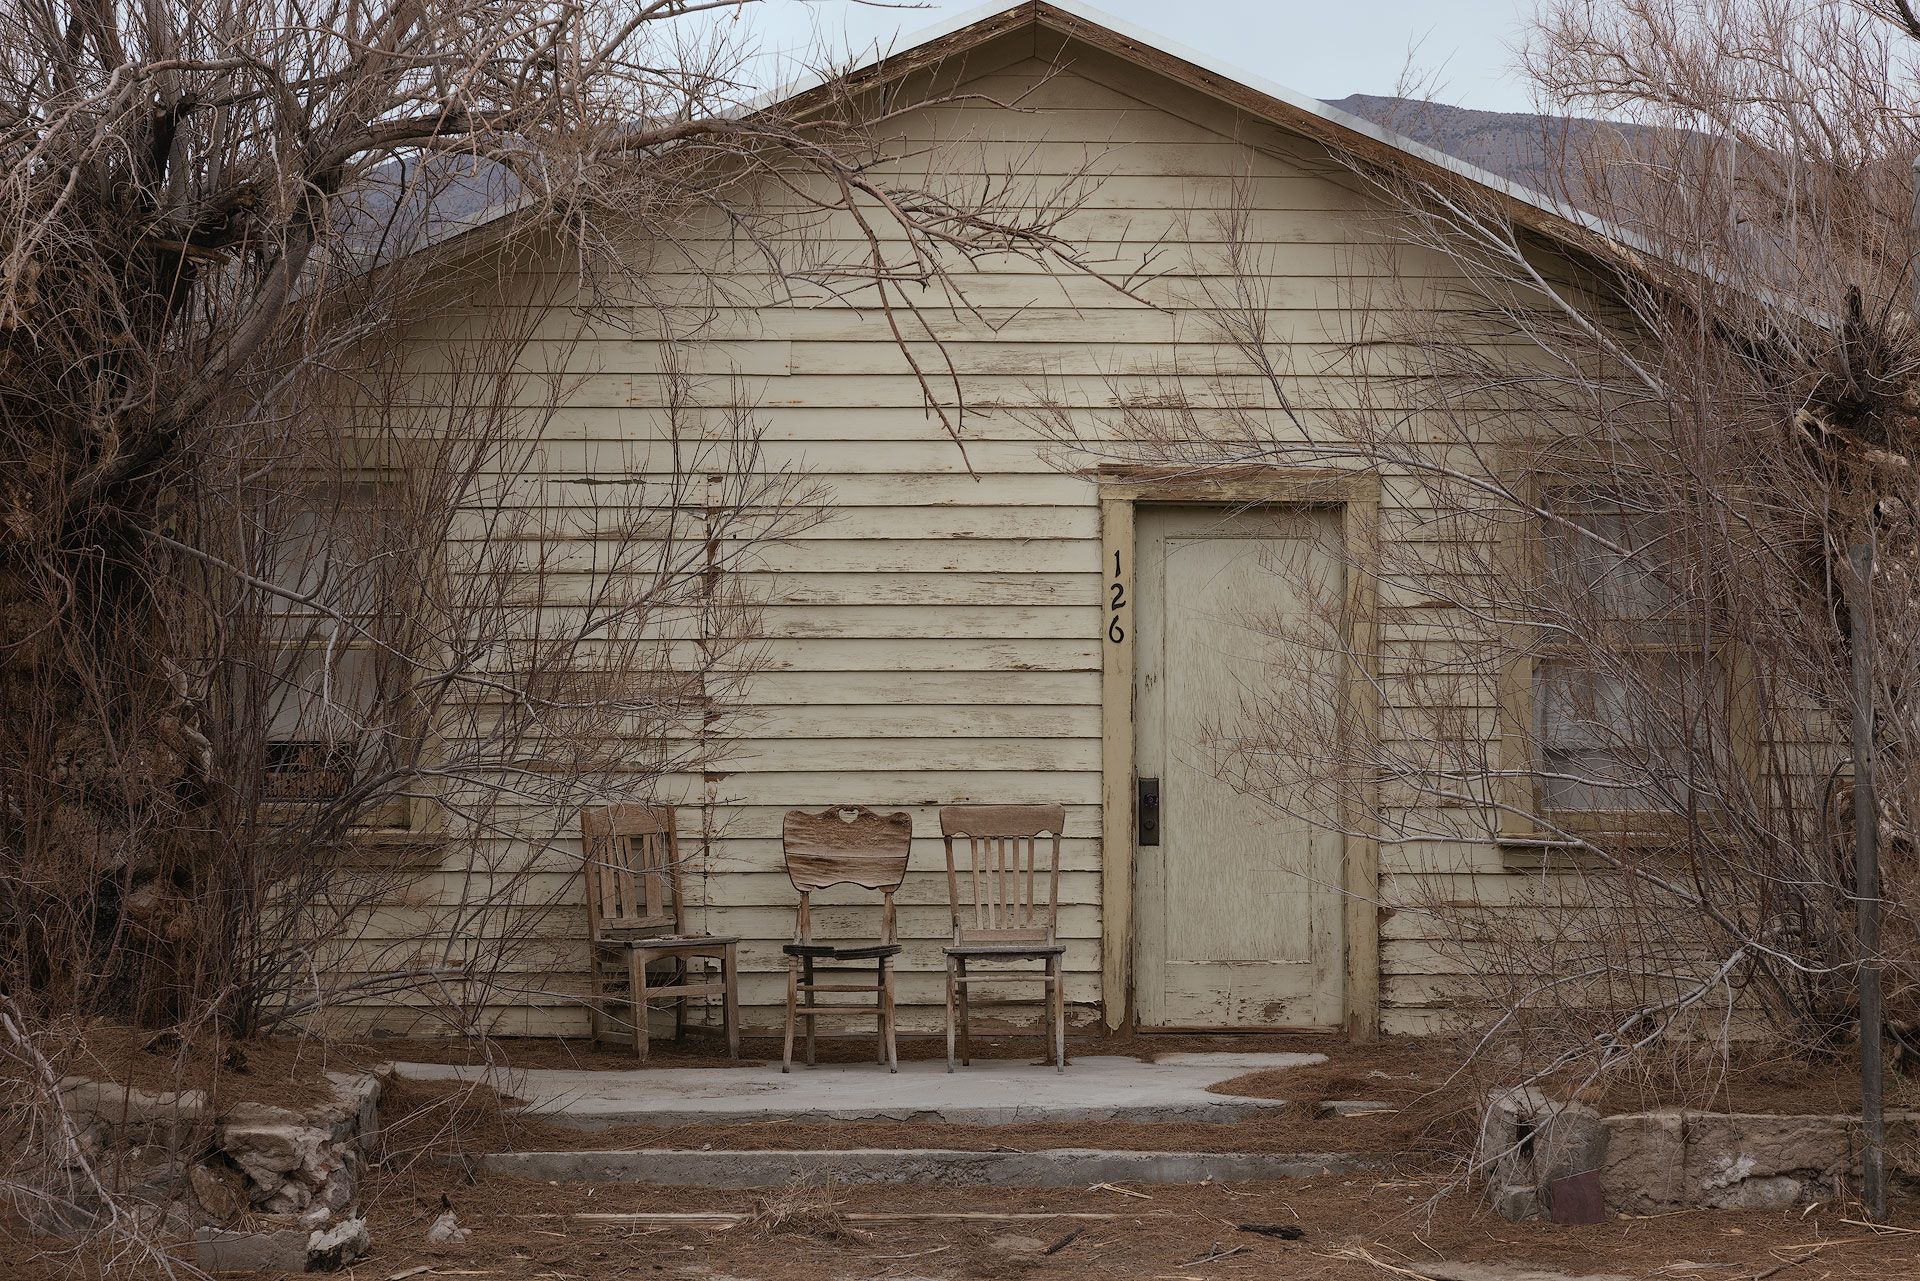
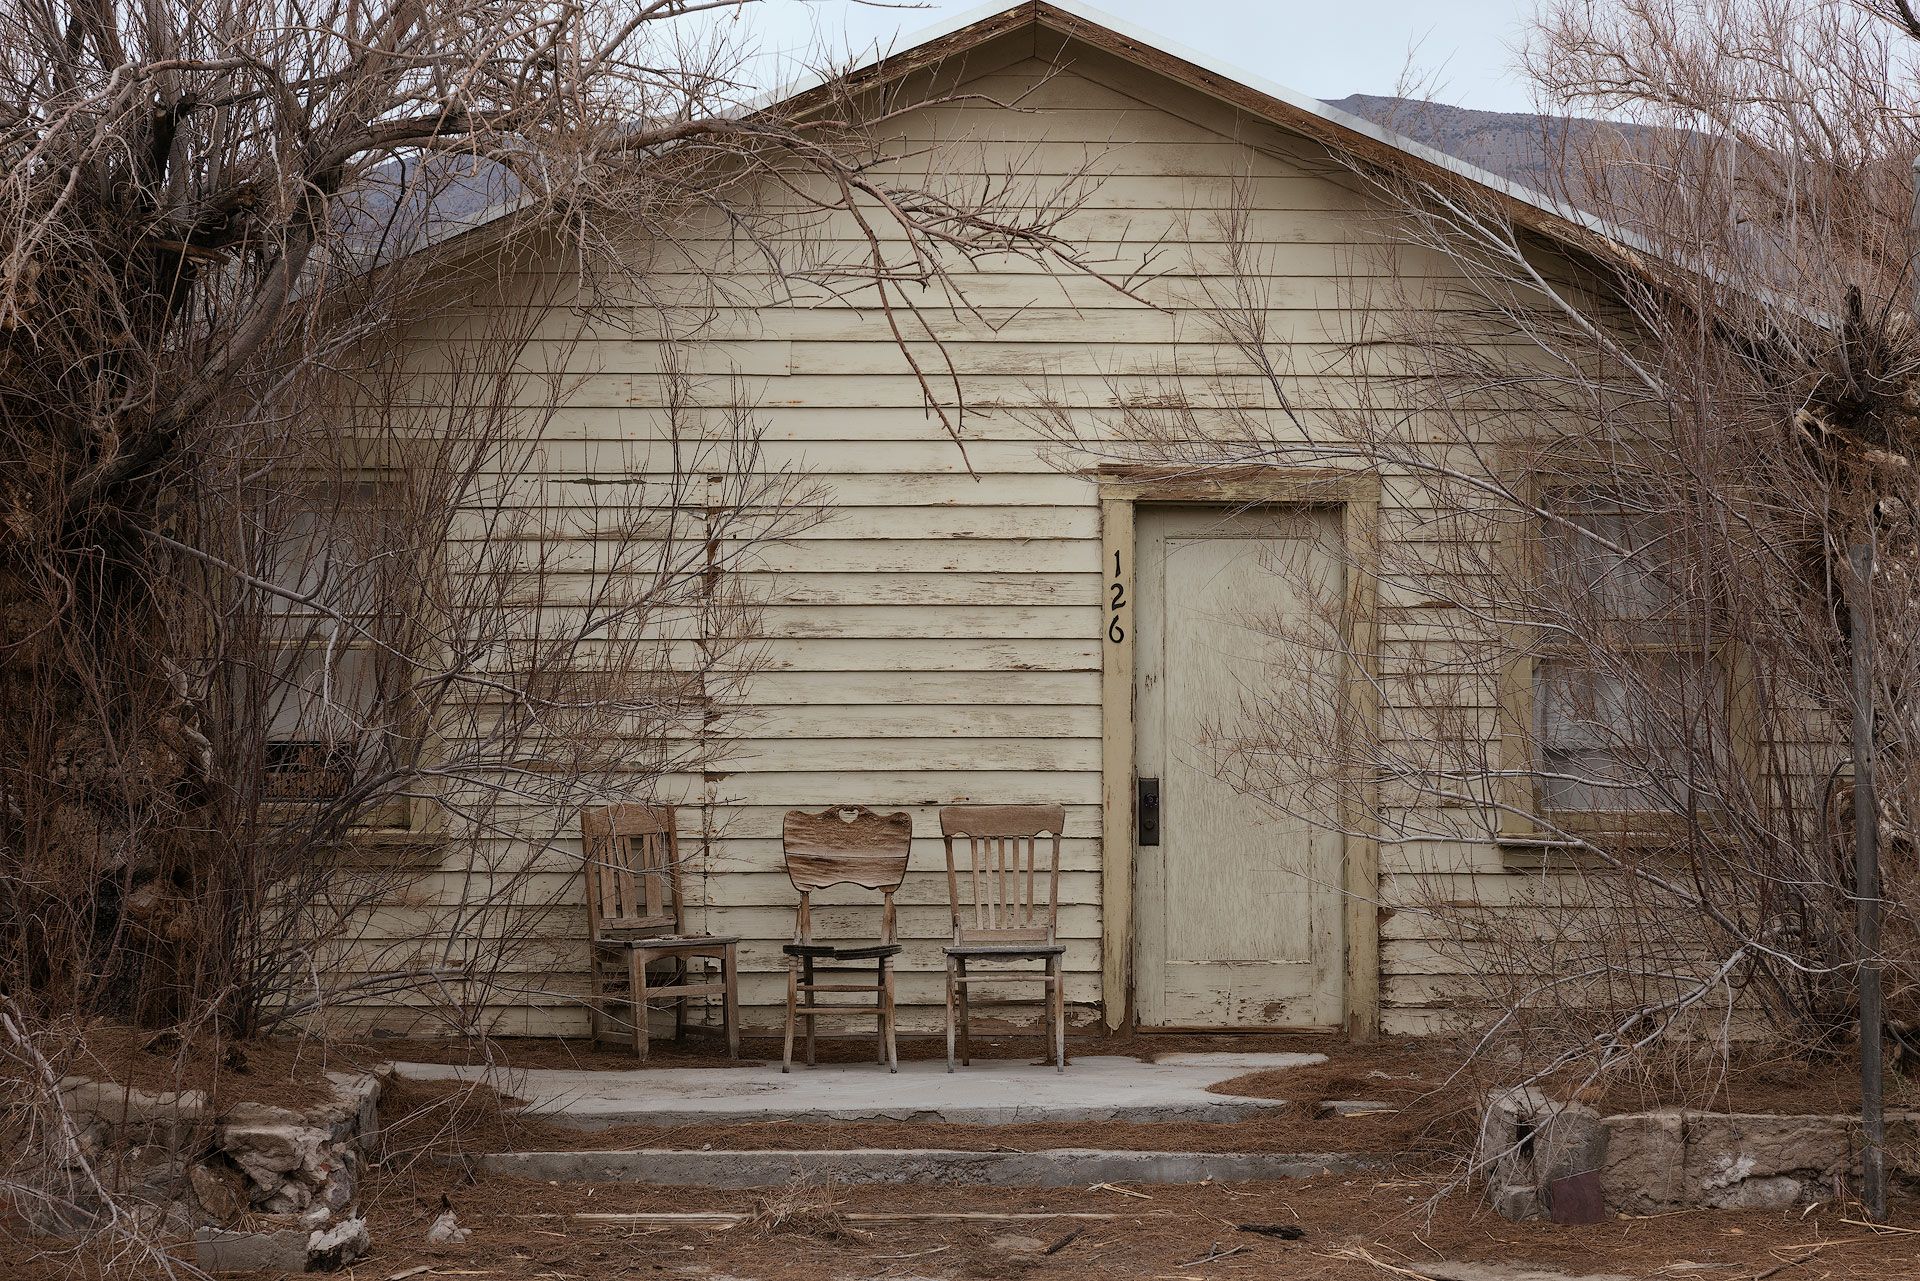
For color negative photos, "Kodak Endura Glossy Paper" is the most appropriate option. You then have additional control over exposure, tonal contrast, color density and saturation, as you would when printing actual color photos in a lab. The image below shows the difference between emulating only a film negative (left) and the same film "printed" to Kodak Endura paper in Dehancer.
For color positive (slide) film, Dehancer recommends using "Linear" as the print medium to remove the influence of photographic paper, but you're free to experiment.
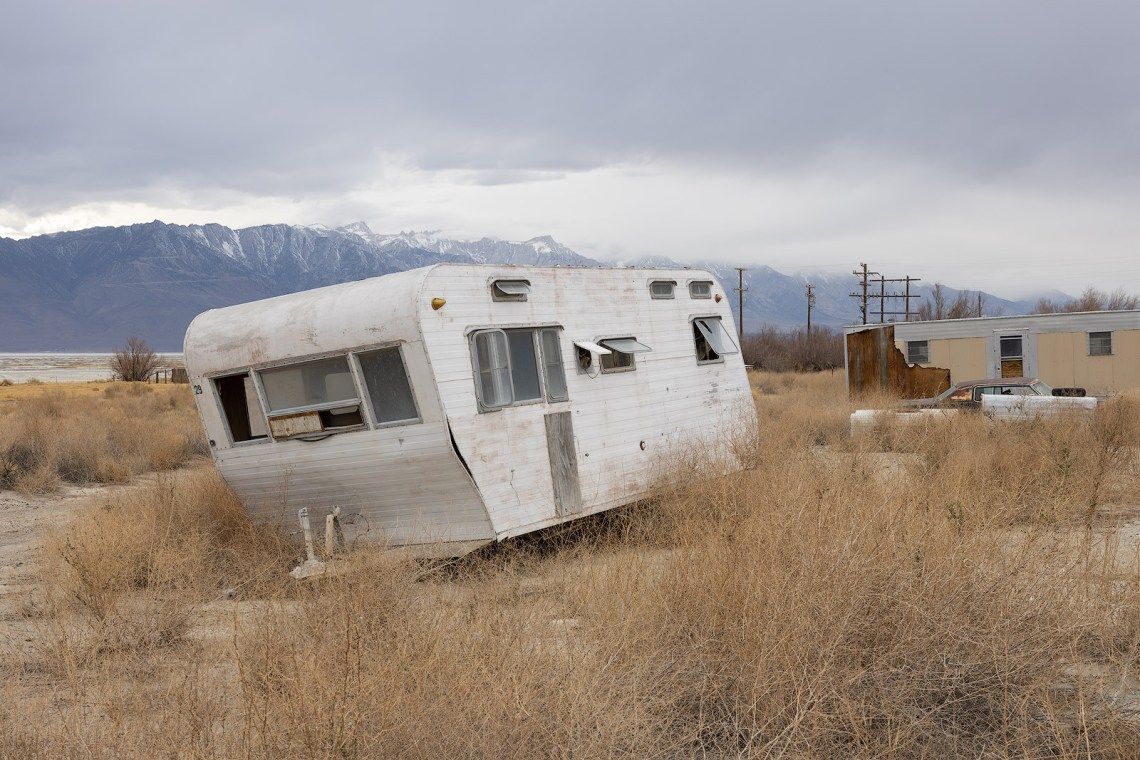
Speaking of experimenting, the Fujifilm 3513 and Kodak 2383 motion picture print films don't have anything to do with still photography, but there's nothing stopping you from utilizing them to get a Hollywood film look. For example, the image below was edited using the Kodak Vision3 500T film negative, then "printed" using Kodak 2383 (a standard combination used in countless films).
Applying edits and effects
Dehancer Photo’s right column provides additional editing tools and effects for modifying an image. Some of the tools are more or less the same as what Lightroom provides (color temperature, contrast, chromatic aberration, vignette), but others are unique film effects that either behave differently or aren’t technically possible in a raw editing workflow: Color Head, Film Grain, Halation, and Bloom.
Color head
Color Head adds colored light to manipulate hue; similar to using an enlarger in a darkroom. This emulates the behavior of subtractive color processing using Cyan, Magenta and Yellow tinted light. For example, when yellow tinted light is added, prints display more blue and less yellow. When magenta light is added, prints display more green and less magenta.
In an actual darkroom, colored light also affects print brightness. When more colored light is added, the print gets brighter. Remove all colored light, and the print gets darker. Because most users probably aren’t interested in brightness changes, this panel includes a Preserve Exposure slider, which is set to 100% by default. Set this to 0% to emulate the behavior of using an actual, physical color head, if interested.
Film grain
Film Grain is Dehancer Photo looks and behaves more like actual film grain. Dehancer has a whole video explaining how their grain implementation works, but in general, Dehancer Photo does not apply grain as an overlay. It fuses images with grain, and changes grain density in the shadows, midtones and highlights; similar to the behavior of actual film. Dehancer Photo’s grain is also more random and less programmatic looking than grain used in raw editing tools.
But what I find most interesting is colorized grain. Most grain tools (eg, Lightroom) only support monochromatic grain. Monochromatic is appropriate for black and white film emulation, but not color. Actual color film grain has small flecks of magenta, green and blue, and makes the image look thicker and denser.
For example, in the zoomed-in image below, the grain in the middle is monochromatic (created using Lightroom), while the grain at far right (created using Dehancer Photo) is denser and more colorful.

If you don’t want colorized grain, that’s okay. Simply set the color slider to 0% and monochromatic grain will be used instead.
Halation
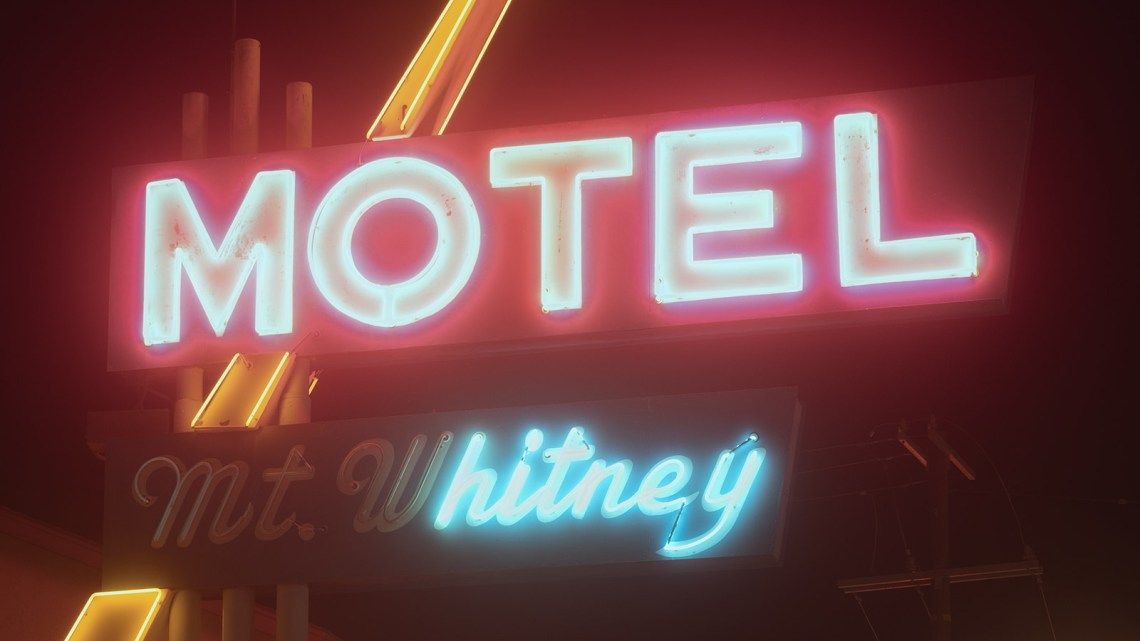
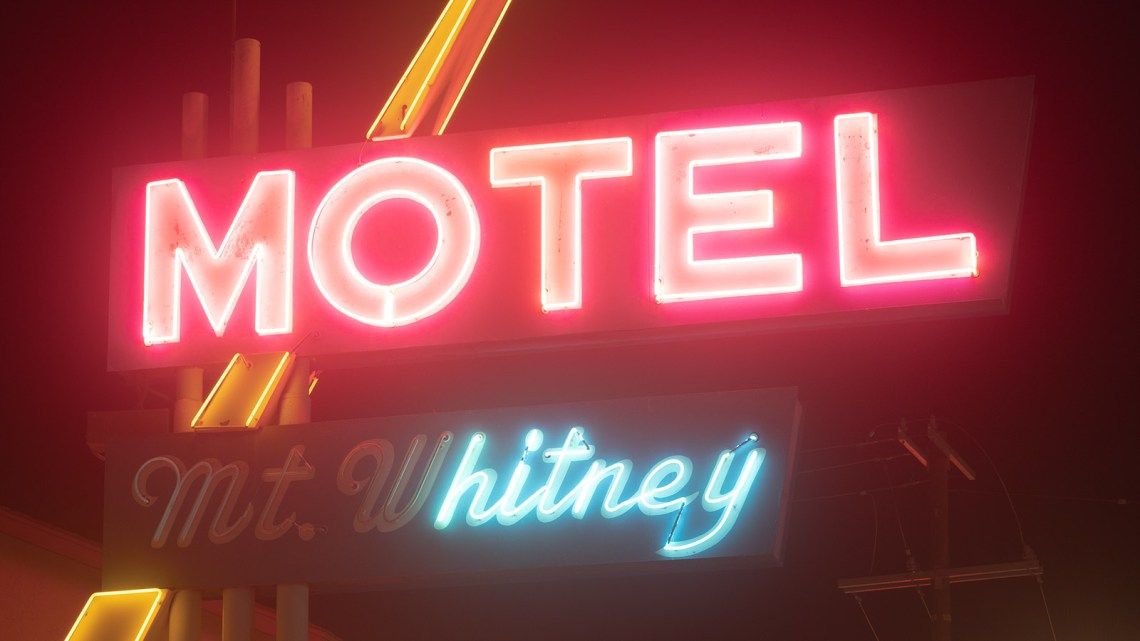
The next unique tool in Dehancer Photo is Halation. This emulates the reddish, orange halo that can appear in high contrast areas; most commonly around bright light sources. This produces light that appears more like film and less clinical or perfect like a digital image. Pay attention to the area around the yellow neon in the image below to see the added red glow.
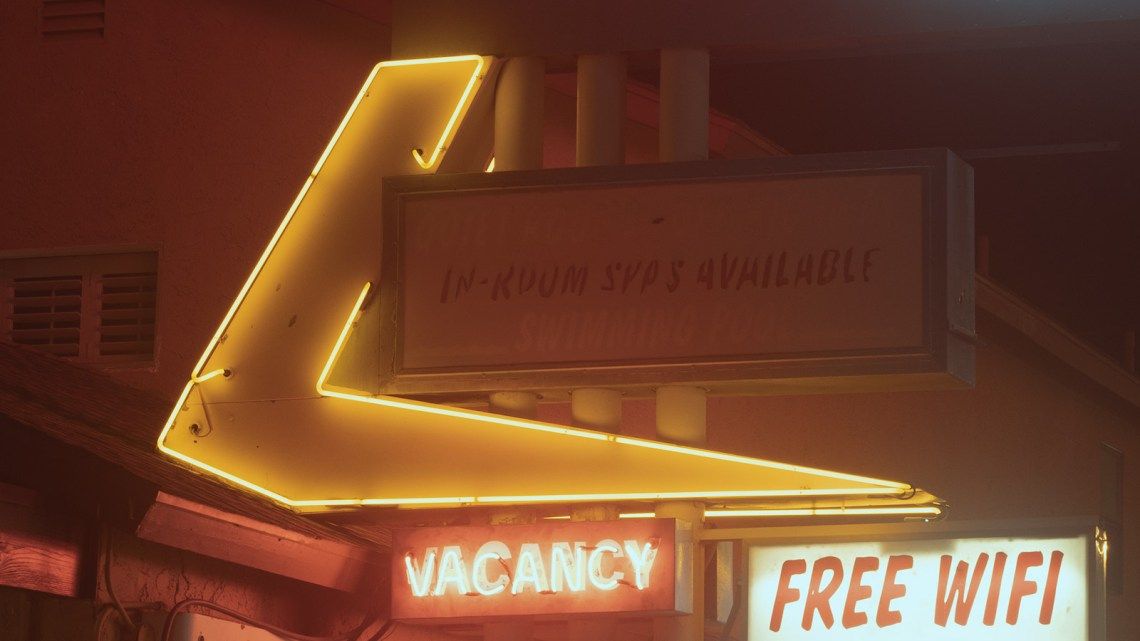

This effect can be subtle, so if you have a hard time seeing it check the “Mask Mode” option. This will isolate the halation effect so it can be viewed independently of the image.
Bloom
Finally, there is Bloom. This affects the clarity and volume of light to make it appear bigger, softer, and more diffused; similar to what one would see when photographing a light source in fog or atmospheric haze, or when using a diffusion “mist” filter. Eight customizable tools are included to fine tune strength, saturation and clarity. Again, “Mask mode” may be enabled to preview the effect itself.
Saving edits as presets
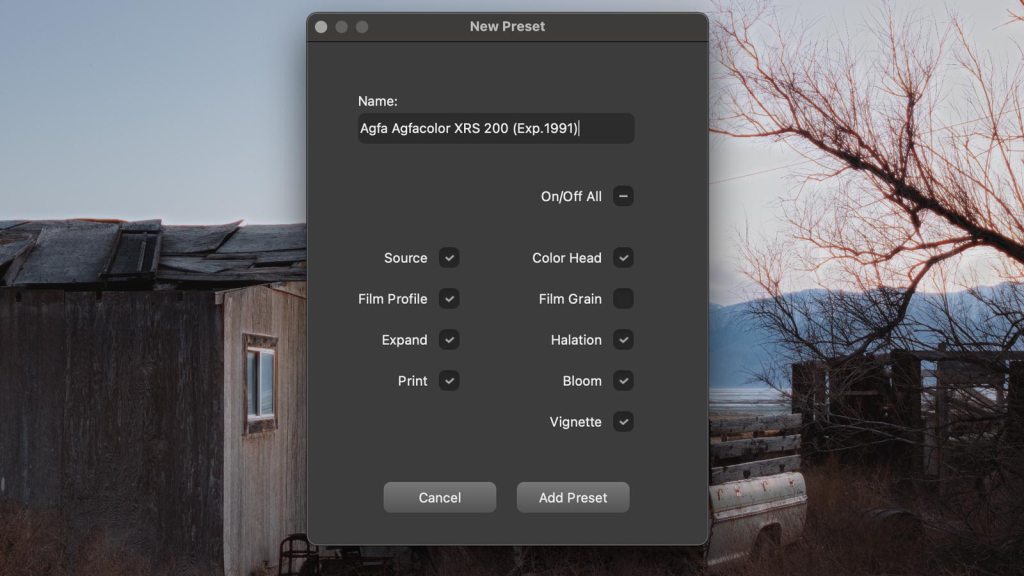
Once an image has been edited, settings may be saved as presets and applied to other images. Presets include the baseline film profile, plus effects which may be included or excluded (see below). Presets can also be exported and imported for backup or sharing between plugin installations.
Film emulation accuracy
How accurate are Dehancer Photo’s’ film emulations? Dehancer claims to have conducted extensive scientific research to build the most accurate photo and video film emulations on the market. Based on my own experience shooting with some of the film stocks emulated by Dehancer Film, the emulations do appear accurate and believable.
But while authenticity and accuracy are important (especially when matching digital media with actual film) it’s worth remembering that the appearance of film can and will be different depending on how it was developed, scanned, and the type of paper it was printed on.
For example, the “Fujifilm Pro 400H” profile in Dehancer Photo can and will look different from a “Fujifilm Pro 400H” Lightroom preset created by a different developer (also claiming near-perfect accuracy with their emulation). This discrepancy is simply the nature of an analogue medium that is inherently unpredictable and open to interpretation.
At the end of the day there is no substitute for actual analogue film, but Dehancer Photo goes further than any tool currently on the market (that I’m aware of) in emulating the look, character, and flaws of true film.

Workflow considerations
Once a TIFF file has been processed and saved by Dehancer Photo, the image has been effectively “printed”. Additional edits to the same image could degrade image quality, so it may be better to create a new TIFF file when re-editing a raw image. This may feel cumbersome to photographers more accustomed to raw, non-destructive image editing workflows (where an image can always be tweaked or reset to its original state).
Additionally, Dehancer Photo edits one image at a time. It is technically possible (as described earlier) to create custom presets for faster processing of multiple images, but it’s still slower than copying and/or syncing settings across multiple raw files in Lightroom.
For high production workflows, Dehancer Photo may not the best option. If however only a single or handful of images are being edited a time, Dehancer Photo shouldn’t slow you down.
Room for improvement
I tested Dehancer Photo on both an Intel and M1 Mac (there are separate installers for both), and both plugins performed fine. No issues with crashing, errors or unexpected results. There are however some rough spots in the user interface and experience that could be improved.
Previews could be better
Thumbnail previews of each film profile are displayed in the left column. These are nice to have, but in practical use they’re not as helpful as they could be.
First, I would recommend displaying the source image at its native aspect ratio, not cropped to a 1:1 square. Second, a toggle for a single column view would produce larger, easier to see previews. Finally, Dehancer Photo could also support mouseover previews, similar to how Lightroom works with presets and profiles, for an even better user experience.
Default film grain settings
Film profiles in Dehancer Photo do not contain grain. It’s great that a photographer can add as much or as little grain as they want, but the film emulations could be more accurate and authentic if default values for Film Grain were assigned with each film profile. That way a photographer could choose to use the “real world” grain of a particular film, customize it, or remove it altogether.
Could use a histogram
I really wish Dehancer Photo displayed a histogram to better visualize tonality and keep an eye the black and white point. Without one, it’s impossible to see if tonal values are being clipped.
Update 9/9/2022: Dehancer v2.2 now includes a histogram (yes!)
Support for larger color spaces than sRGB
Dehancer Photo automatically converts imported images to sRGB. This can cause images with richly saturated colors to appear dim and muted in Dehancer. Be better if the plugin respected at least Adobe RGB or (even better) DCI-P3 or ProPhoto RGB.
Slider behavior is odd
Sliders are initially very slow (for making fine-tuned adjustments, I assume). Press the Shift key, and the sliders then move normally. I believe the functionality should be the other way around, with “normal” slider behavior at the start, then using a key command to make fine-tuned adjustments.
Better support for standalone files
Dehancer Photo is marketed as a plugin for Photoshop and Lightroom, but the application does work with standalone 16-bit sRGB TIFF images (simply drag a TIFF onto the installed application). With a little extra work, including local file system support for opening and saving files, Dehancer Photo could function as a standalone application.
If it could also open RAW/DNG files and export them as TIFFs or JPGs, that would be icing on the cake.
Keyboard shortcuts, undo, redo
Dehancer Photo doesn’t support keyboard shortcuts, so everything has to be clicked. This is especially noticeable with the Preview toggle, which could perform faster if it toggled on and off via a keyboard shortcut. Similarly, no keyboard shortcuts for undo and redo are available either (you have to click arrows in the toolbar). Not a major thing, but a nice to have for power users.
Final thoughts
Overall, Dehancer Photo is a well-rounded application with sophisticated film emulation profiles and tools that not only supersede the capabilities of raw editing software applications, but go beyond what’s possible with raw presets, profiles and styles.
Photoshop experts could create some of these effects on their own, but Dehancer Photo makes achieving an authentic film look easier, faster, and far less cumbersome. Even if you don’t use the film profiles, quick and easy halation, colored grain and diffusion blooming may be reason enough to own the plugin. For film photography enthusiasts shooting digital, Dehancer Photo is definitely worth testing with your own images.
Click the button below to download a free trial of Dehancer Photo for macOS and Windows. If you choose to purchase Dehancer Photo, use coupon code DOMINEY to get 10% off.