How I setup a new MacBook: settings and apps
Everything I download and install when buying a new MacBook Pro laptop, plus recommendations for saving and storing data.

I’ve gone through at least six or seven Apple laptops in my lifetime. None have ever been used as primary, desktop computers, but rather secondary machines for use when traveling or whenever I’m not in the mood to sit at a desk.
The most recent MacBook Pro I owned — a late 2016 13″ model — was the worst of them all. The keyboard key switches were horrendous (I hated typing on it). I also had to always carry dongles around to connect anything (because it had only two USB-C ports, one of which was often used for power). The 2016 MacBook Pro was also woefully underpowered for doing much of anything outside of sending emails and writing (forget about editing photos and videos).
So I recently replaced it with a late 2021 14.2″ MacBook Pro with an M1 Pro chip, and the difference is literally night and day. Apple finally got the message that thinner and simpler isn’t always better (especially when user experience is sacrificed) and delivered a proper “pro” laptop with a great keyboard, plenty of ports (SD! HDMI! MagSafe returns!), and enough power to do everything I need (including editing video in Premiere – hallelujah!).
How I setup a new MacBook Pro
Everyone does it differently, but here is how I typically setup and configure a new MacBook Pro, fresh out of the box.
Clean install, no migration
As cool as Apple’s fully-automated migration tool is from a technical perspective, I don’t like using it. In my experience the tool can sometimes cause migration problems, especially Adobe Creative Cloud. The tool also brings over loads of preference files and other cruft I most likely no longer need. Instead, I prefer setting up everything brand new, from the start.
Sure, it takes time to configure system preferences how I like them, but I’d rather do that than fix messy migration problems.
No local files
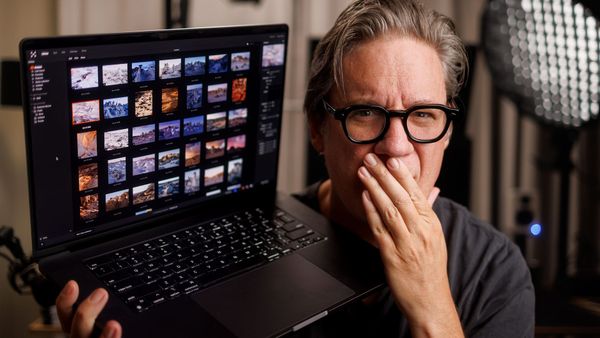
I use my laptops as clients. Meaning, I don’t store any files on the laptop’s internal hard drive outside of macOS and apps. Any files that need to be saved are added to Dropbox or an external SSD drive. That way I don’t have random files flying around and it keeps things cleaner and simpler — especially when upgrading to a new laptop.
(By the way, if you’ve never seen it before, here’s a great video of Steve Jobs from 1997 explaining cloud computing before "the cloud").
System Preferences
When I get a new computer, I always change or tweak these settings in macOS:
Uninstall default Apple apps — Gigabytes of hard drive space are occupied by official Apple apps you may not need (I always remove Garageband, Pages, Keynote, and iMovie). You can do the same by going to Apple Menu > About this Mac and clicking on the Storage tab. Then click Manage… next to the hard drive, then Applications in the left column. Select the app you want to remove then click Delete at bottom right.
Faster trackpad — The default speed of the macOS trackpad is a bit slow for my taste, so I always bump Tracking Speed up a few notches. You can do the same in System Preferences > Trackpad.
Tap to click trackpad — While in Trackpad preferences, I also recommend enabling Tap to click. This way you may quietly tap the trackpad to click (especially helpful when in a quiet space).
Three finder drag — Similar to Tap to click, you can also drag windows around with three fingers instead of clicking and dragging. Takes a little practice to get used to, but I like using it. Try it out by going to System Preferences > Accessibility > Pointer Control, click the Trackpad Options button, then enable Enable dragging with “three finger drag” assigned in the dropdown.
Desktop hot corner — To quickly grab any file saved to the Desktop, I assign Desktop to the lower-right-hand-corner in System Preferences > Mission Control > Hot Corners… Huge timesaver!
Disable True Tone — Enabled by default (System Preferences > Displays), True Tone automatically shifts display colors to match ambient light. This might be okay for the average user, but if you edit photos or videos, or do any kind of design work involving color, you should absolutely disable this.
Enable Night Shift — Similar to True Tone, but this shifts display color from cool to warm at night. I’m usually not editing images at night, so I enable this (System Preferences > Displays) to reduce the amount of blue light my eyes are exposed to in the evening (which helps with sleep).
Show path bar — Select the Finder and choose View > Show Path Bar from the top menu. This will add a helpful row to the bottom of every Finder window that visualizes where you are in the drive hierarchy. Can interact with folders and drives here as well.
Must have (mostly free) applications
After getting the operating system how I like it, the next step is installing applications. Here are my essential apps for the MacBook Pro.
Dropbox
(Free) As explained earlier, I try to keep all my day-to-day, locally stored data in the cloud for safekeeping and accessibility across all my devices. For me, Dropbox is still the easiest, simplest, and most fluid cloud service I’ve tried (especially how elegantly it integrates into the macOS Finder). This is also where I store an encrypted database of all my passwords and important textual information for the next app in this list.
1Password 7
($2.99/mo and up) In today’s day and age, password management is a must. If you’re still using the same password for every website you visit, you’re leaving yourself open to identity theft and plenty of other awful things. I’ve used 1Password for years to manage all my logins, which is also synced to my other devices via Dropbox.
Google Chrome
(Free) While I'm not the biggest fan of Google Chrome, I do love the variety of powerful extensions that are available, and how data is syncs across browsers. The only thing I have to do when getting a new laptop is download Google Chrome and sign in to my Google account.
Caffeine
(Free) I often record videos of my screen, so to prevent the screen saver from launching (or the display going to sleep) I use the Caffeine menu bar app. Simply click the icon to enable, and display energy settings are temporarily bypassed. Click it again, and you’re back to normal. Did I mention it’s free?
CopyClip
(Free) I am constantly copying and pasting URLs, text snippets…all kinds of things. CopyClip keeps track of everything you’ve copied through a menu bar drop-down. Think of it as a history panel for your clipboard. No more accidentally replacing something important on your clipboard when copying something else!
Rectangle
(Free) I tend to get a little obsessive over window size and placement (especially on a small laptop screen with a bunch of windows floating around). Rectangle brings order to chaos by resizing and positioning windows using preset sizes and placements. Access it through the menu bar, or learn the keyboard shortcuts to quickly organize things.
TopNotch
(Free) The latest MacBook Pro’s display a black notch around the integrated webcam, similar to iPhones. If the notch bugs you too, download the free TopNotch utility. This changes the top menu bar to solid black to effectively camouflage the notch.
Skitch
(Free) Skitch is the Swiss Army knife of screenshot apps. You can capture individual screens, the entire screen, make annotations, and drag/drop images into other apps or as files on your local drive. QuickTime in macOS provides similar functionality, but isn’t as robust or useful. I’ve used Skitch for years.
TextMate
(Free) Even if you don’t write code, everyone needs a simple text editor. Especially helpful when finding and replacing text, stripping formatting, or whatever else you need to do. There are a number of similar text editors out there, but TextMate is free, open source, and I like the magenta flower icon in my dock (silly, I know, but true).
Mail for Gmail
(Free) Gmail isn’t the prettiest or most inspiring email app, but it works. I especially love how good it is at automatically filtering-out spam. So I don’t have to keep Gmail open in a web browser, I use the free Mail for Gmail (weird name, but okay) desktop app, which appears to simply be a local web view of the Gmail website. This makes Gmail feel more like a local app without using macOS Mail.
VLC
(Free) Every now and then I’ll come across a video file that can’t be played in QuickTime, or a video that requires transcoding before it can be used in Premiere. For all of the above, VLC does the job.
Video
Here’s the video version of this article.