How to move a Lightroom Classic catalog to a different drive
Two methods for safely moving catalog images from one hard drive to another without losing edits, settings, or metadata
We've all been there. A hard drive has filled up with images, and it's time to embark on the exciting, perilous journey of moving an entire Lightroom Classic catalog to a bigger hard drive! This may sound difficult, but is actually fairly easy to do.
In this article, I'll share two techniques for moving and relinking images. Then at the end, I'll share an additional, optional tip to ensure everything is working properly again.
Technique #1: Use Lightroom to move images
Here we'll use Lightroom Classic to move all catalog images to a new hard drive. This approach works best if your Lightroom catalog isn't large (eg, less than a thousand images). If your catalog is larger, I recommend jumping further down to Technique #2. For the rest of you, here's how Lightroom can move images for us.
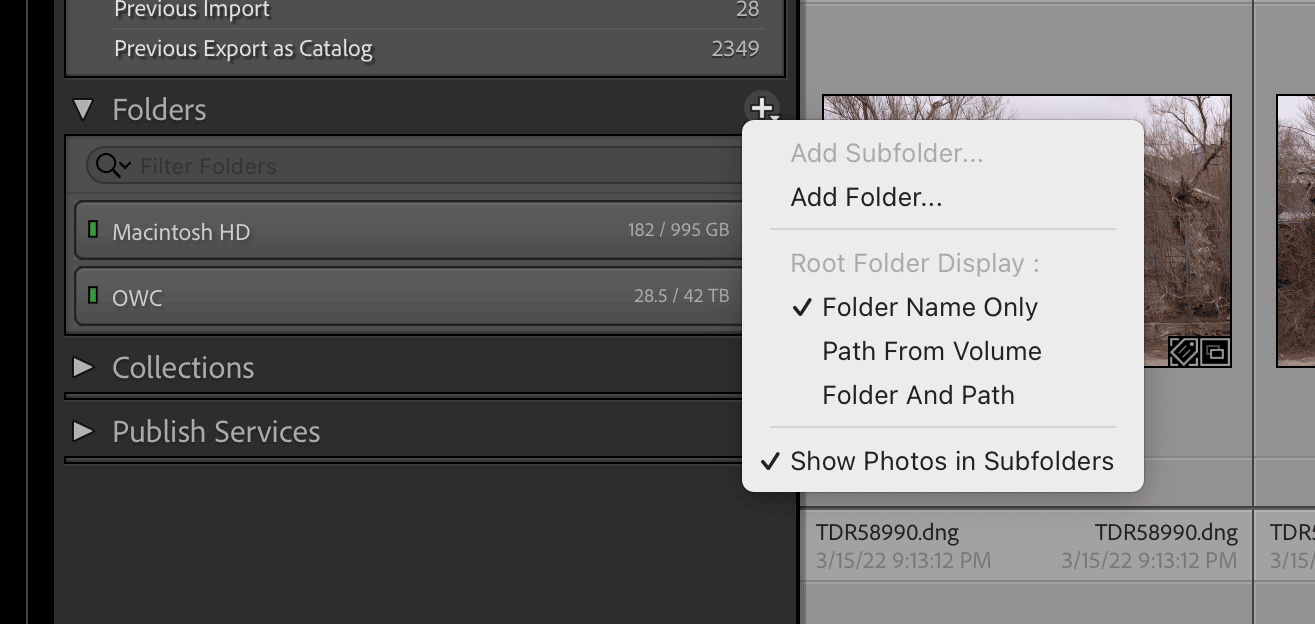
Create new folder on destination drive — In Lightroom, click Library in the top menu, then click the plus (+) button at the top of the Folders panel. In the dropdown-menu that appears, click Add Folder...
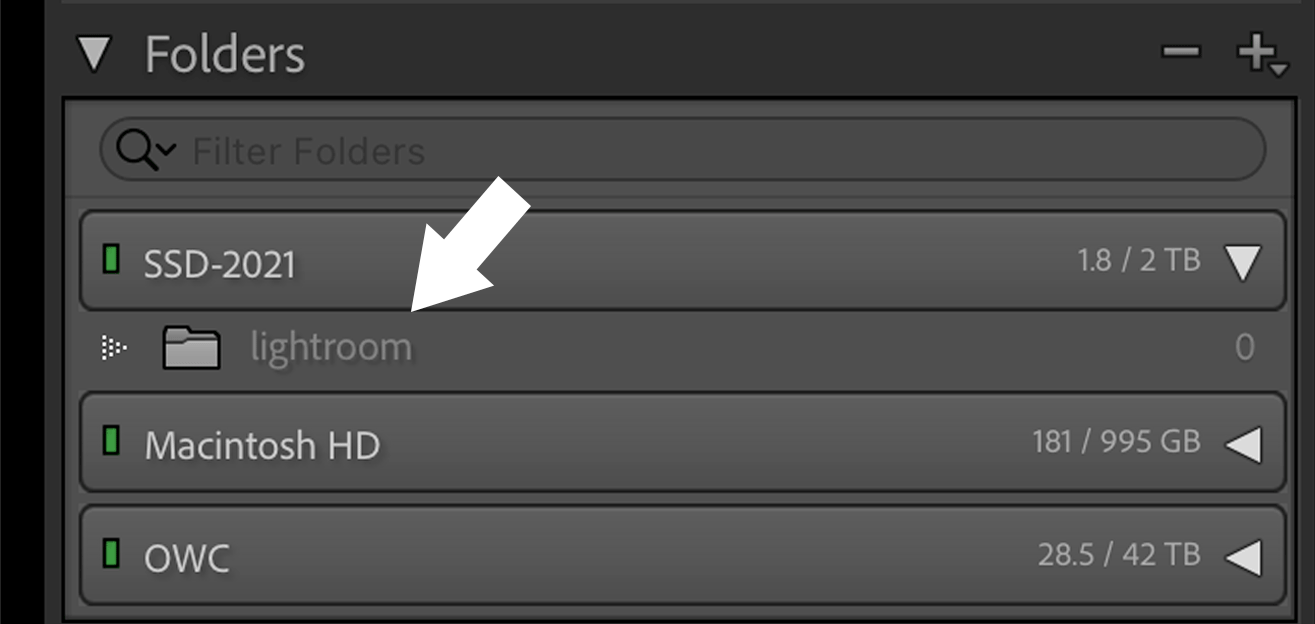
Navigate to the destination drive and create a new folder. Name the folder whatever you like. When finished, the new drive and empty folder should appear in the Folders panel, as shown below.
Move folder to new folder — Again in Lightroom's Folders panel, drag the folder of images you want to move onto the newly created folder. Lightroom will display the alert shown below to confirm the change.

Click Move and Lightroom will move the images to their new location. Repeat this process for any other folders you intend to move.
Technique #2: Move images yourself, then relink
Here we will move the images ourselves, then tell Lightroom where they went to re-establish their catalog connection. This option is preferable for large collections of images, and gives you more control over the process.
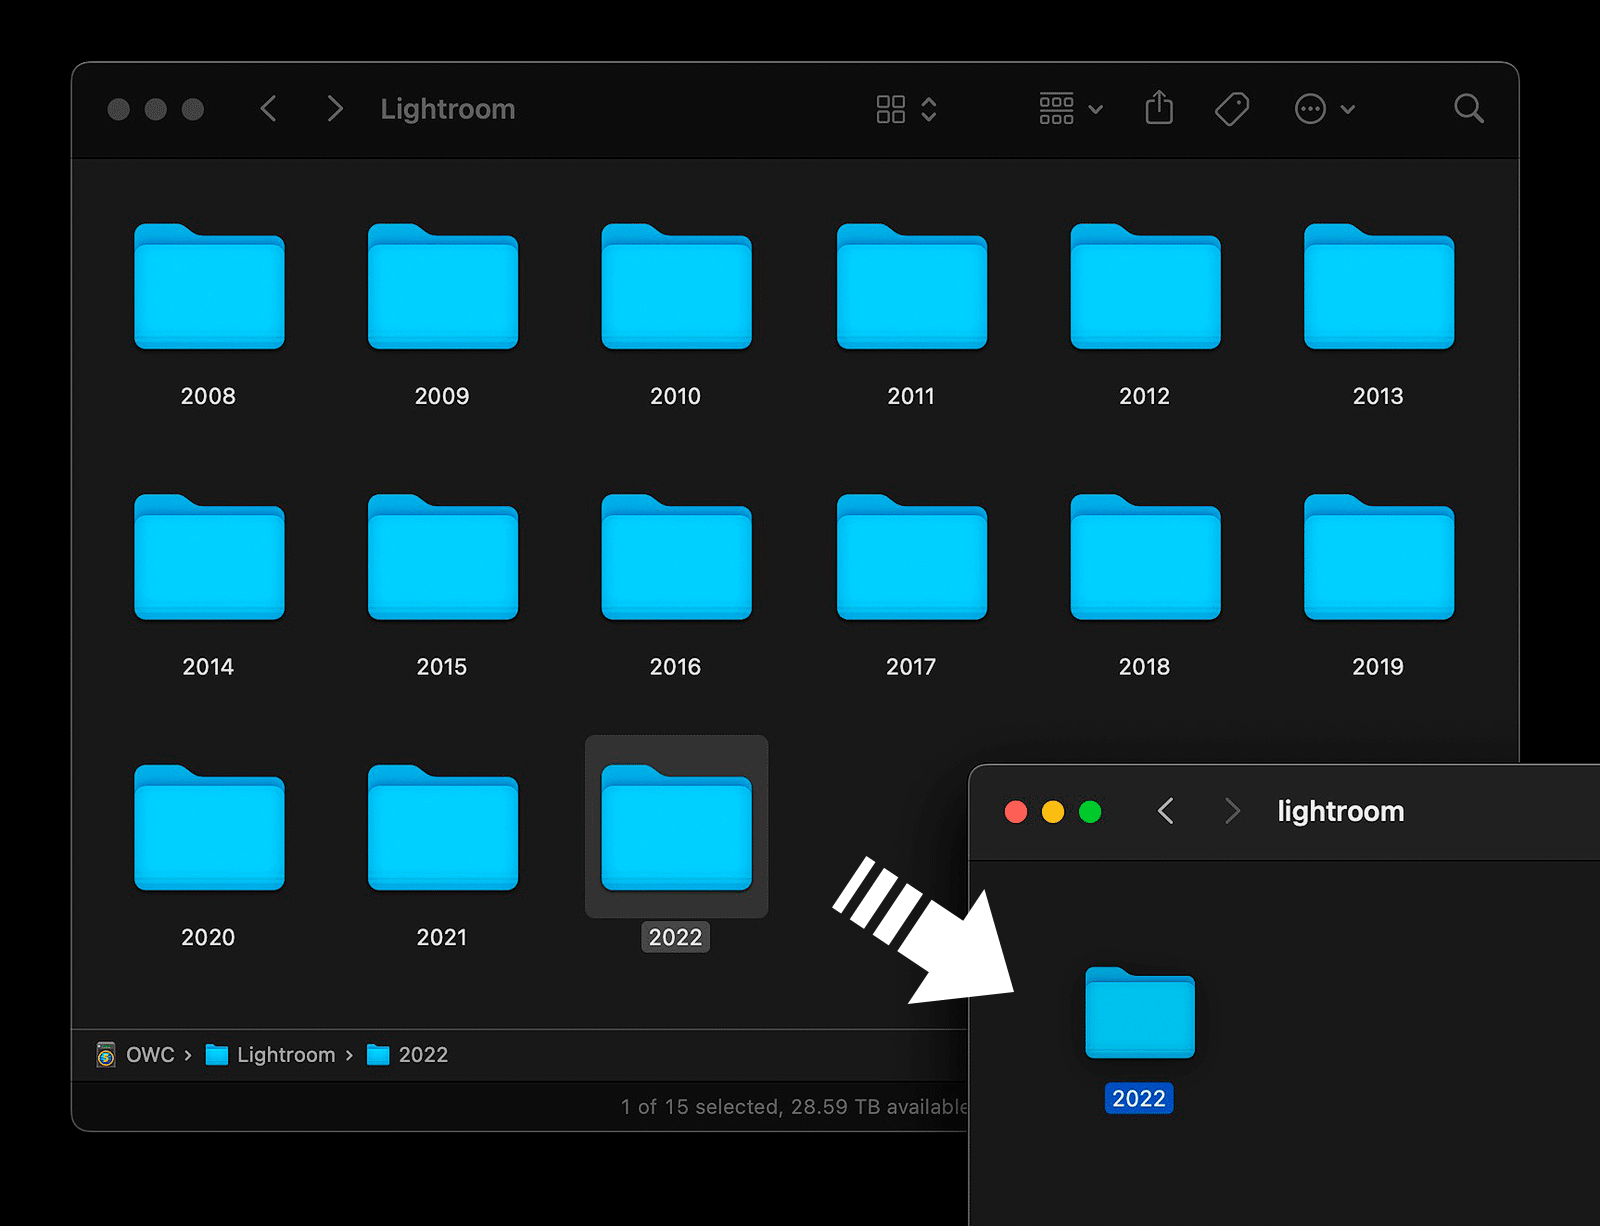
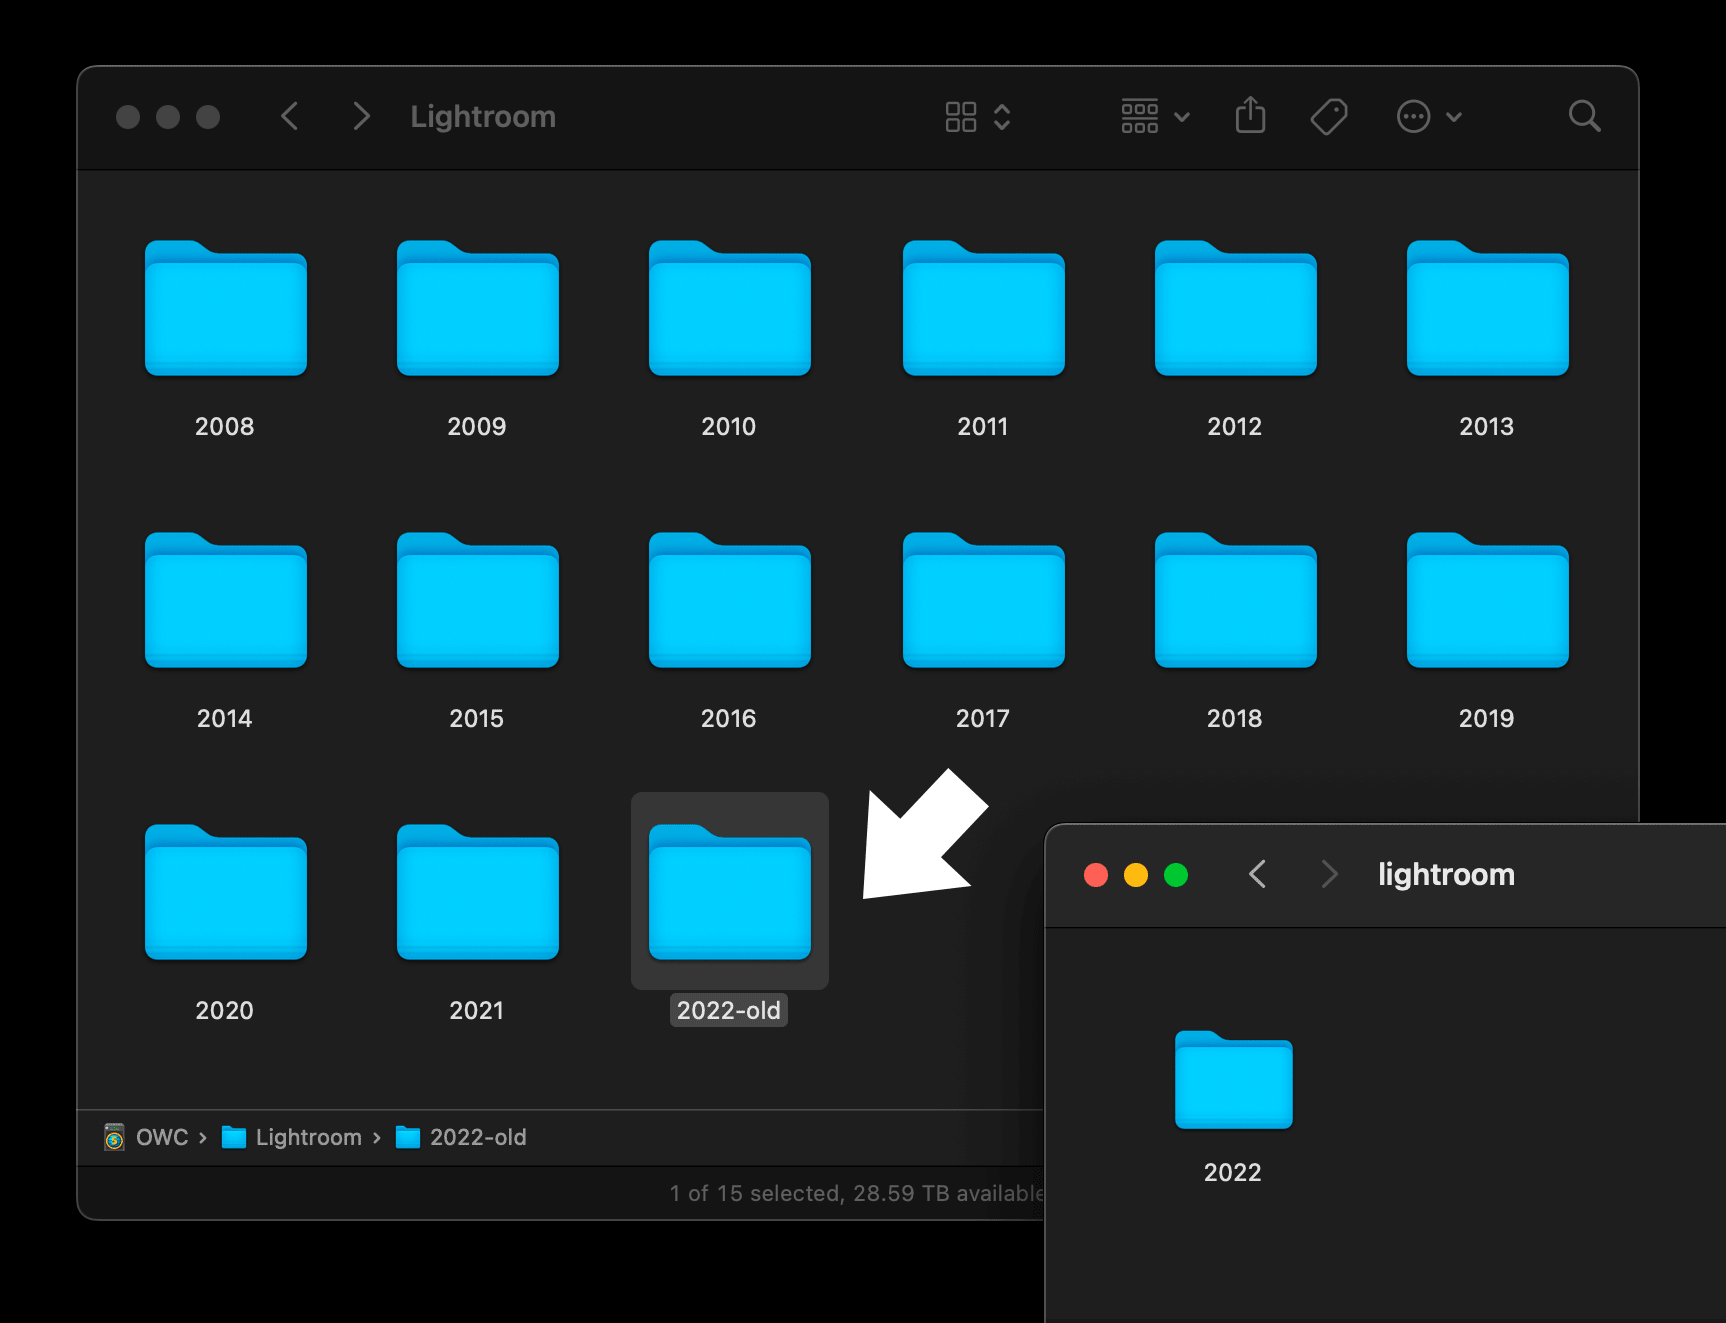
Move image folders to new destination drive — Copy all images and their parent folders to your new drive. I recommend maintaining their current folder structure and names to make Lightroom's job easier. In the example below, I copied my "2022" folder to its new home on an external hard drive.
Rename old directory — After the images have copied, we will now trick Lightroom into thinking our images are missing (so Lightroom will help us find them). To do that, quit Lightroom, then rename the old folders something different (can be anything). In the example below, I renamed my old 2022 folder "2022-old".
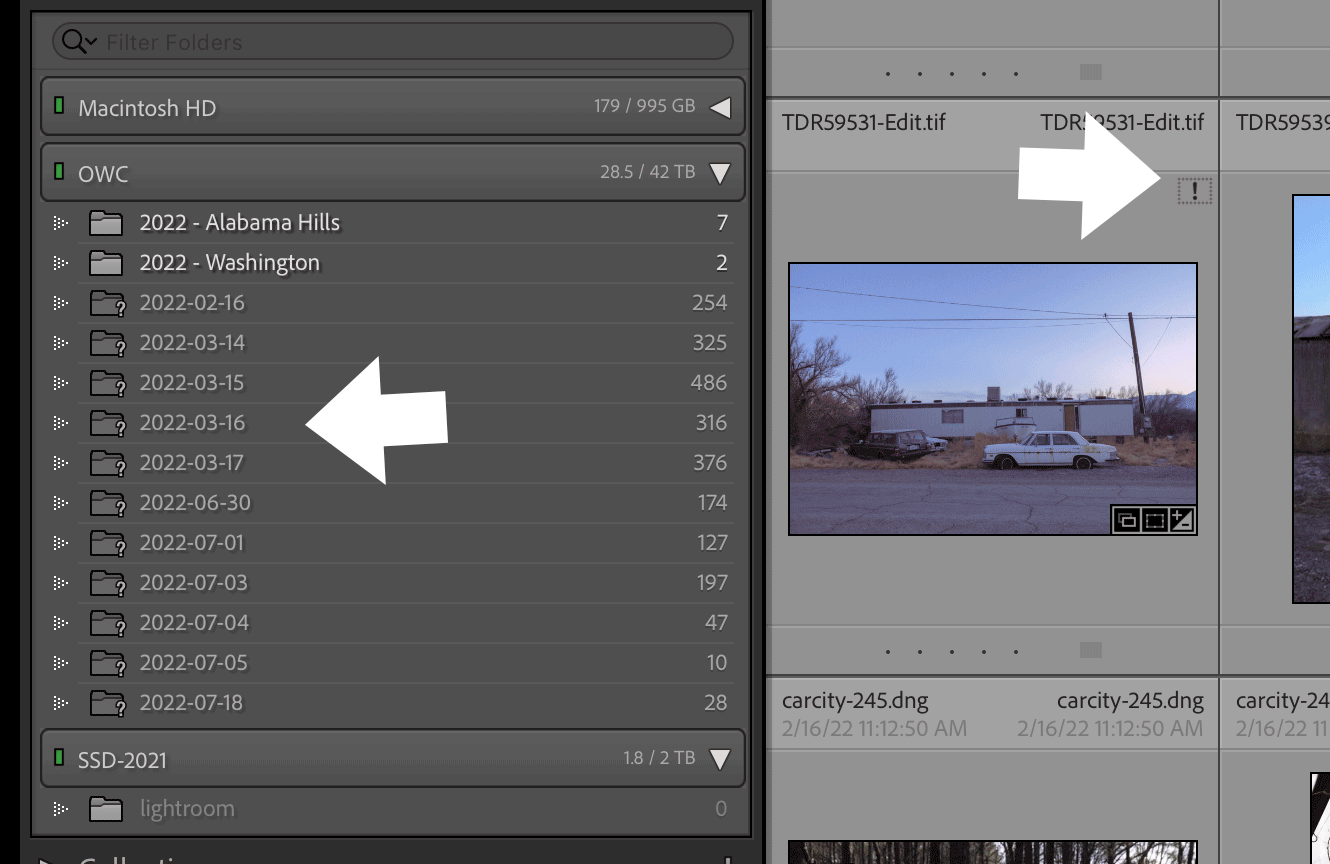
Relink folders and images — Launch Lightroom Classic. Look at the Folders panel. Any "-old" folders should now be grayed out with question marks attached (see below). You should also see exclamation marks next to image previews. Both symbols mean Lightroom can't find images (that's a good thing!).
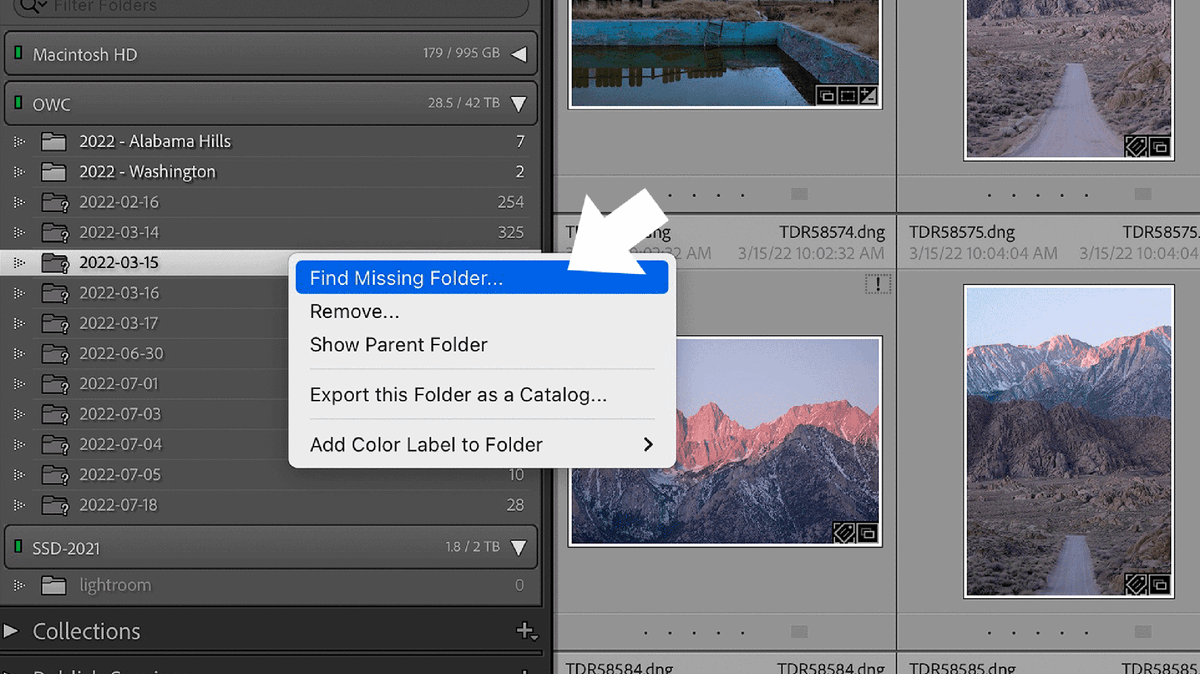
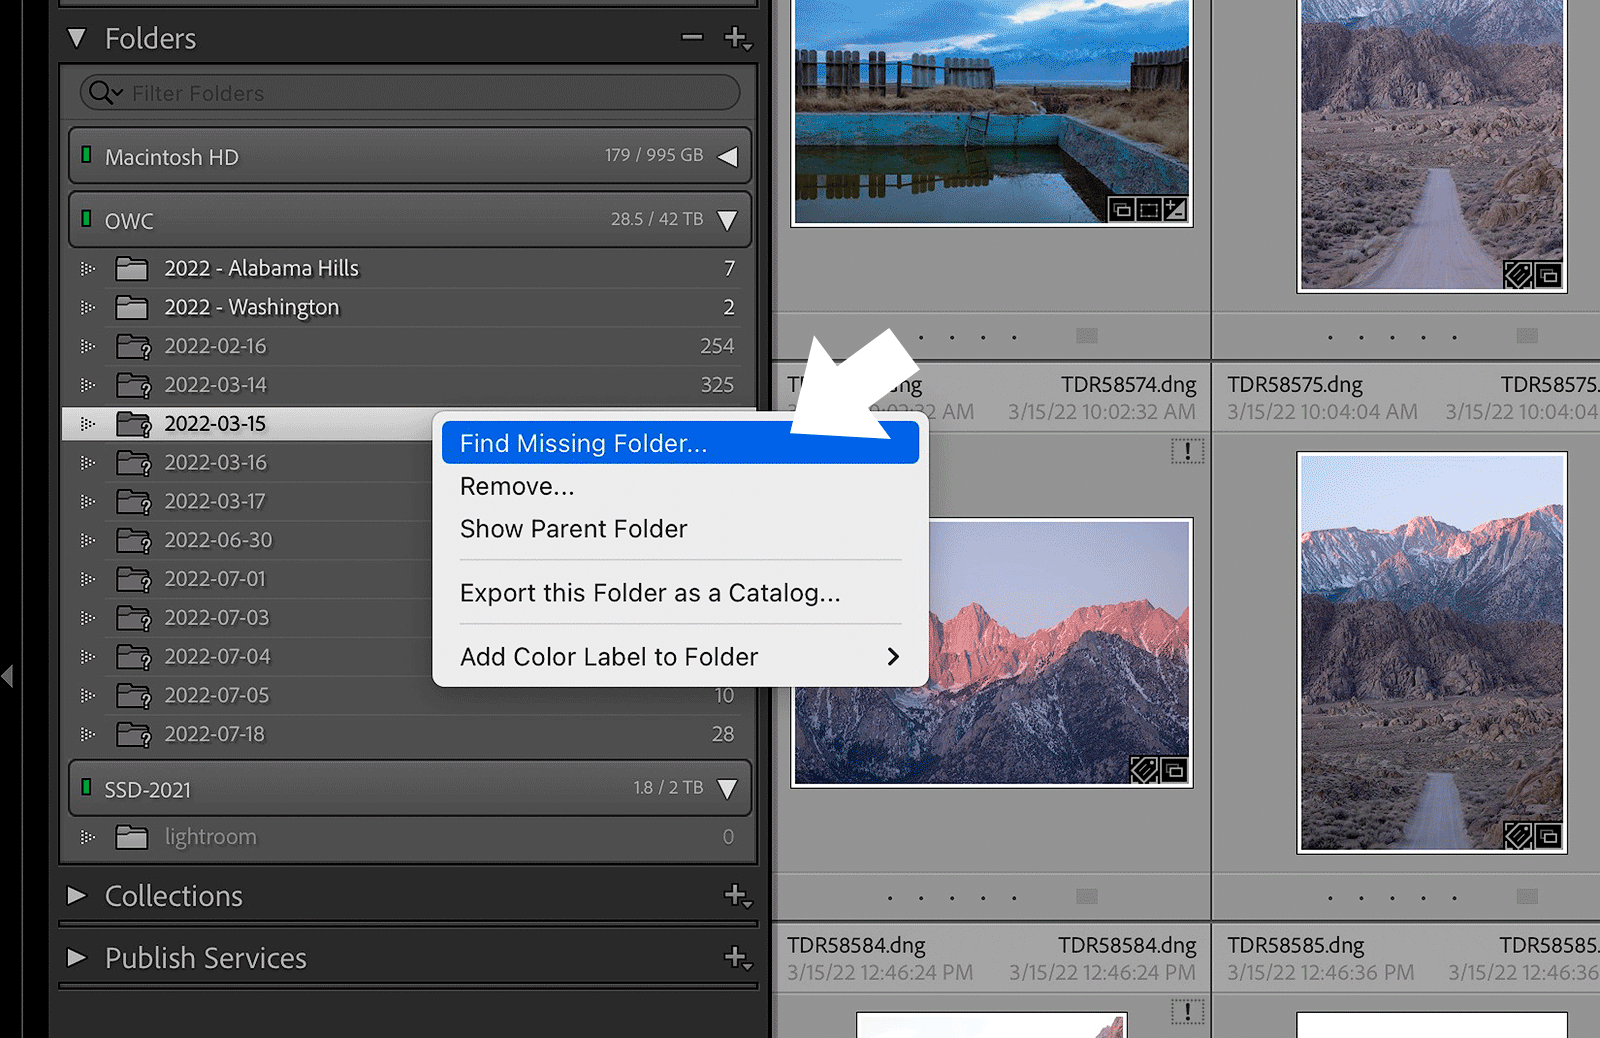
Right click on any missing folder in the Folders panel, the select Find Missing Folder... from the dropdown menu (see below).
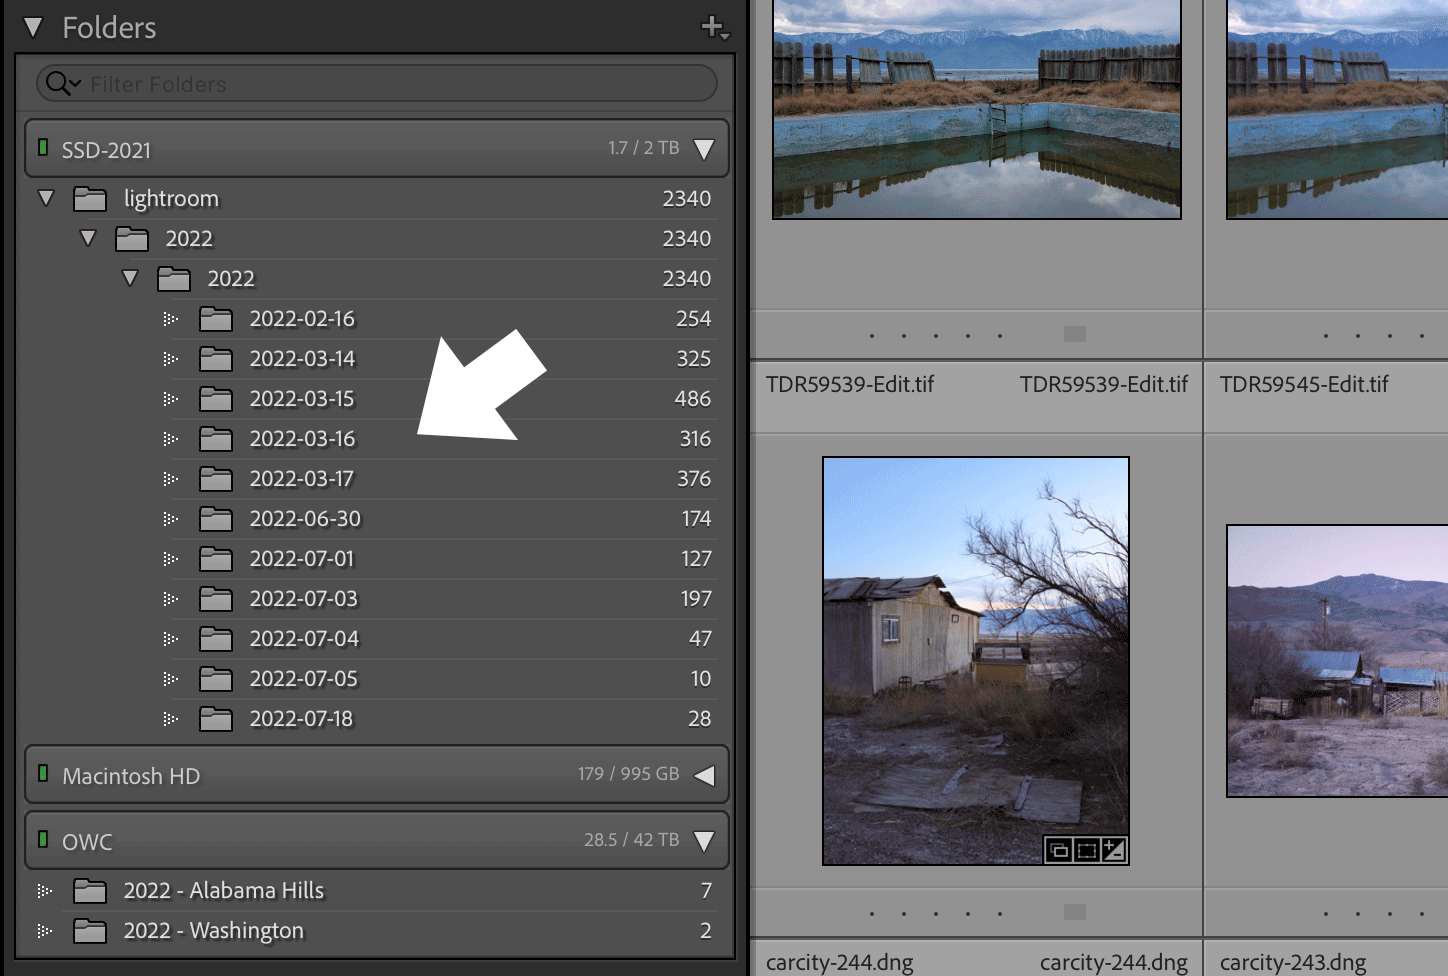
Select the corresponding folder on your new hard drive. Repeat this process for any other missing folders. When finished, all your Lightroom catalog previews will be relinked to their corresponding source files in their new home.
Extra tip: Verify nothing is missing
Before deleting the old images from your hard drive, it's a good idea to test the migration to ensure all your images are present and accounted for in their new location. You shouldn't have this issue if you followed either one of the techniques outlined above, but nonetheless, it's a good idea to check.
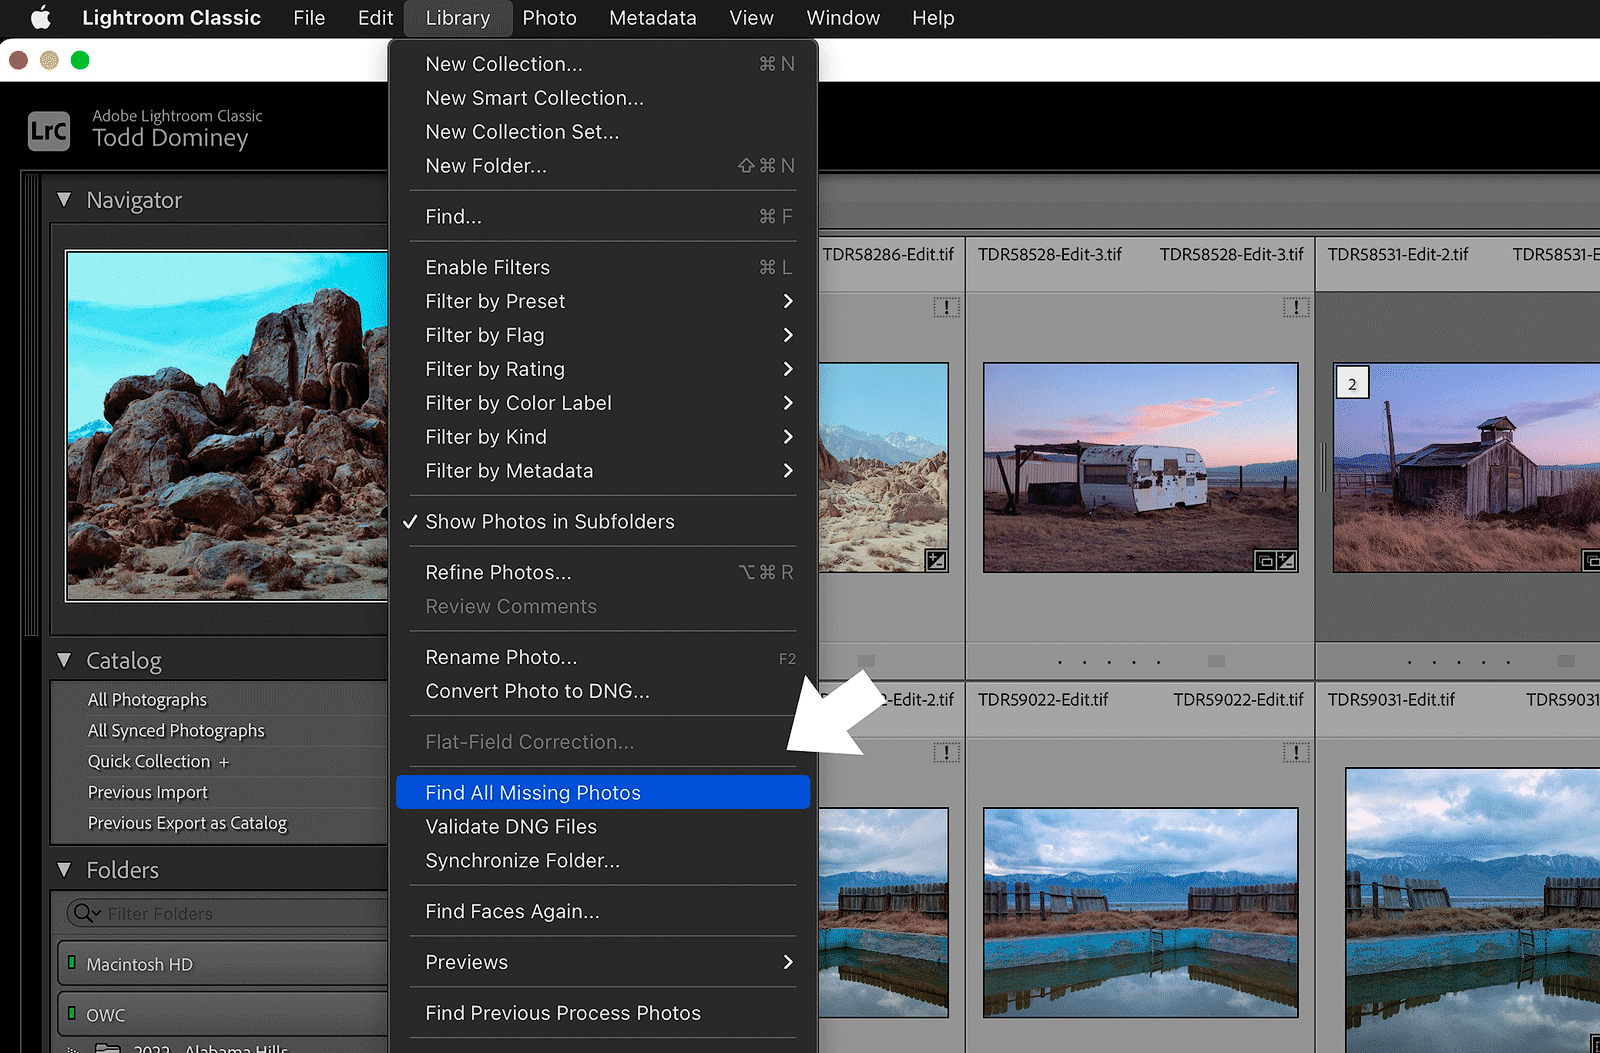
Click on Library in the top application menu, then scroll down and select Find All Missing Photos.
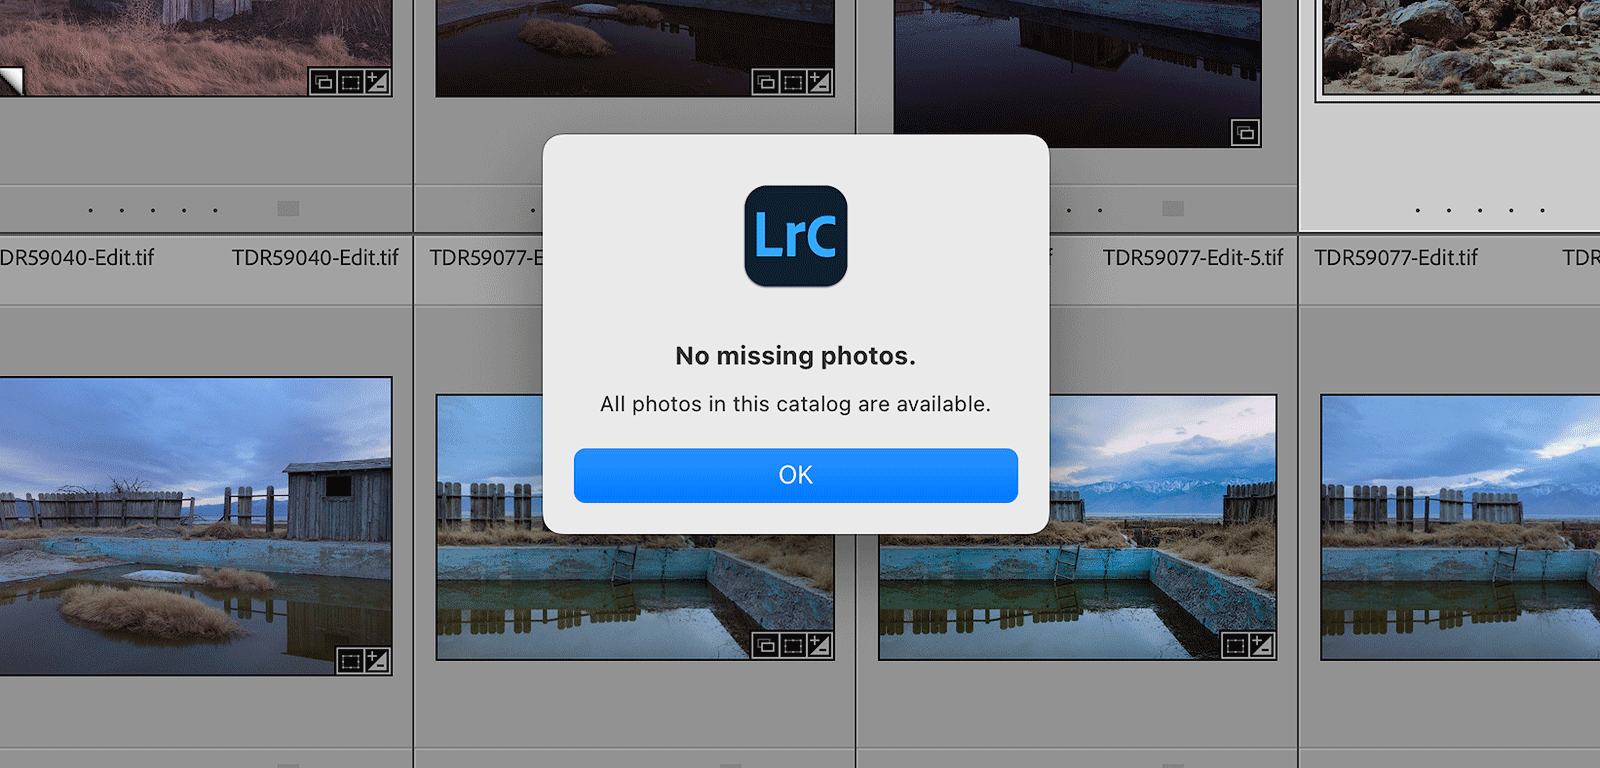
If the migration was successful, you should see the following alert. Congratulations! Everything is good with the world again (high five).
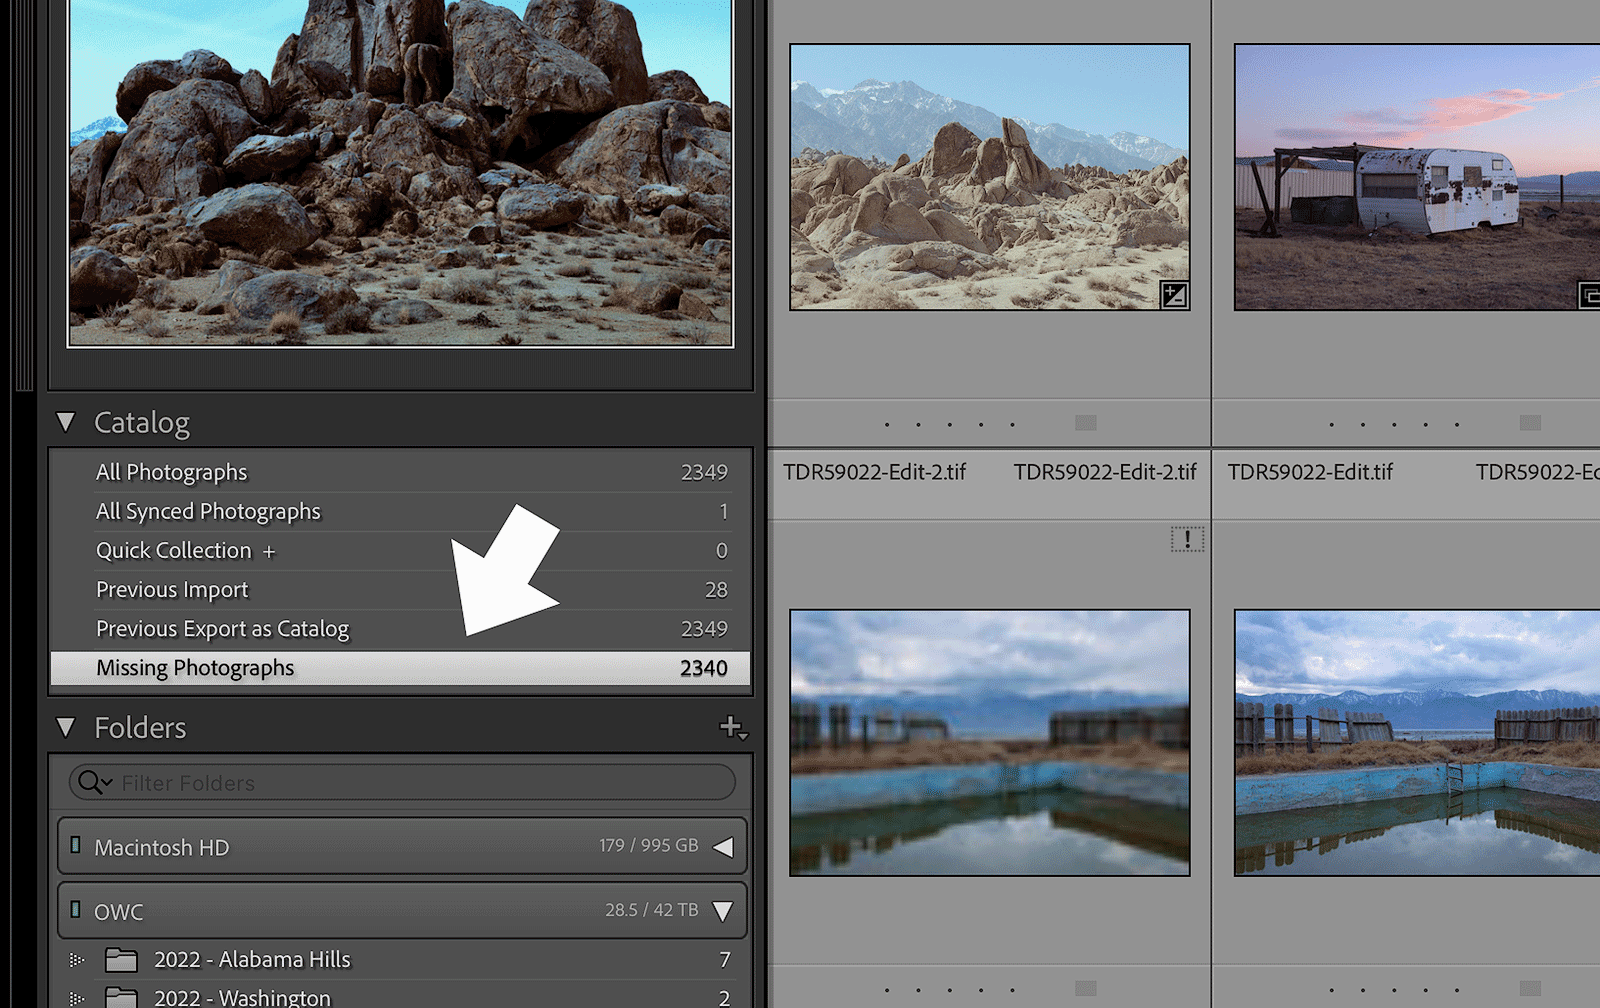
If any images are missing, Lightroom will automatically create a new Missing Photographs catalog in the Catalog panel.
To fix this, check for any missing folders in the Folders panel and relink them (as explained above). Doing so will automatically relink entire folders of images. You may also click the exclamation point icon in the upper right hand corner of each missing image to find its corresponding source file. After reconnecting folders and/or images, run Find All Missing Photos again to refresh the catalog. Repeat this process until you no longer have missing images.

Let's review
If you followed Technique #2, and have verified no images are missing from your Lightroom catalog, you may now delete any "-old" folders. For added security (always a good idea when moving important files), I recommend keeping a duplicate of all local images backed-up in the cloud. I use Backblaze to do just that. It runs automatically in the background of my Mac Studio, and I can upload as many images as I want for one low monthly fee. Highly recommend checking them out if you don't already have a cloud backup setup in place.