My new super lightweight video rig (used at White Sands)
Shaving pounds off my camera backpack with an iPhone 15 Pro Max, plus a handful of accessories to turn it into a capable video camera
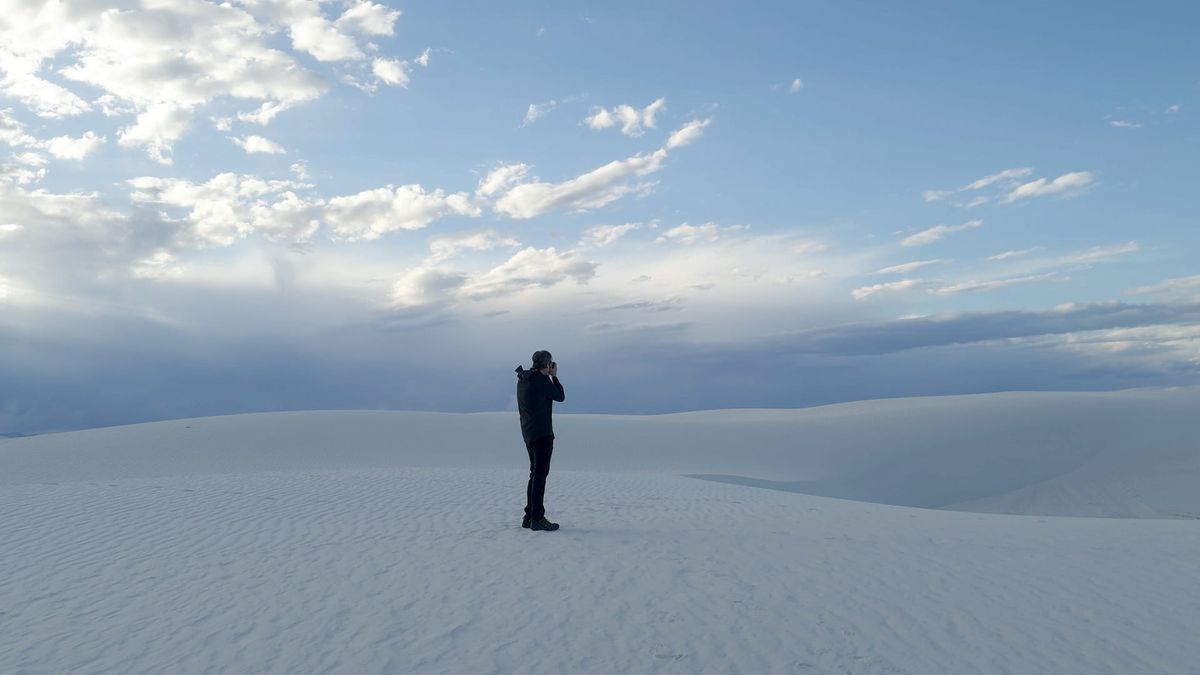
When I travel for landscape photography, I create "from-the-field" videos to share the experience with you. However, this often requires me to pack a second camera body, lens, and tripod, which is manageable for short hikes but becomes uncomfortably heavy on longer treks. This is especially true when hiking for hours in desert sand dunes, as I recently did at White Sands in southern New Mexico.
I knew from past experience how strenuous this would be, so I looked for an alternative video setup that wouldn't add four or five extra pounds to my backpack, like my Canon EOS R5 setup. Something better and easier to compose than a GoPro or Osmo Pocket 3.
That's when I turned to Apple's latest iPhone, the 15 Pro Max, plus a few accessories.
- iPhone 15 Pro Max (Apple)
- Neewer iPhone 15 Pro Max cage (Amazon)
- Neewer cage SSD drive mount (Amazon)
- Samsung T7 2TB SSD drive (Amazon)
- Rixmie 20Gbps flexible USB-C cable (Amazon)
- Maven 67-82mm step-up magnetized filter ring (Maven)
- Maven 2, 3, 4, 6 stop solid NDs (Maven)
- Rode Wireless Go II microphone kit (Amazon and more)
- Ulanzi Zero Y carbon fiber tripod (Ulanzi)
iPhone 15 Pro Max
I have never been a "must have the latest iPhone" kind of guy (I'm usually 2-3 generations behind), but made an exception with the 15 Pro Max because Apple finally switched its proprietary Lightening port to USB-C (thank you EU!), plus a true, Log video profile (named "Apple Log", of course). This Log profile expands the dynamic range of the iPhone's camera and captures footage without the sharpening and clarity effects that make video look like...well, smartphone video.
Even better, Apple Log can be used with third party apps, including Blackmagic Camera. Blackmagic's extensive experience designing video software and hardware really shows, for this free app is unquestionably the best video app on the iPhone (and soon Android too). It has loads of features and functionality, including multiple codecs (ProRes, h.265, etc), external recording (more on that in a minute), LUT importing and previewing, and manual exposure control. We still can't control aperture (it's always fixed at f/1.8), but at least we can set shutter speed, ISO and white balance to fixed values.
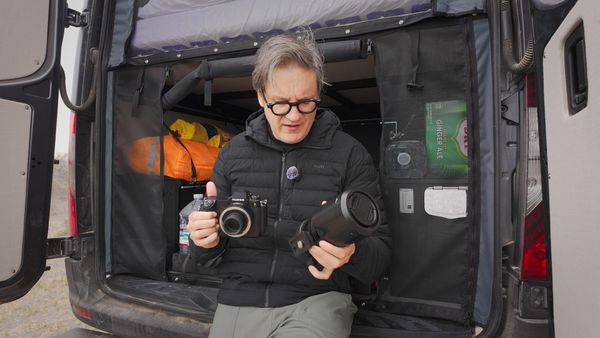
Neewer iPhone 15 Pro Max cage and accessories
Many companies offer phone cases that mount filters and lenses, but most are proprietary, closed systems that aren't compatible with other products; forcing users to buy all their iPhone filters and accessories from the same company.
That's why I was excited to find the Neewer iPhone 15 Pro Max cage, for it comes with a 67mm filter adapter that mounts any circular filter. For my setup, I mounted a Maven 67-82mm magnetized step-up ring to magnetically swap my 82mm Maven NDs, CPLs and diffusion filters. Again, any circular filter 67mm in diameter (or larger with a step-up ring) work with this adapter.
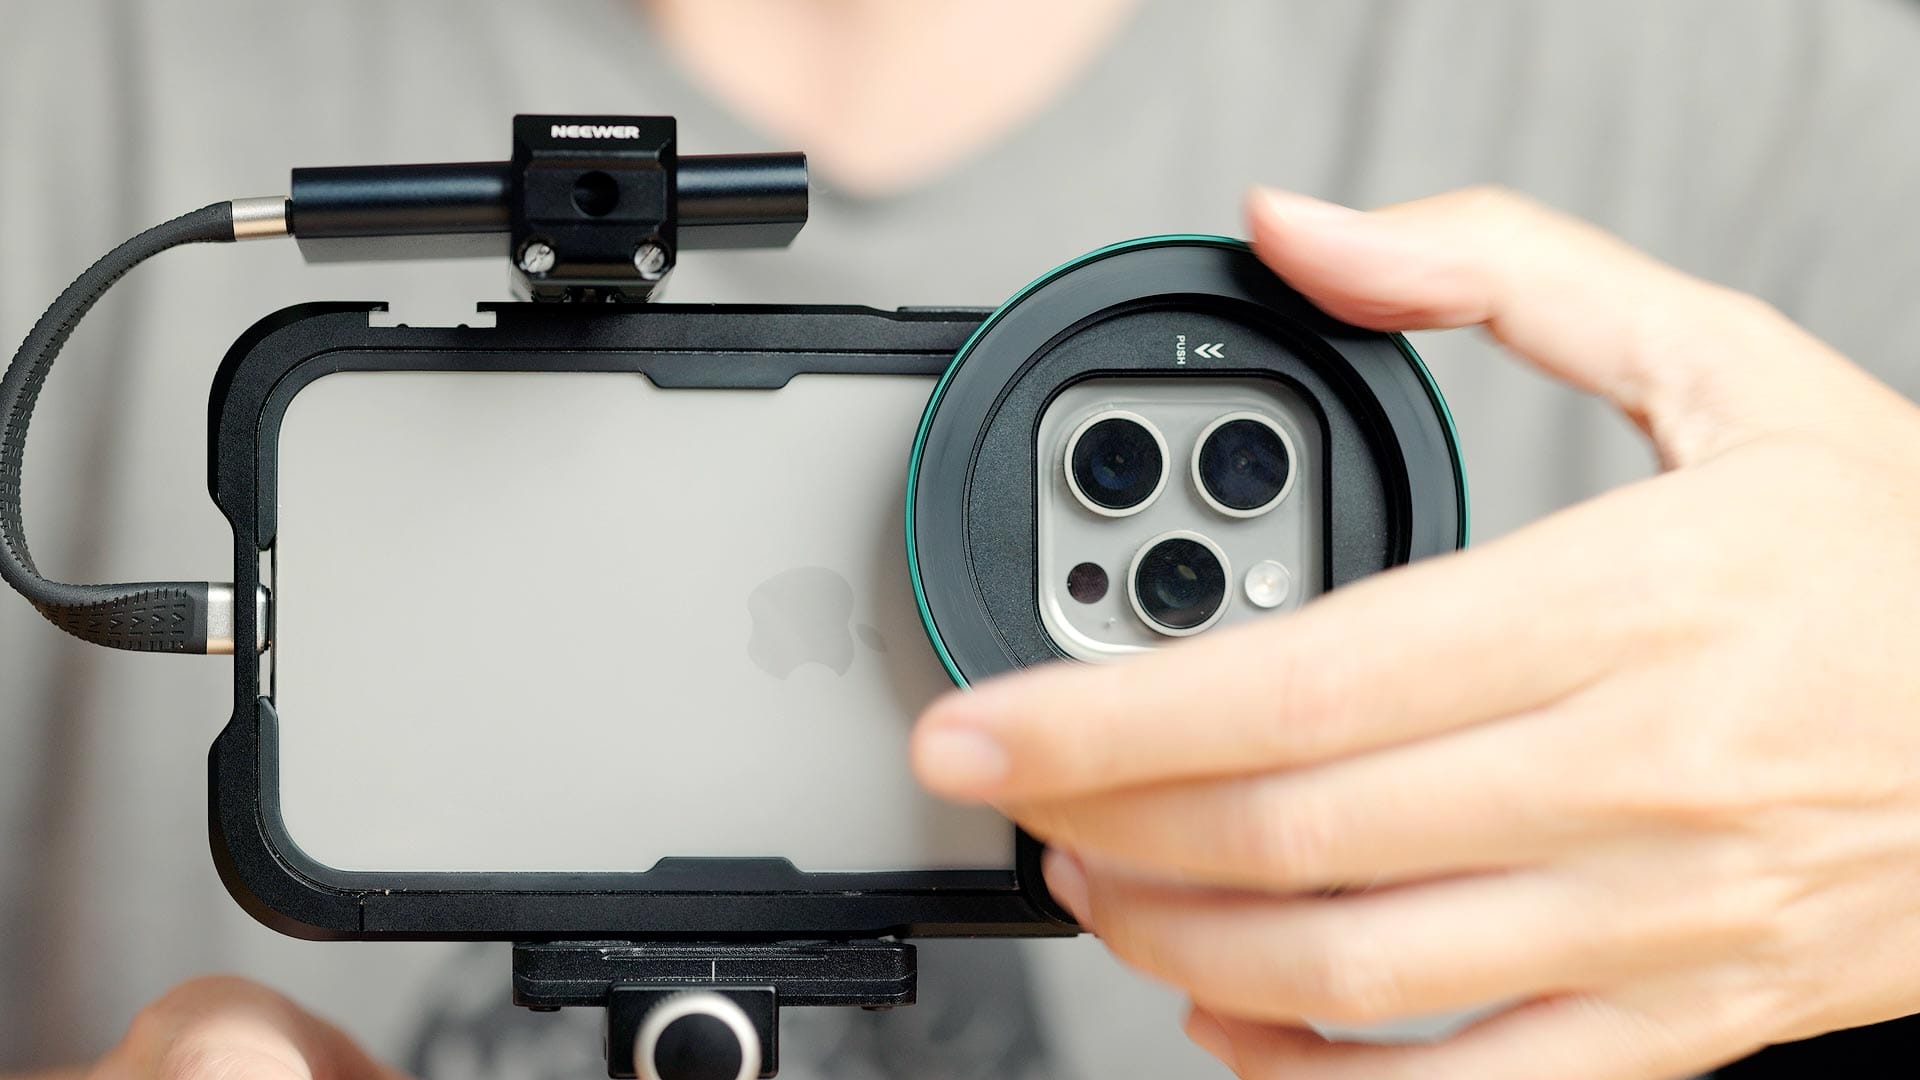
The Neewer cage has multiple 1/4"-20 mounts around the outside, plus two cold shoe mounts for microphones, lights or other accessories. You can also use these to mount a tripod head plate, which is how I mounted the cage to my carbon fiber Ulanzi Zero Y tripod.
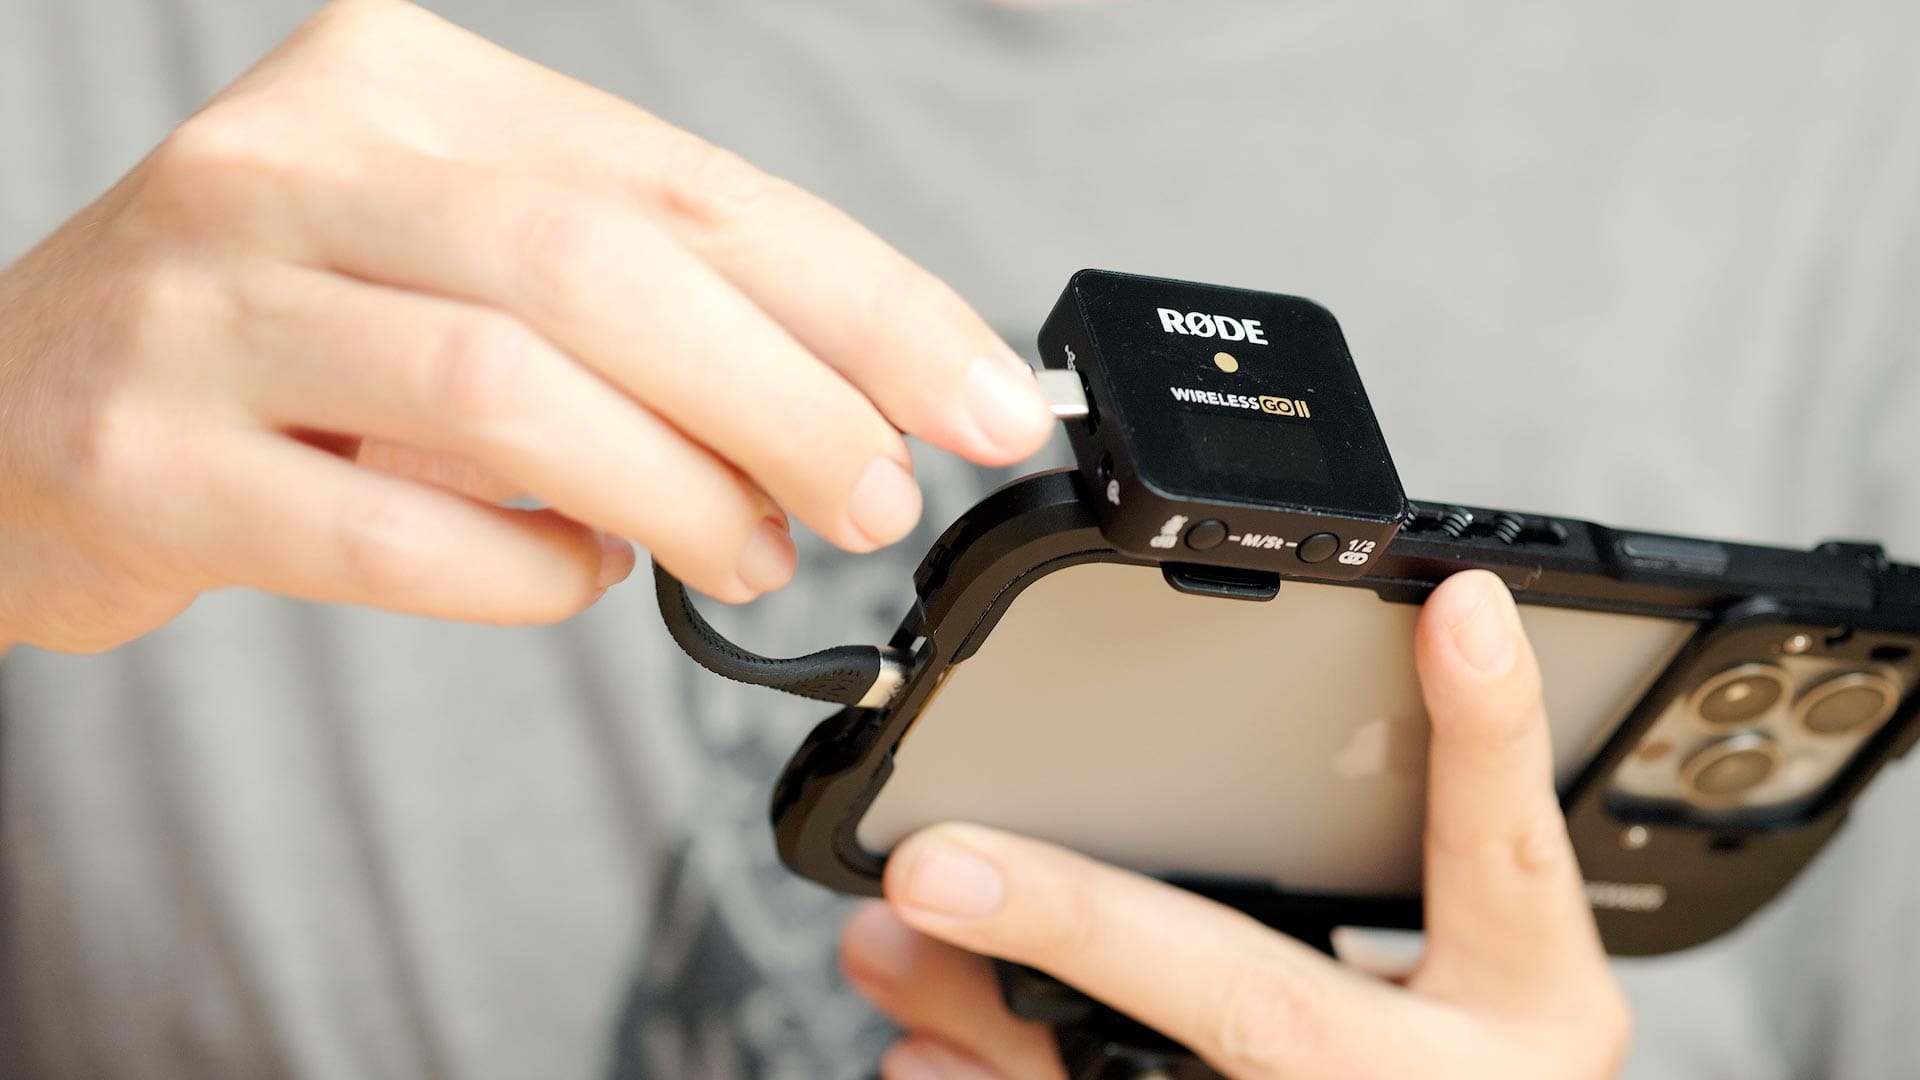
I also used the 1/4"-20 threads to mount a Neewer SSD drive bracket (pictured above), which is designed for the aforementioned Neewer cage, but can be mounted to anything with 1/4"-20 threads. This bracket provides a convenient slot for a Samsung T5, T7 or T9 portable SSD drive. I already owned a 2TB T7 SSD drive, so this was perfect for me. The SSD bracket also includes a cold shoe mount for mounting microphones, lights, etc.
With everything mounted, I then connected the SSD drive to the iPhone using a flexible USB-C cable supporting speeds up to 20Gbps. Higher speed USB-C cables are preferable when recording video to avoid dropped frames and when recording using faster frame rates.
Recording audio
Because the iPhone has only one USB-C port, it's not possible to connect both an SSD drive and microphone without an additional hub. I came up with two workarounds for this.
First, I connected my Rode wireless microphone to the USB-C port, left the SSD drive in my bag, and recorded video internally on the iPhone. This was fine when I was shooting about an hour of video, but it did fill up quickly. To conserve space, I unplugged the Rode mic, attached the SSD, and recorded video externally when shooting b-roll (which wouldn't need audio).
Perhaps someday there will be a more elegant USB-C splitter and power option to connect both the SSD and microphone. I've seen other people recommend this Belkin Connect USB-C hub to do just that, so I may pick up one of those and try it out.
Mounting and using filters
Videographers often follow the 180-degree shutter rule when recording video, which means they set their camera's shutter speed to 1/(2x frame rate). This creates smoother, more natural looking motion blur in recorded footage, which can be especially important when shooting outdoors.
I use Maven circular magnetized filters for both photos and videos. I like them because they're extremely thin, lightweight, color accurate, and easy to attach magnetically. I also very much like their color-coded scheme, which makes them easier to identify in a bag or pouch.
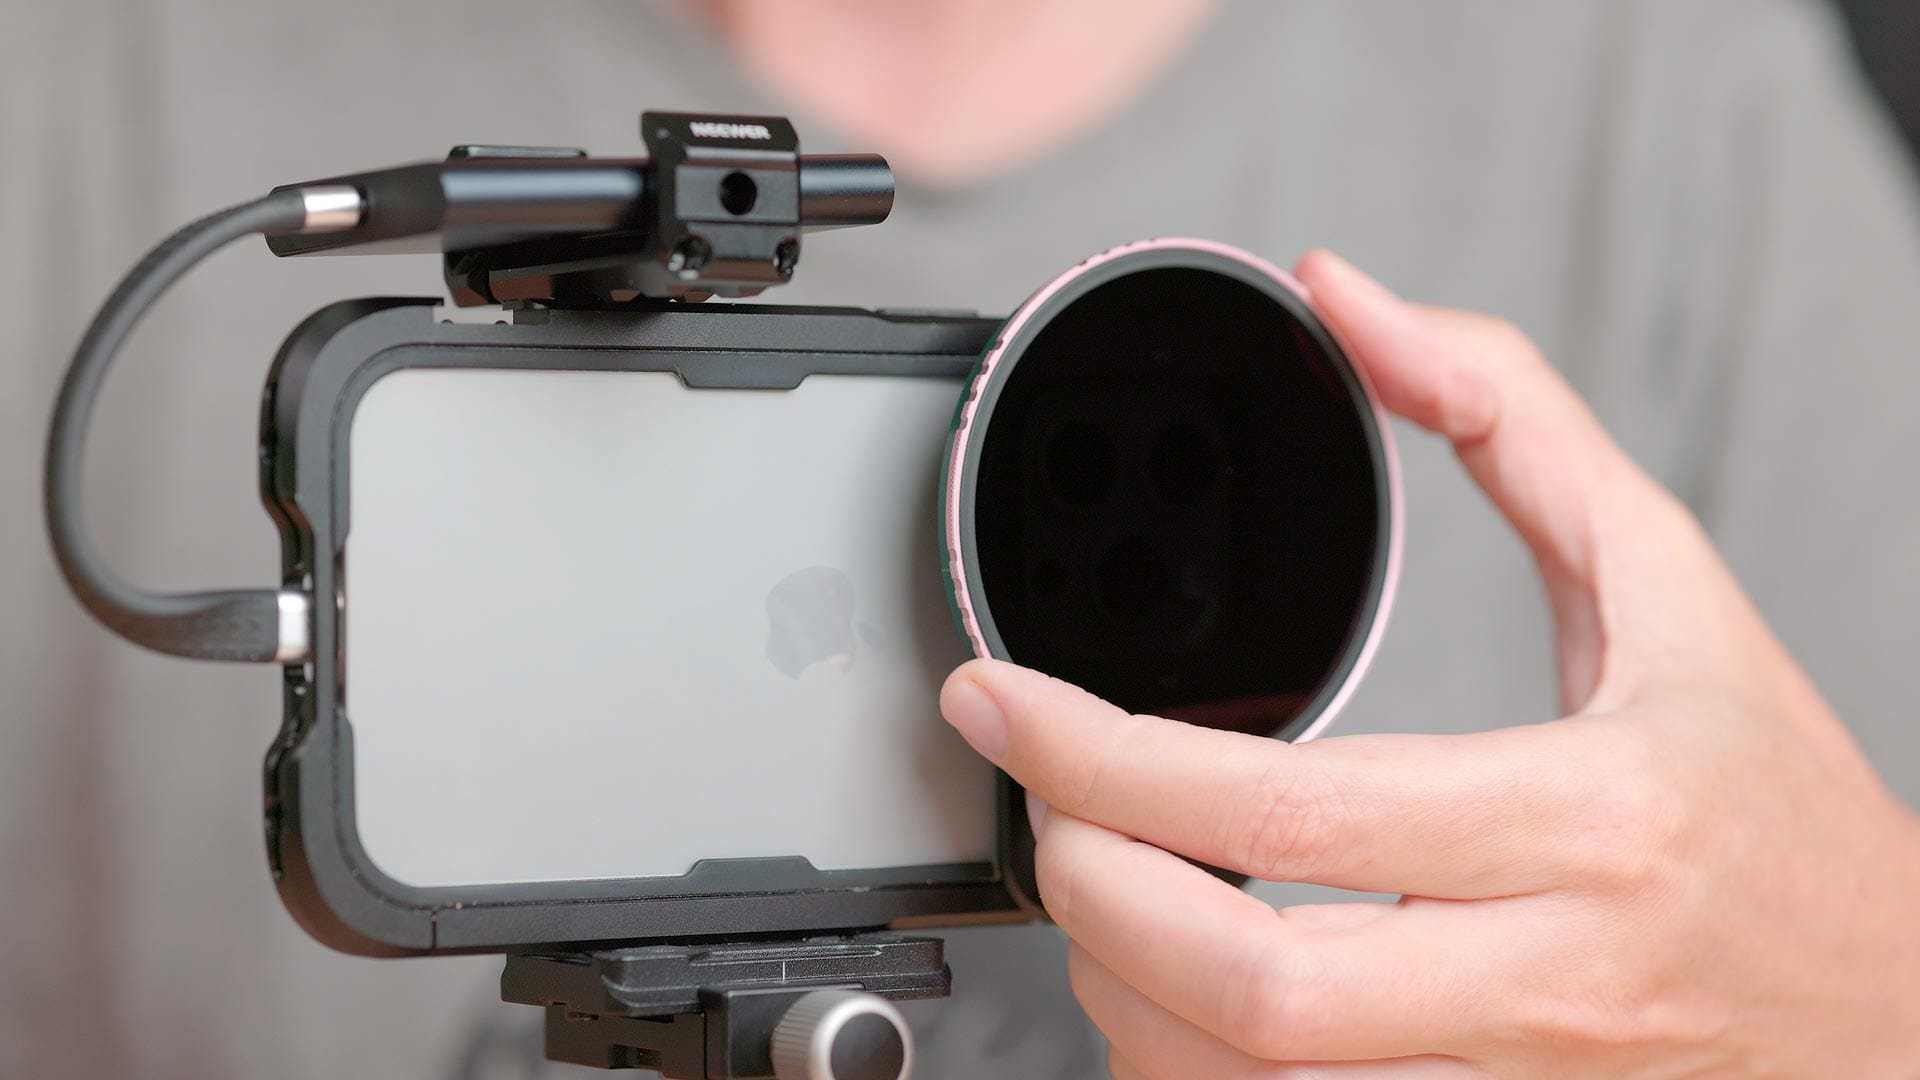
To mount my Maven magnetized filters, I first mounted the aforementioned 67mm circular adapter that comes with the Neewer cage, then a 67-82mm magnetized step-up ring (also from Maven). With this setup, I hot swapped magnetized solid ND filters, CPLs, dark CPLs, plus a diffusion mist filter (either by itself or mounted in front of one of the aforementioned filters).
All that said, there is one major problem with the Neewer cage. When used outdoors in bright sunlight, light reflects off the back of the phone and sneaks underneath the 67mm filter adapter; causing a noticeable light streak on the right side of the frame. To solve this, I wrapped a black velcro strap around the base of the adapter. Gaffers tape should work too. This gap can easily ruin footage, but thankfully I noticed the issue while testing the cage prior to using it. Hopefully Neewer can address this issue in the future.
Exposure and other settings
Blackmagic Cam offers a number of video recording codecs including ProRes HQ, ProRes, ProRes LT, ProRes Proxy, h.265 and h.264. I recorded everything in ProRes LT, for it provided better image quality than h.265, and was quicker to edit on a video timeline. File sizes were a bit larger, but not as large as ProRes or ProRes HQ. For me, ProRes LT felt like the best compromise of file size and image quality.
BlackMagic Cam provides full manual control over white balance, ISO, and shutter speed. As mentioned earlier, aperture is fixed at f/1.8, but we can adjust ISO and mount ND filters to achieve optimum exposure.
When doing this, I highly recommend enabling the histogram view in the Blackmagic Cam settings. This provides a clear overview of what's happening with exposure when making changes. I also recommend locking white balance to a fixed kelvin value (eg, 5500k) to prevent white balance fluctuations while shooting. Videographer Matt Johnson has a great video explaining how to setup manual exposure in Blackmagic Cam, if you need help doing so.
Speaking of Johnson's video, he recommends setting ISO to somewhere around 1250 for optimum dynamic range. I tried this, but had to use heavy density NDs (eg, 10 stops) to achieve proper exposure during the daytime. Additionally, ISO 1250 increased noise in the shadows, which negatively impacted detail and texture. High ISO values might be fine in darker environments without filters, but this approach didn't work for me.
Instead, I got the best image when lowering my ISO to 100, 200, or 400, and exposing for the highlights to protect them against overexposure. If you see a "wall" towards the right side of the histogram in Blackmagic Cam, your exposure is likely too bright and should be darkened either by lowering ISO or increasing ND filter density.
Diffusion mist filters can help soften contrast, lift the blacks, and bloom the highlights, but in my experience a little goes a long way. I tested 1/8, 1/4 and 1/2 strength diffusion filters and felt that 1/8 was more than enough (the others were too noticeable for my taste).
Pros and cons of an iPhone video kit
Overall, I experienced some definite pros and cons shooting with an iPhone for this trip. The light leaks with the Neewer cage were a big problem, and I doubt I'll use it again in the future. It was also a little annoying not being able to easily use my iPhone for other things, notably checking GAIA GPS, messages, etc. Image quality wise, I felt the resultant footage was good, and perfectly suitable for YouTube, but I've captured better using my Canon gear.
The most positive change was weight. I would be carrying an iPhone with me anyway when hiking, so only the cage and a few small accessories added weight to my bag. It was also super easy picking up the camera and tripod, hiking with it, and composing shots on the large Pro Max screen. Imagine using an HDMI video monitor with cameras on the back, and that's about what it felt like.
I'm definitely a fan of this setup, especially for longer, more strenuous hikes, and will be experimenting with it more in the future.