Two mistakes I regret when creating landscape images
Looking back through old Lightroom catalogs, I've identified two editing mistakes from my early photography days that seemed sophisticated at the time, but were actually counterproductive.
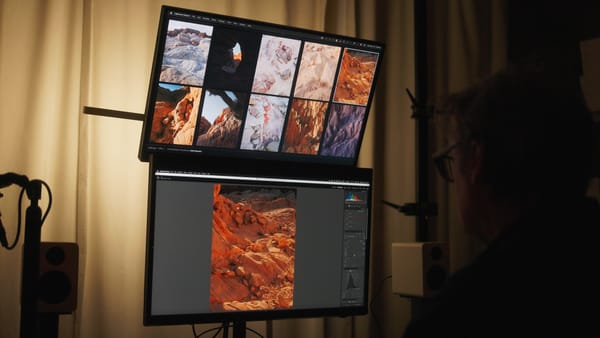
I've been revisiting my old Lightroom catalogs to find landscape photos from years past. As I've scrolled through hundreds of images, examining my past decisions with fresh perspective and additional experience, certain patterns have emerged. Two techniques in particular (which I thought were sophisticated approaches at the time) now seem heavy-handed and misguided.
Before we get to those, let's begin with some friendly advice.
Don't delete unwanted images
If you have the drive space, I highly recommend keeping all your past raw files except those with obvious technical flaws (e.g., poor focus or severe exposure errors). Older images are invaluable for two reasons.
First, they serve as excellent learning tools and reference materials, technically and creatively.
Second, it can take months or even years to see an image objectively, and you may have hidden gems from years past that deserve another look.
Obviously, once a raw file is gone, it's gone, so it's a good idea to invest in local storage for your growing archive of images, plus cloud storage for additional safe keeping (e.g, OWC ThunderBay 8, which is what I use).
Mistake #1: Always bracketing my exposure
HDR bracketing works great for high-contrast landscapes that exceed a camera's dynamic range. For example, bright skies with dark foregrounds, or any situation where noise and clipping are problematic.
Years ago, I was paranoid about clipping and harming my images with technical flaws, so I compensated by bracketing almost every exposure. Sunny days, cloudy days, dim blue hour light, whatever the conditions, I'd bracket all my tripod shots, figuring I could delete extras later, but would have additional exposures for HDR blending if needed.
Looking back, I rarely needed those extra bracketed shots. My base exposures usually had good tonal range, minimal noise, and no blown-out whites or blacks.
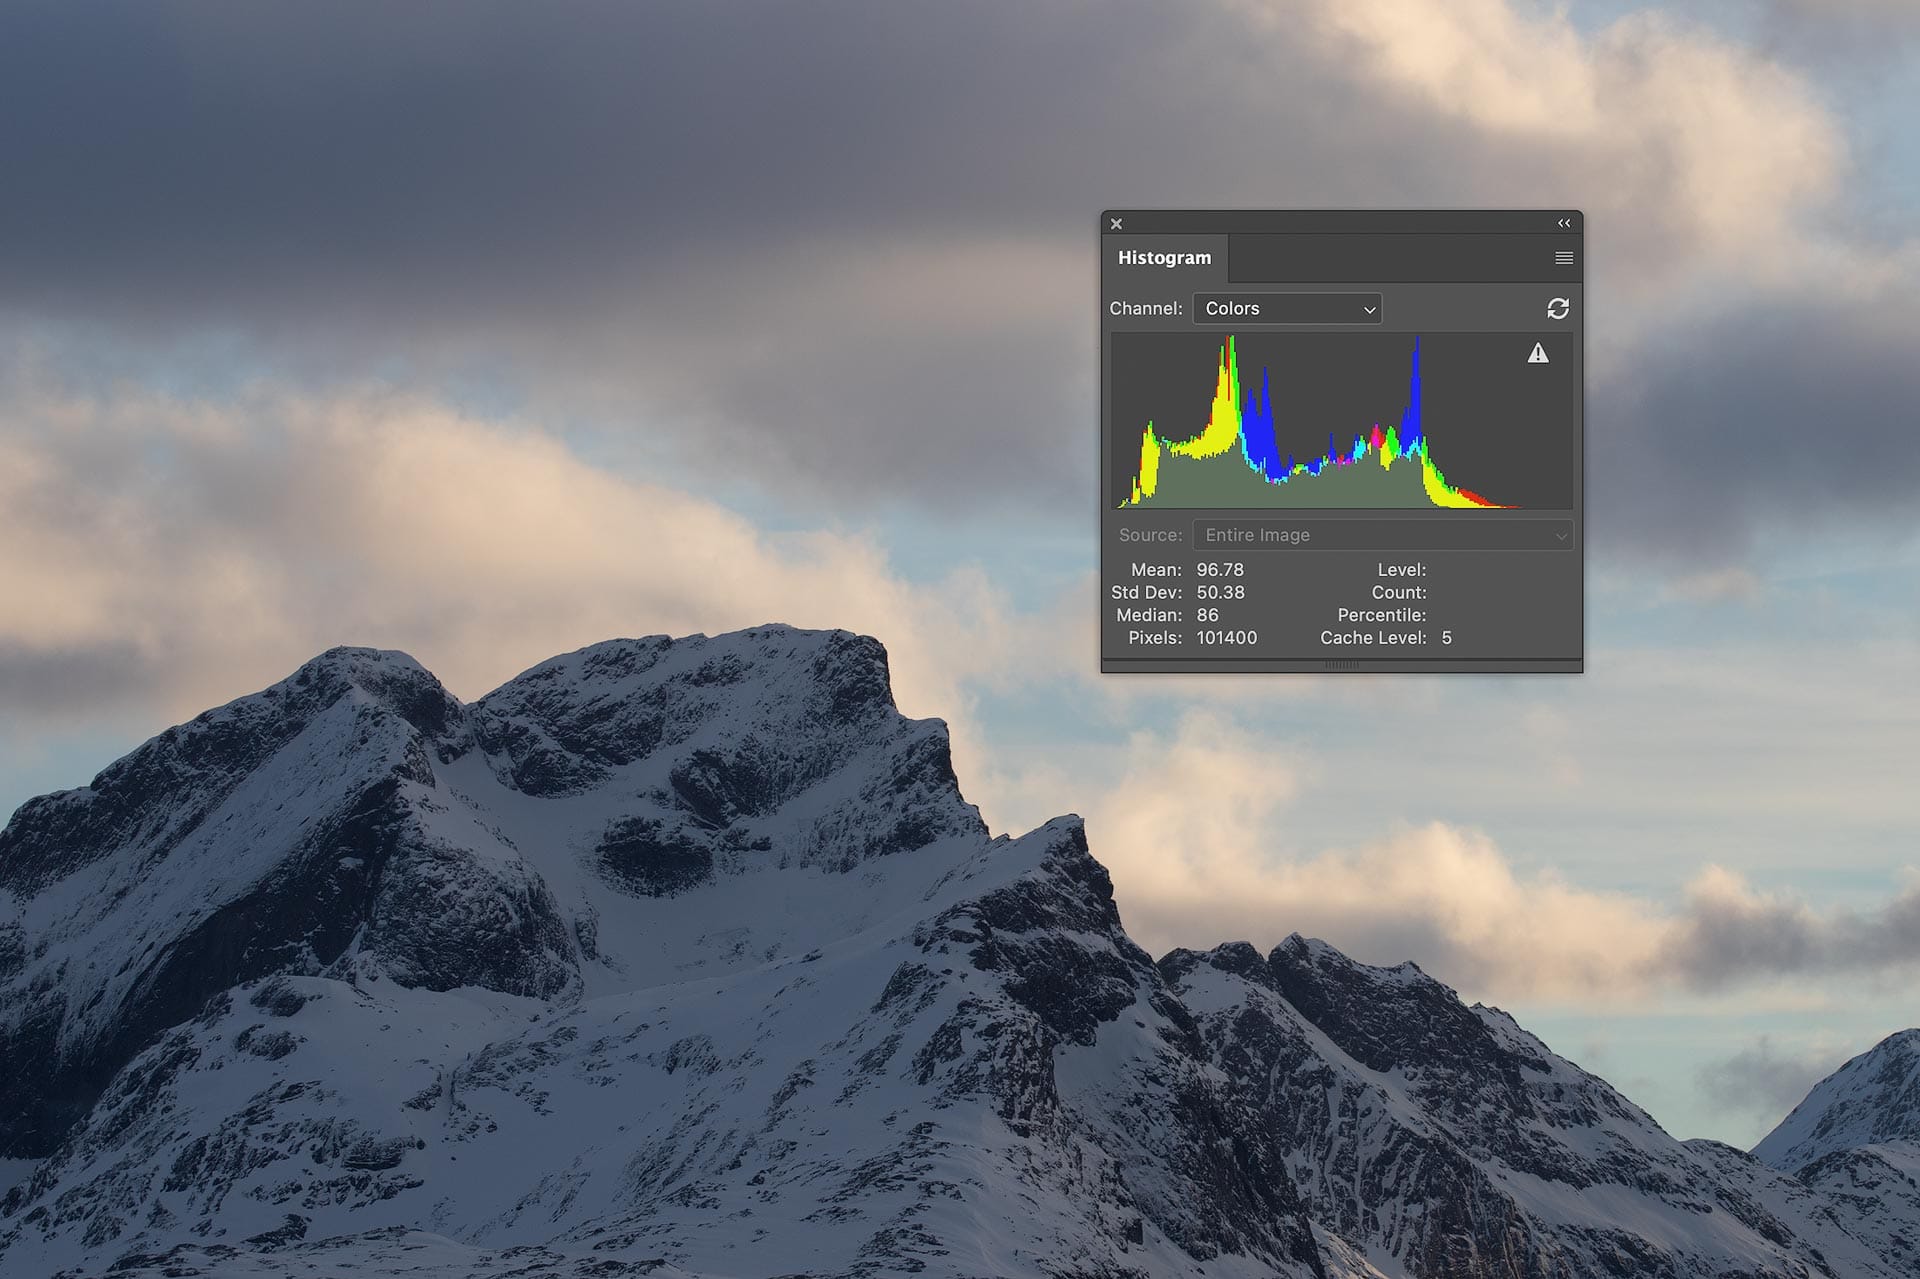
For example, look at the histogram of the raw file below. Nothing is clipped, and there's plenty of information for me to work with when balancing tonality and adjusting contrast. I can do everything I need with a single exposure, and yet I ignored my camera's histogram and bracketed my exposure anyway; stuffing my Lightroom catalog full of extra, unnecessary raw files.
Speaking of extra files, I never bothered deleting them! Perhaps someday I'll take the time to weed them out, but it would be quite a project.
Finally, I'd often process HDR images simply because I had multiple exposures available. In my mind, three blended exposures was better than one. But Lightroom's HDR mode isn't perfect. It can make mistakes when compositing images, leading to strange halos, unsightly edges, and smudgy details that can remain hidden until you're deep into processing.
My advice? Bracket with purpose. Check your camera's histogram. If the exposure is bunched up at either end, bracket. Otherwise, one exposure is usually more than enough.
Mistake #2: Correcting white balance for no reason
You'll often hear photographers talk about "correcting" white balance, a term I dislike because it implies any non-neutral white balance is inherently wrong. A technical fault or amateur mistake.
In reality, removing color casts and neutralizing tones (making gray truly gray) can remove the natural color of light from a scene, leading to gray, lifeless landscapes which then need an injection of artificial color to bring them back to life.
I was once so fixated on the idea of "correct" white balance I carried a small white balance card in my wallet. I'd then hold the card in front of the camera, take an image, then select the card with Lightroom's white balance eyedropper to "fix" all images taken around the same time. Not a bad idea in practice, but I was overlooking something important.
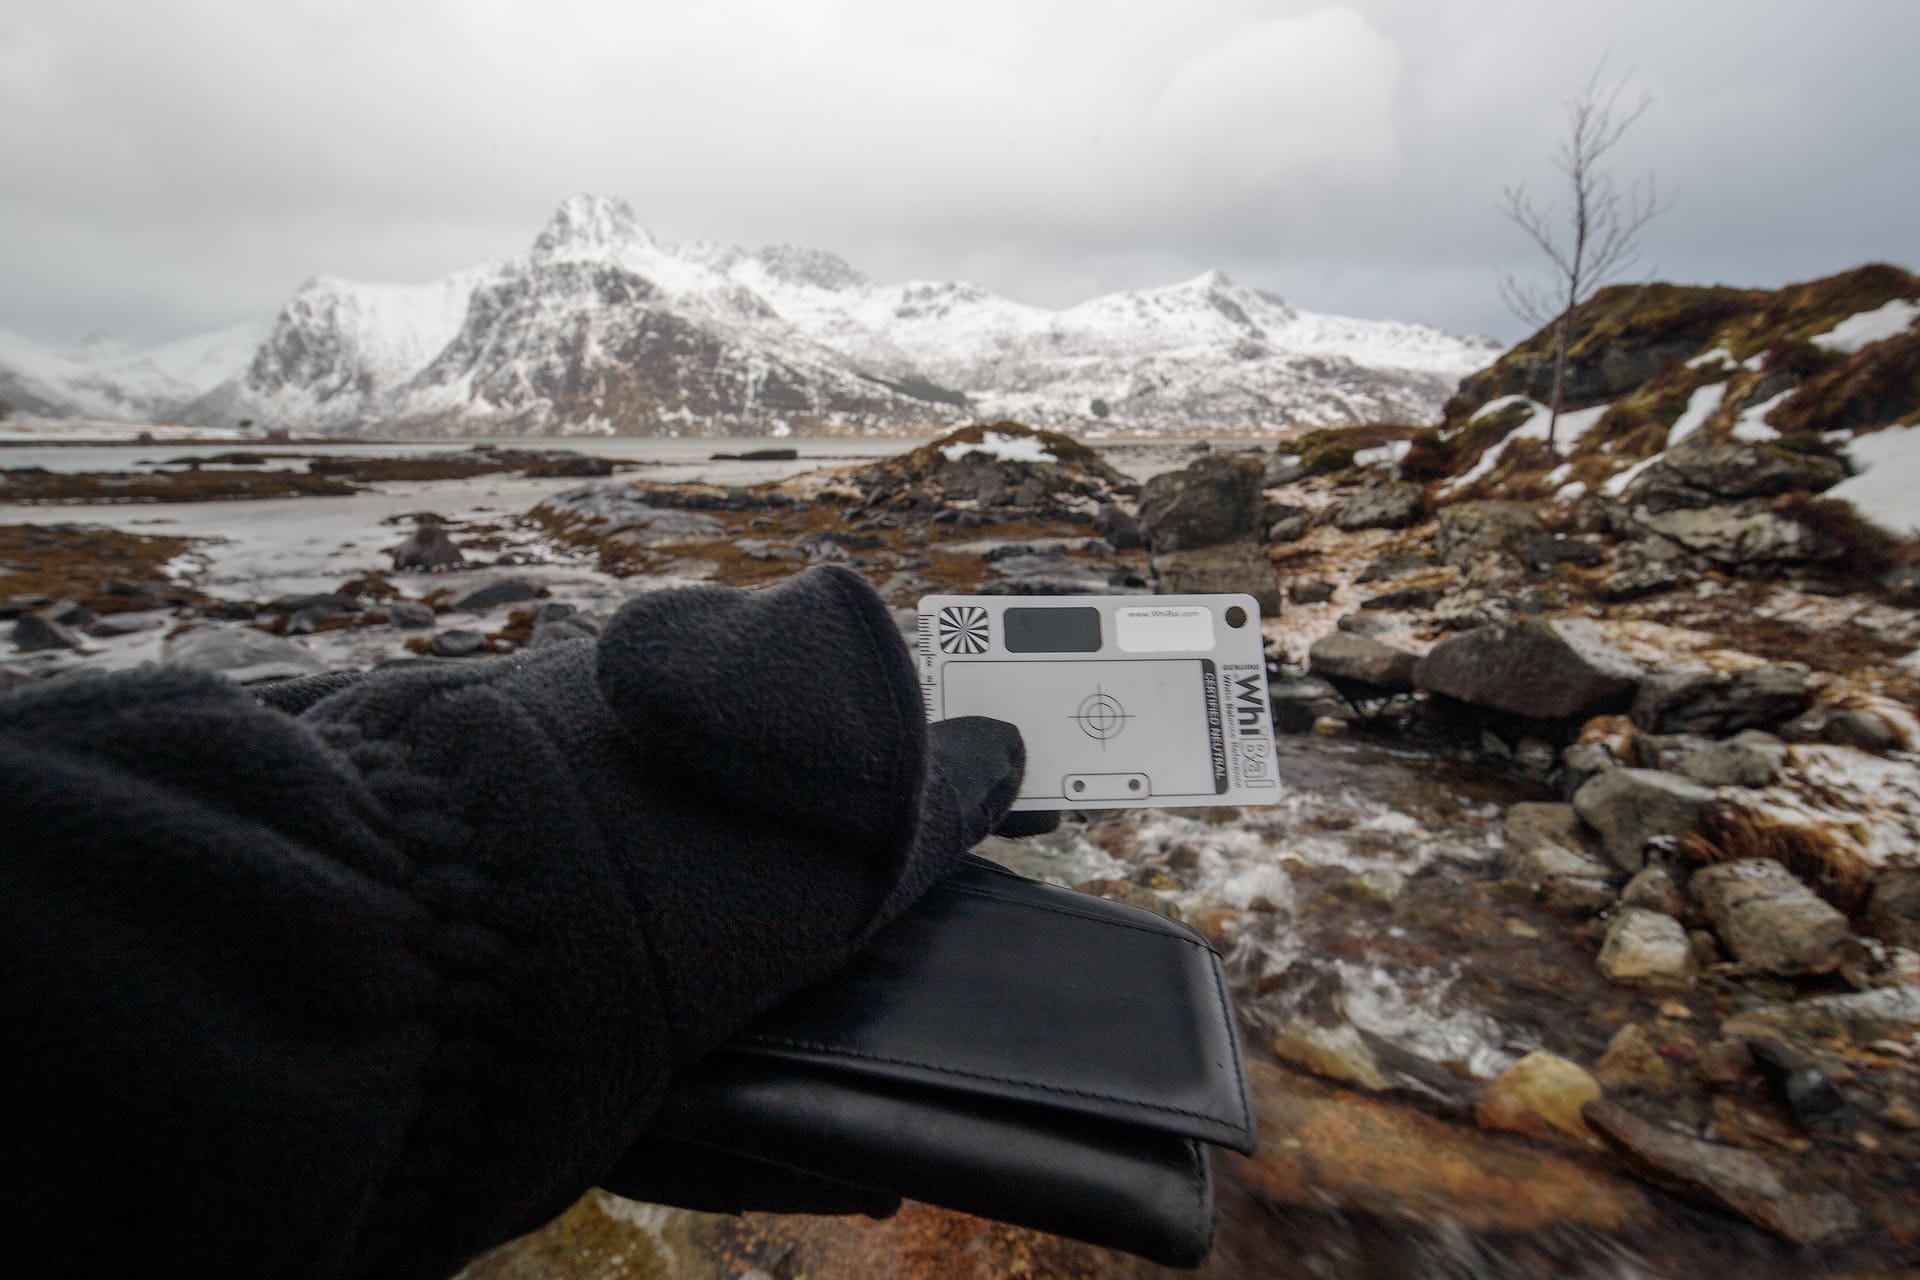
Neutrality matters in product photography for accurate brand colors, and in portraits for natural skin tones. But in landscapes? Sunlight is rarely neutral. Light almost always leans warm or cool except at midday with high, overhead sun. The only time a white balance card would actually be neutral in the real world would be a small sliver of time, if at all.
And besides, who wants landscape images that look like they were shot in gray, neutral midday light?
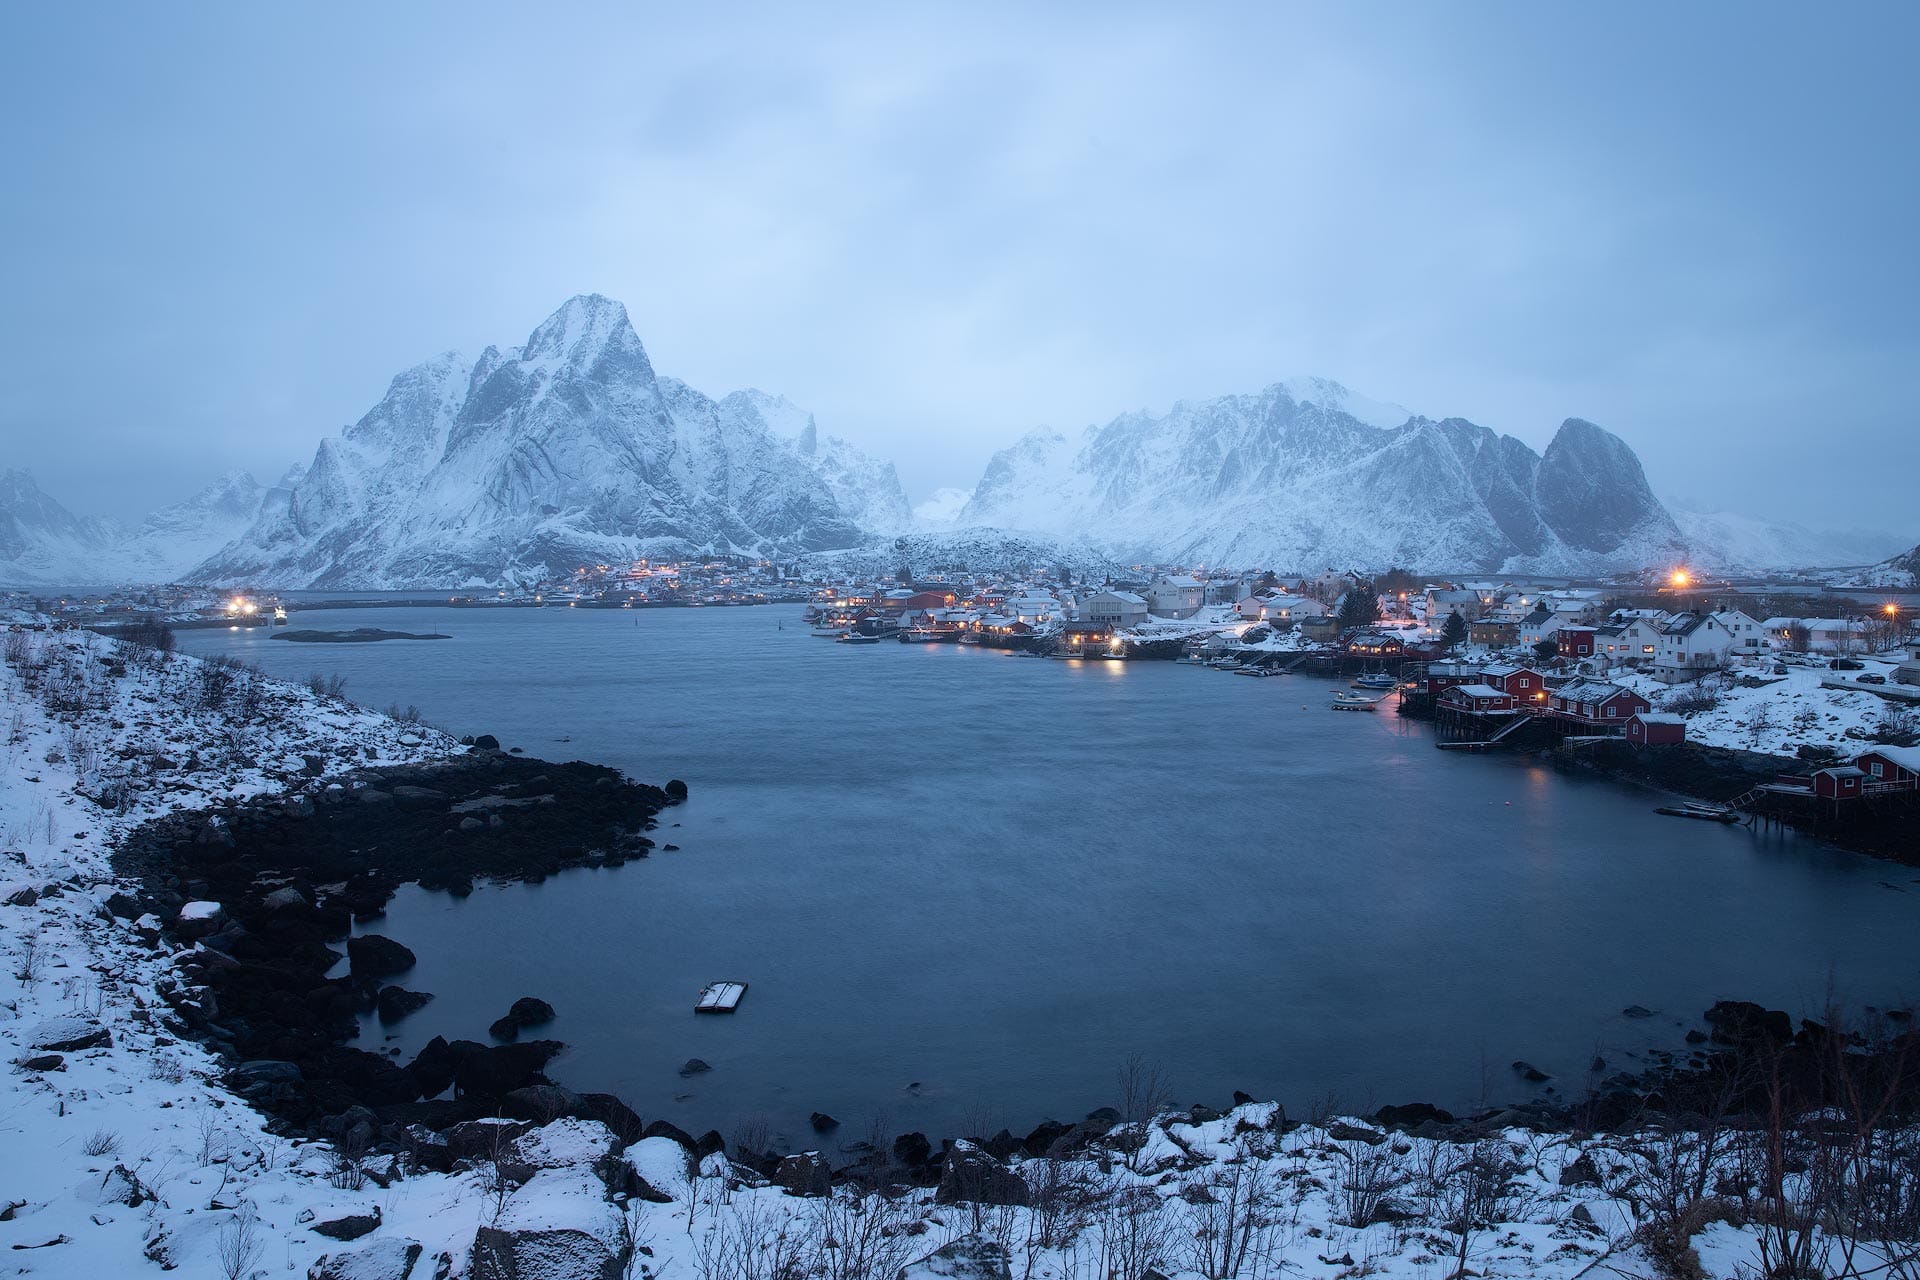
For example, here's an old image of mine captured at blue hour early in the morning just before sunrise in Lofoten, Norway. All the color, atmosphere and vibe is removed when its white balance is "corrected" using the card and eyedropper.
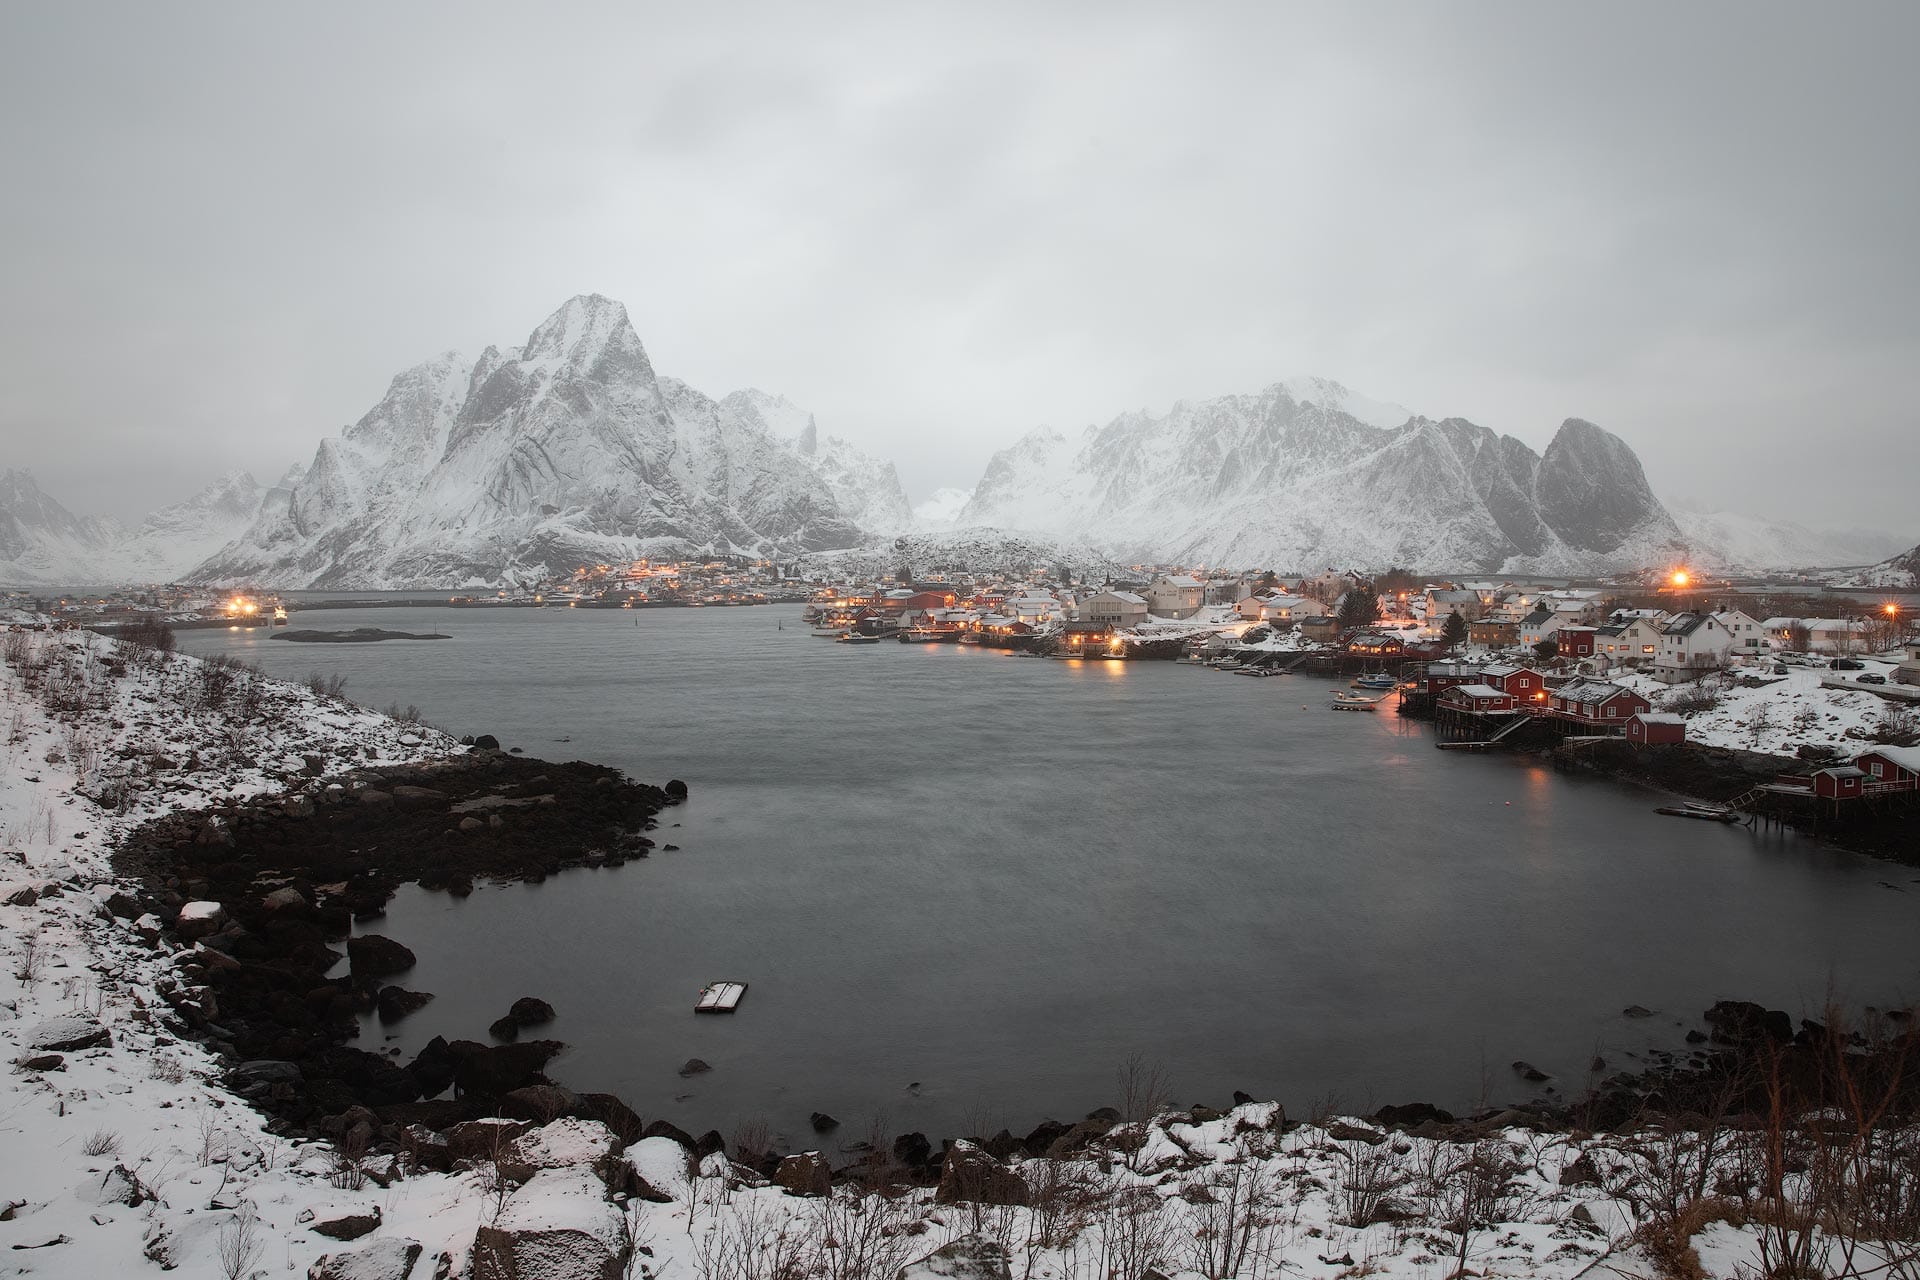
You actually don't need to carry a white balance card for this to affect your images, for cameras set to Auto White Balance (AWB) sometimes do this all on their own. When set to AWB, cameras automatically look for the closest pixel to neutral, then skew the color temperature/tint of a raw file to help remove color cast.
My advice? Set your camera to a fixed color temperature of 5600 kelvin. This helps remove camera bias; allowing the natural colors of the environment to pass through and be authentically captured. Blue hour then looks blue. Golden hour looks golden. It retains the natural color cast of the environment (which of course you're then free to adjust afterwards if you so desire).
Video
Thanks to Squarespace for sponsoring the video! Sign-up for a free 30 day trial, then use promo code DOMINEY to knock 10% off a new website or domain.