Step inside my new Sprinter 170 camper van
After years of renting vans from other people to create landscape images, I finally have one of my own.
Nearly a year after this project started, my new fully converted Mercedes Sprinter camper van is finally finished and ready to go. Having my own camper van has been a dream for the past few years, after renting numerous vans from other people and using them to travel and photograph the American west. Throughout that time, I learned a lot about vans.
Video tour of the van
Initially, I was gung-ho on building my own. I thought it would be a fun project (for me and my family, if I could persuade them to help). But knowing myself, I knew I wouldn't be 100% happy with the result, no matter how much time and energy I put into it. For in the words of a former colleague, "Everyone burns their first pancake."
I spoke to a handful of professional van builders in the United States and decided to go with Benchmark Vehicles in Portland, Oregon. I chose them not simply for their deep knowledge and experience (my van would be their 128th van), but also because the fit and finish of their work was exceptionally good. Working with a professional builder would certainly cost more than doing it myself, but Benchmark would do a far more professional job in less time.
In early November 2025, my wife and I flew out to Portland, spent a few hours going over every feature big and small with Benchmark, then drove away for a two week adventure down the Oregon and California coast. We camped overnight in campgrounds, on BLM land, plus a winery in Paso Robles. This was my wife's first experience living in a van for an extended period of time, and thankfully she very much enjoyed it (which is good because she'll be coming with me on on future photography trips).

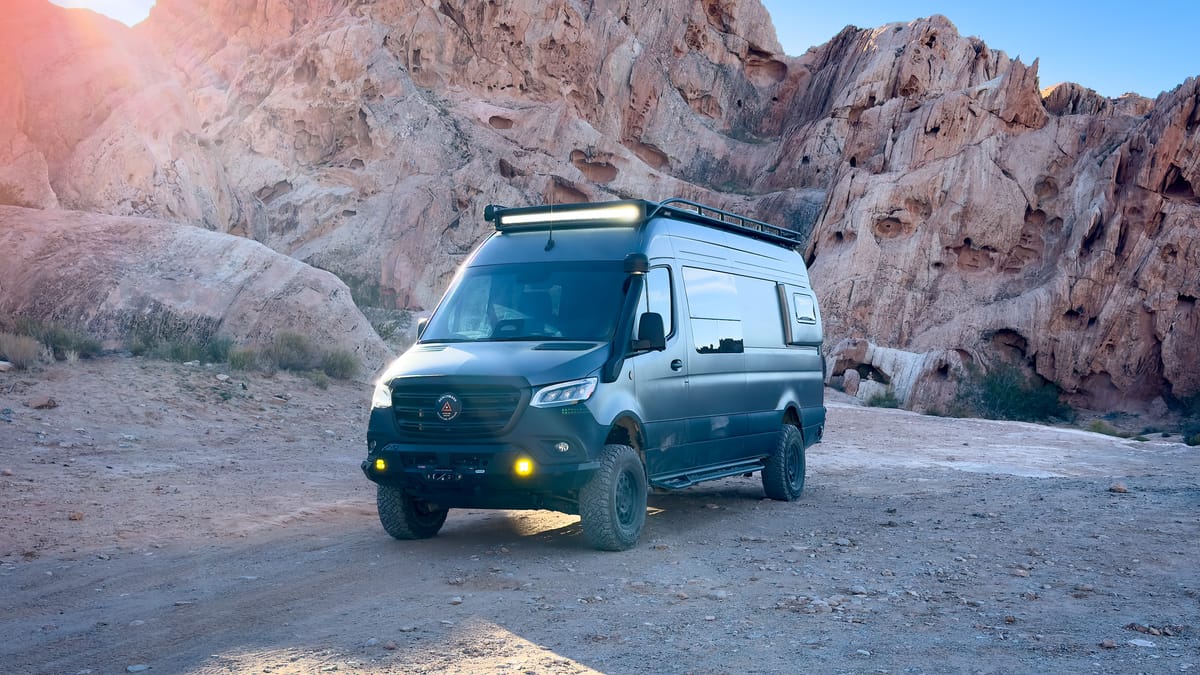
As for the van itself, it's a 2025 Sprinter 170, which provides three additional feet of interior build space compared to the smaller Sprinter 144. I rented a few 144s and enjoyed their more compact size, but felt a 170 would better suit two people and provide more space for everything I needed inside.
The van was ordered through a Mercedes Benz dealership in Stockton, California. I had to order a custom one because a Sprinter 170 with the requisite features I needed did not exist on any dealer lot in the country. That delayed the project a few months, but did ensure I would get the exact van I wanted with minimal waste and redundancy (e.g., windows, which would be replaced with better aftermarket options).
The van is AWD, for Mercedes no longer offers a 4 wheel drive model. Purists might prefer the latter, but the Mercedes AWD system has proven to be very capable when driven off road, which I will definitely need in certain areas.
Van exterior upgrades
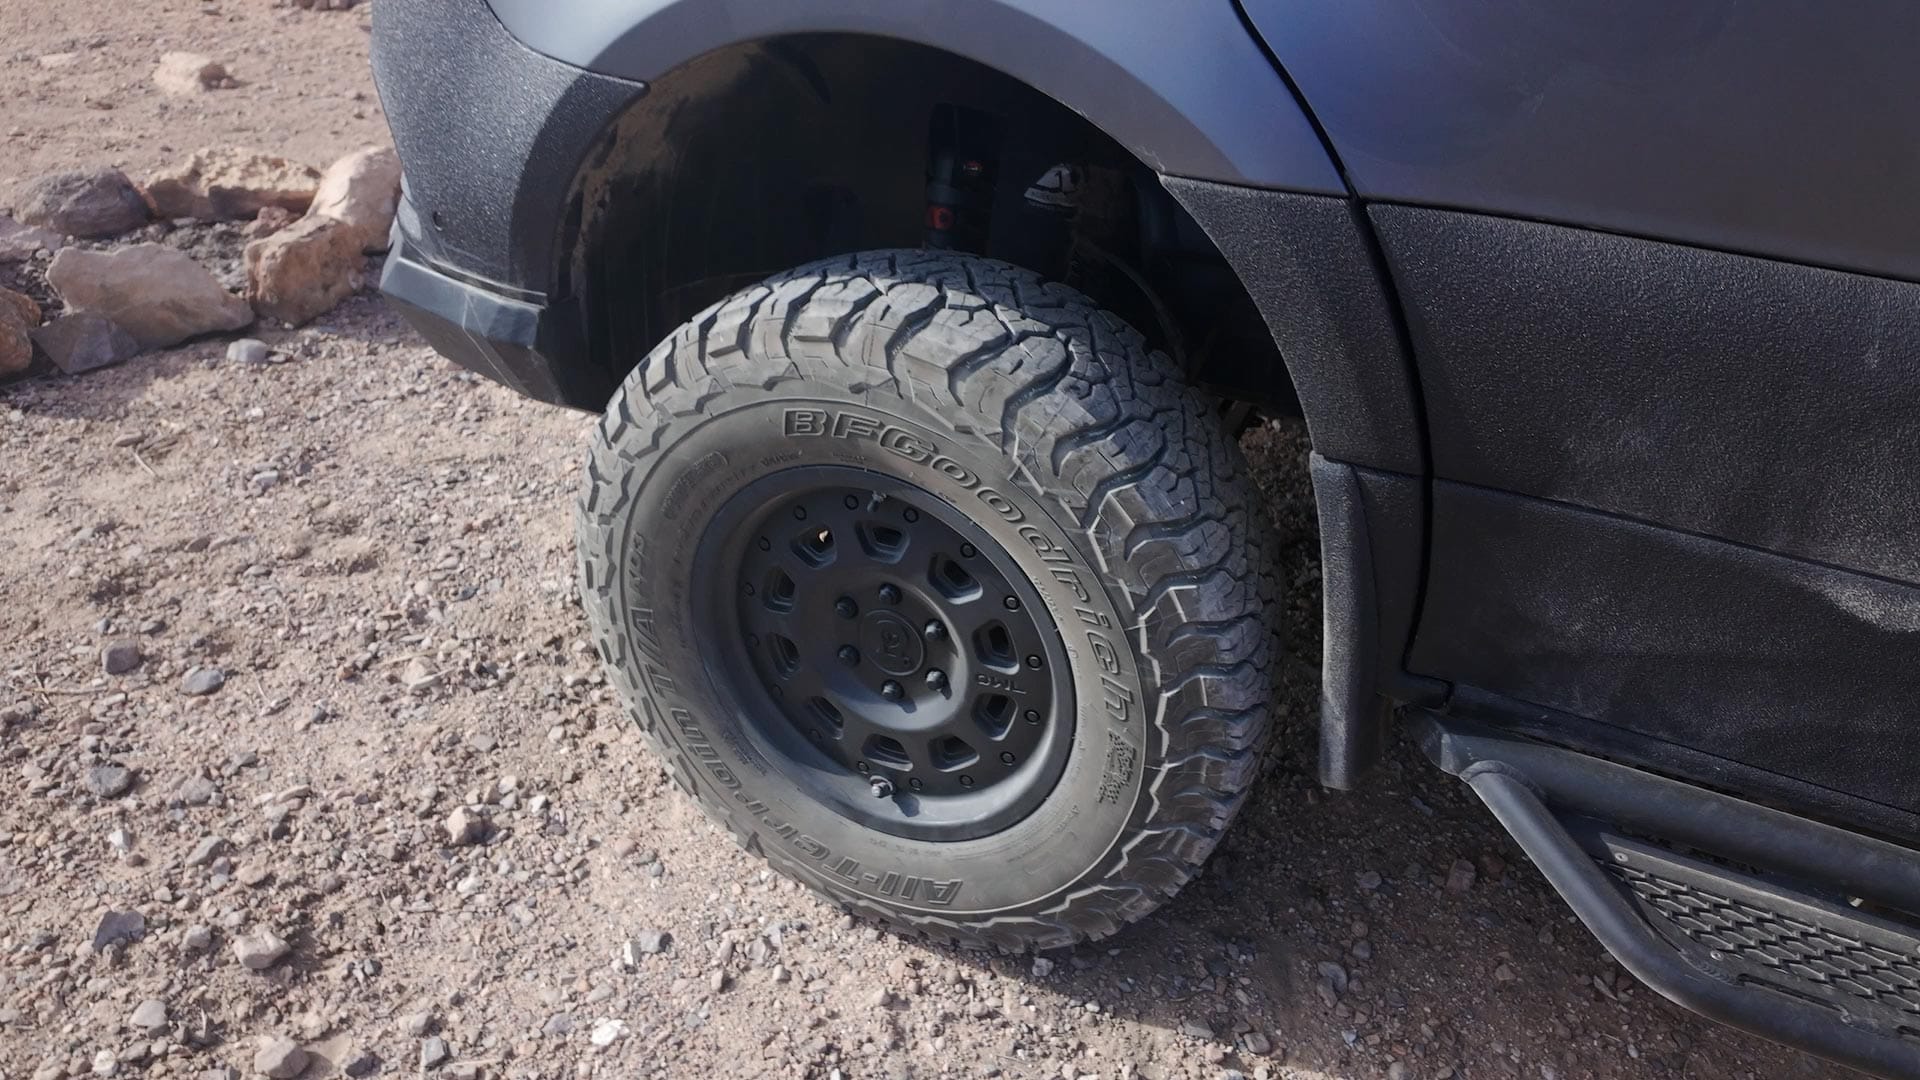
Benchmark upgraded the suspension with an Agile Offroad RIP Kit, plus black aluminum Talon wheels from Owl Vans and BFGoodrich Ko3 all terrain tires. All four wheels have quick release air valves for rapid air-downs when driving off-road. To air back up, there's an ARB dual air compressor inside the engine compartment with hose hookups in the front and rear of the van to reach all four tires. The air compressor is turned on/off through a Switch Pros interface mounted in the dash.
Speaking of using the van off-road, Benchmark replaced the front bumper with a more rugged option made by Flatline Van Company. This bumper provides better recovery structural support with two recovery points, a metal skid plate to protect the van's underside, two amber squadron fog lights, plus a Warn recovery winch for getting myself (or others) out of sticky situations when driving off-road.
To protect the van's body and paint when off-road, the entire van was wrapped with a matte PPF (Paint Protection Film), plus Line X on the lower rockers. These help safeguard the van's exterior from flying rocks and debris.
Side steps on both sides made by Owl Vans make it easier to climb in/out of the lifted van. On the rear doors, more products from Owl Vans including their Explorer spare tire carrier and ladder, B2 Pro mounting hardware, plus a Monster 30 box for storing hoses, cables, tools and other stuff which don't need to be stored inside.

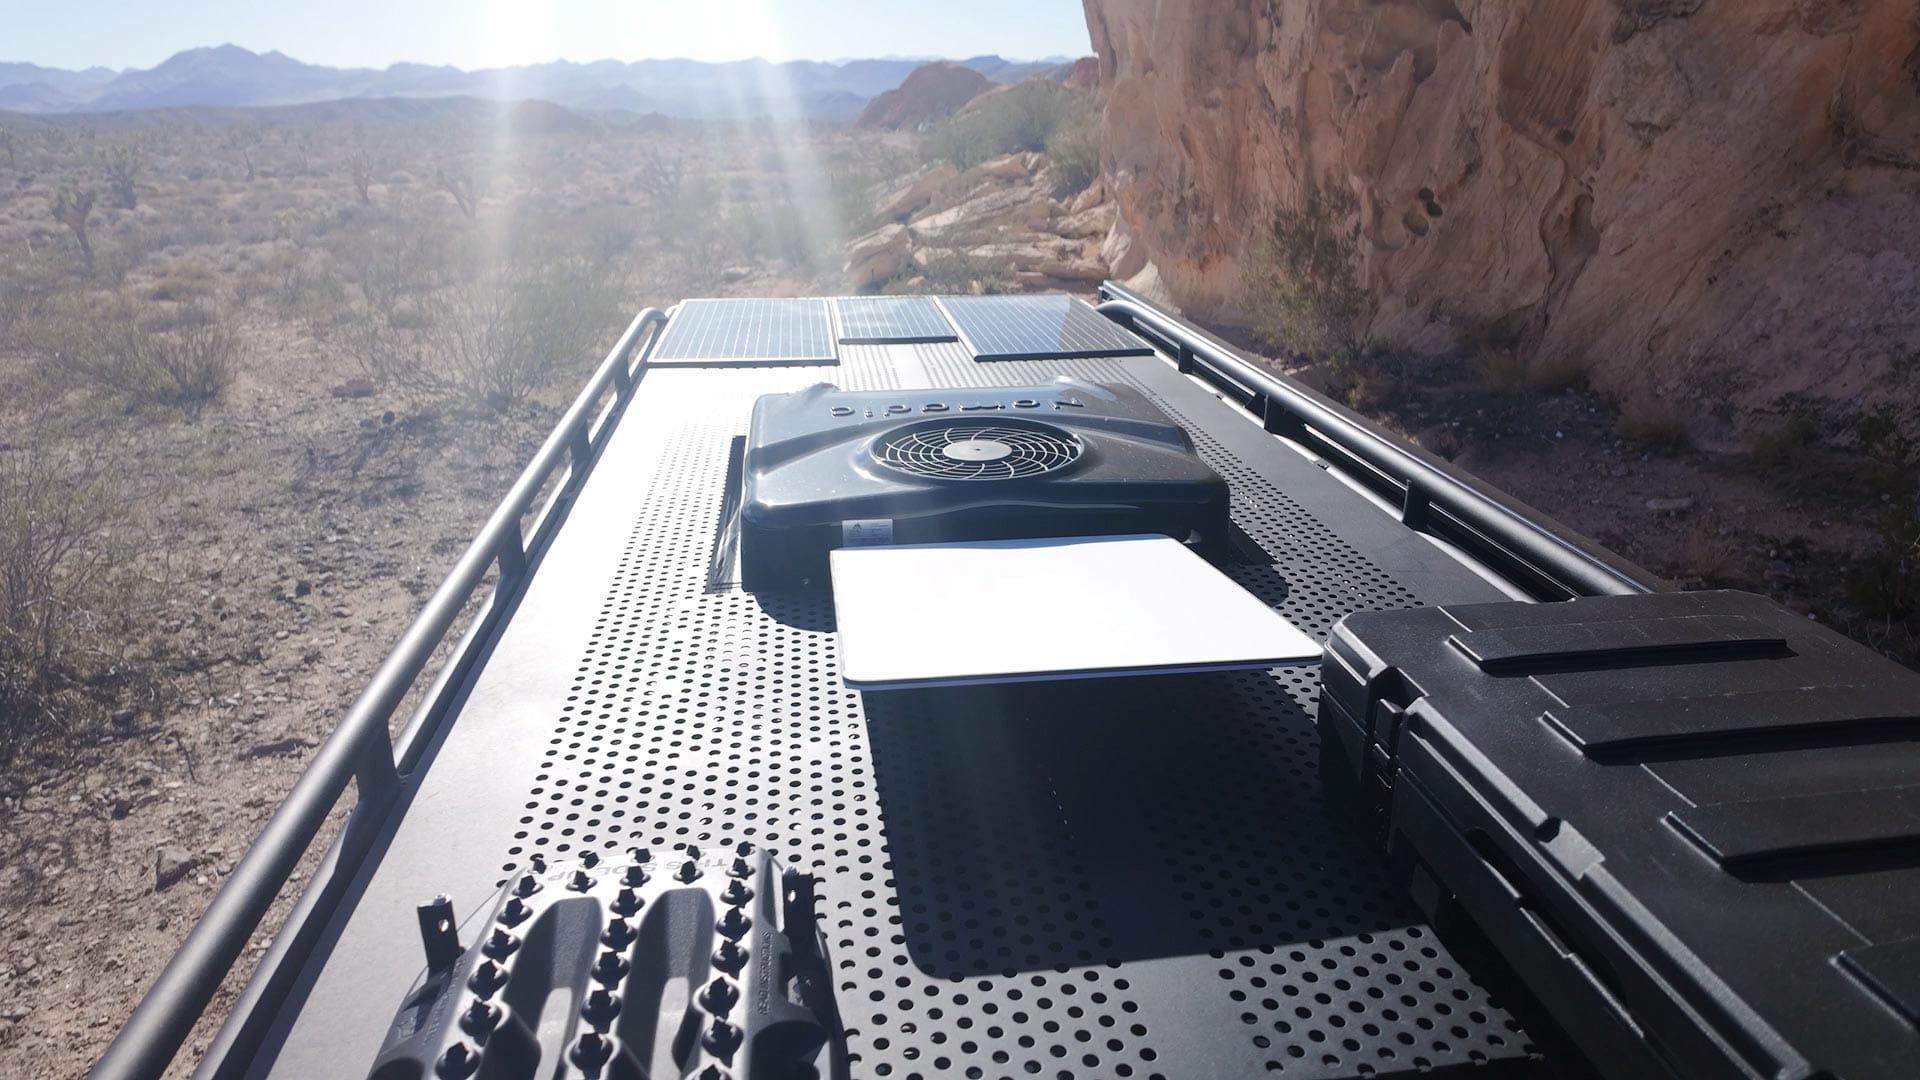
Running down the entire rooftop is a Safari Rack made by Paragon Offroad. This provides mounting points for exterior LED lights, three Obsidian solar panels, Maxtrax recovery boards, a Starlink Performance panel (for satellite internet just about anywhere), plus a Roam 83L storage case for extra things like recovery gear, shoes, etc. There's also a Maxxair Fan (essential in any van build), plus a Nomadic Cooling X3 air conditioning unit which can run off the house batteries when the engine is turned off.
Van interior buildout
I ordered the Sprinter from Mercedes with nothing on the inside. Just a blank, metal box. Benchmark overhauled the interior with a clean, minimal aesthetic, plus a number of clever features based on my wish list and design feedback.
Bed
The most important thing to consider when designing a van interior is the bed. It takes up a lot of space, and it is also where you spend a fair amount of time each day. Every van I rented over the past few years, with one exception, had a sideways bed in the back. In that layout you sleep sideways, with exterior flares that extend the body of the van and provide a few more inches of head and foot room. It is the most common approach because it uses less interior depth and leaves more space for everything else.
Since I am six foot four, these sideways beds never worked for me. They always felt cramped and uncomfortable. For my van, I asked Benchmark to design a bed that ran from back to front instead. They designed and ordered a custom 4.5" inch thick memory foam mattress that fills every available inch, with cutaways around the rear D pillars. The resulting dimensions are 67.5" wide and 80" long, which is essentially the same as a household king size mattress.
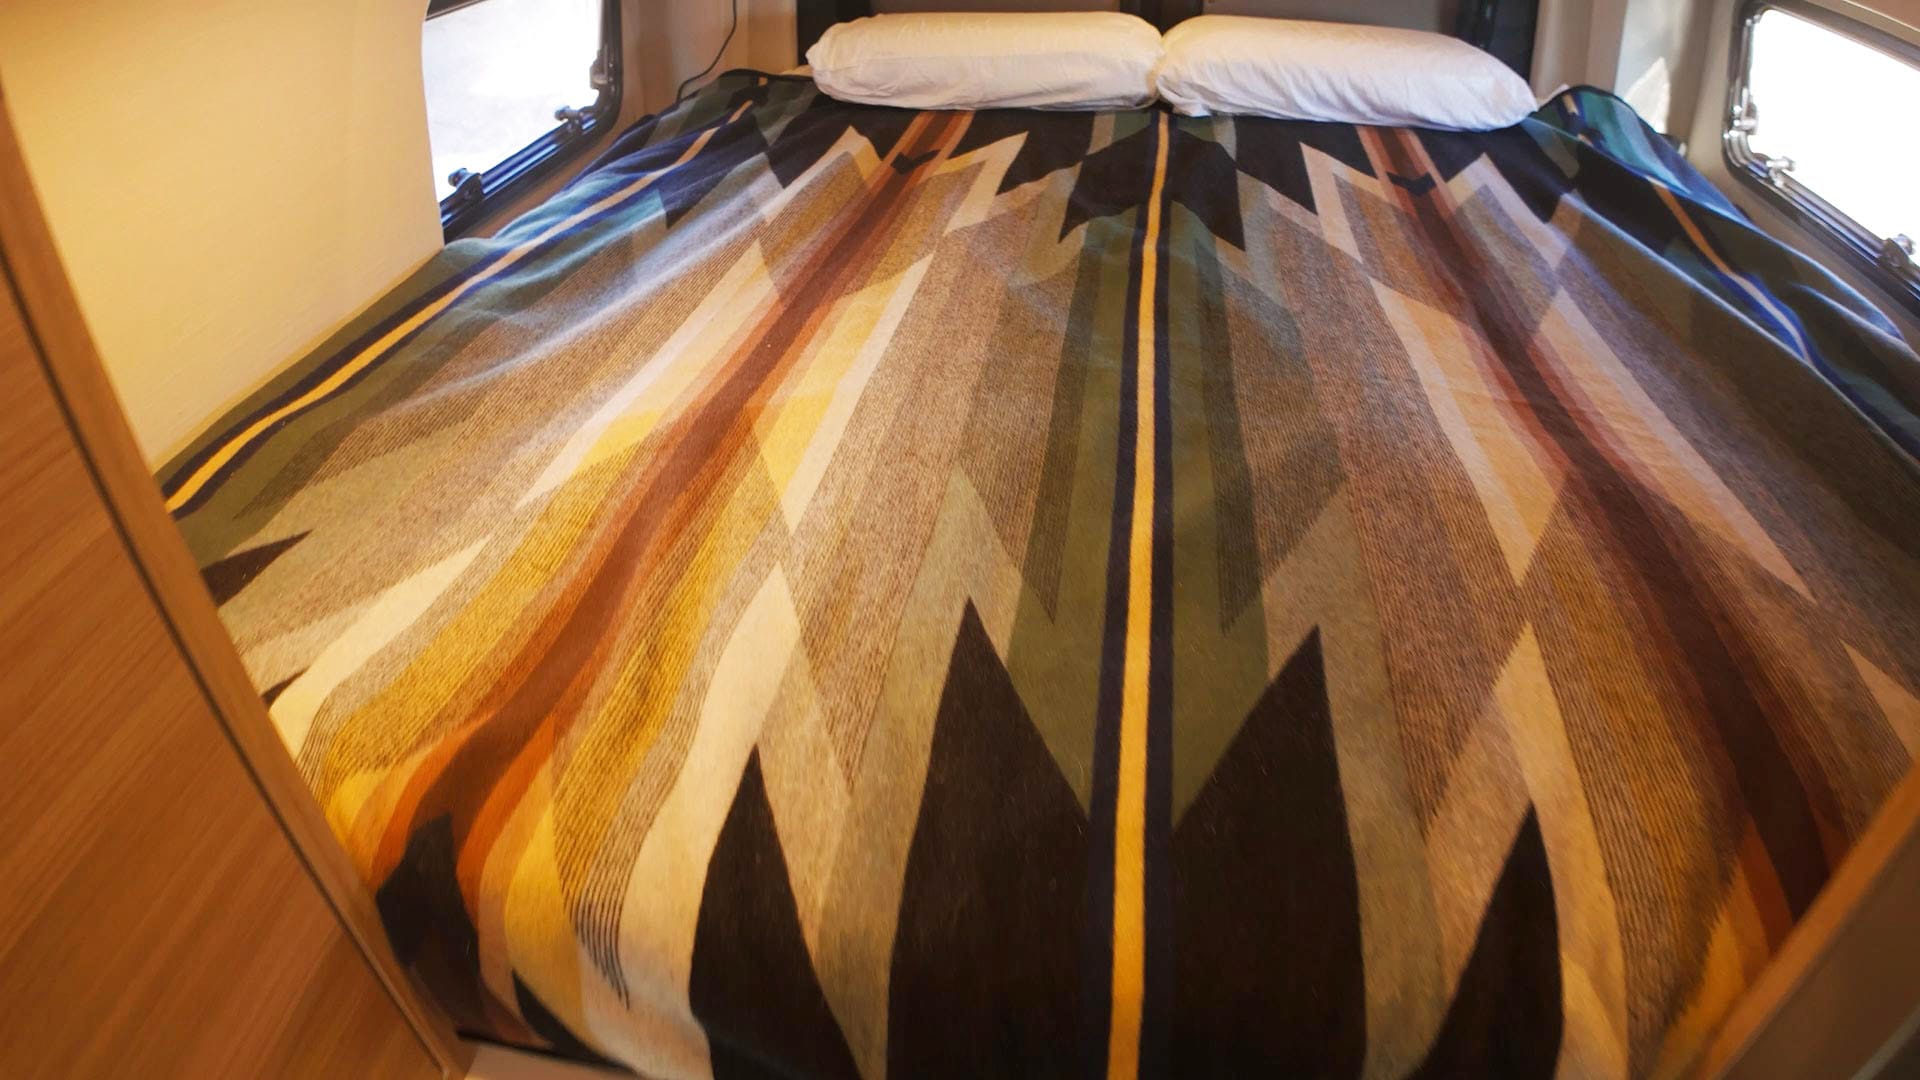
An 80" bed created a couple of challenges, though. The garage beneath it would have been larger than I needed, when I preferred more storage space up front. And during the day an 80" bed does not offer much practical benefit, so the interior would feel more cramped than necessary. Benchmark solved this with a smart design. The mattress has a hinge about one third of the way up from the foot, and the bed platform has a matching hinge. This allows the lower section of the bed to fold back, reclaiming 20" of space and making room for extra cabinets and countertop surfaces underneath.
With the foot folded in, the bed has the same depth during the day as a typical side to side layout, but at night it opens into a full king length.
Without question, the back-to-front bed was absolutely the right call for me. I've never slept so comfortably in van.
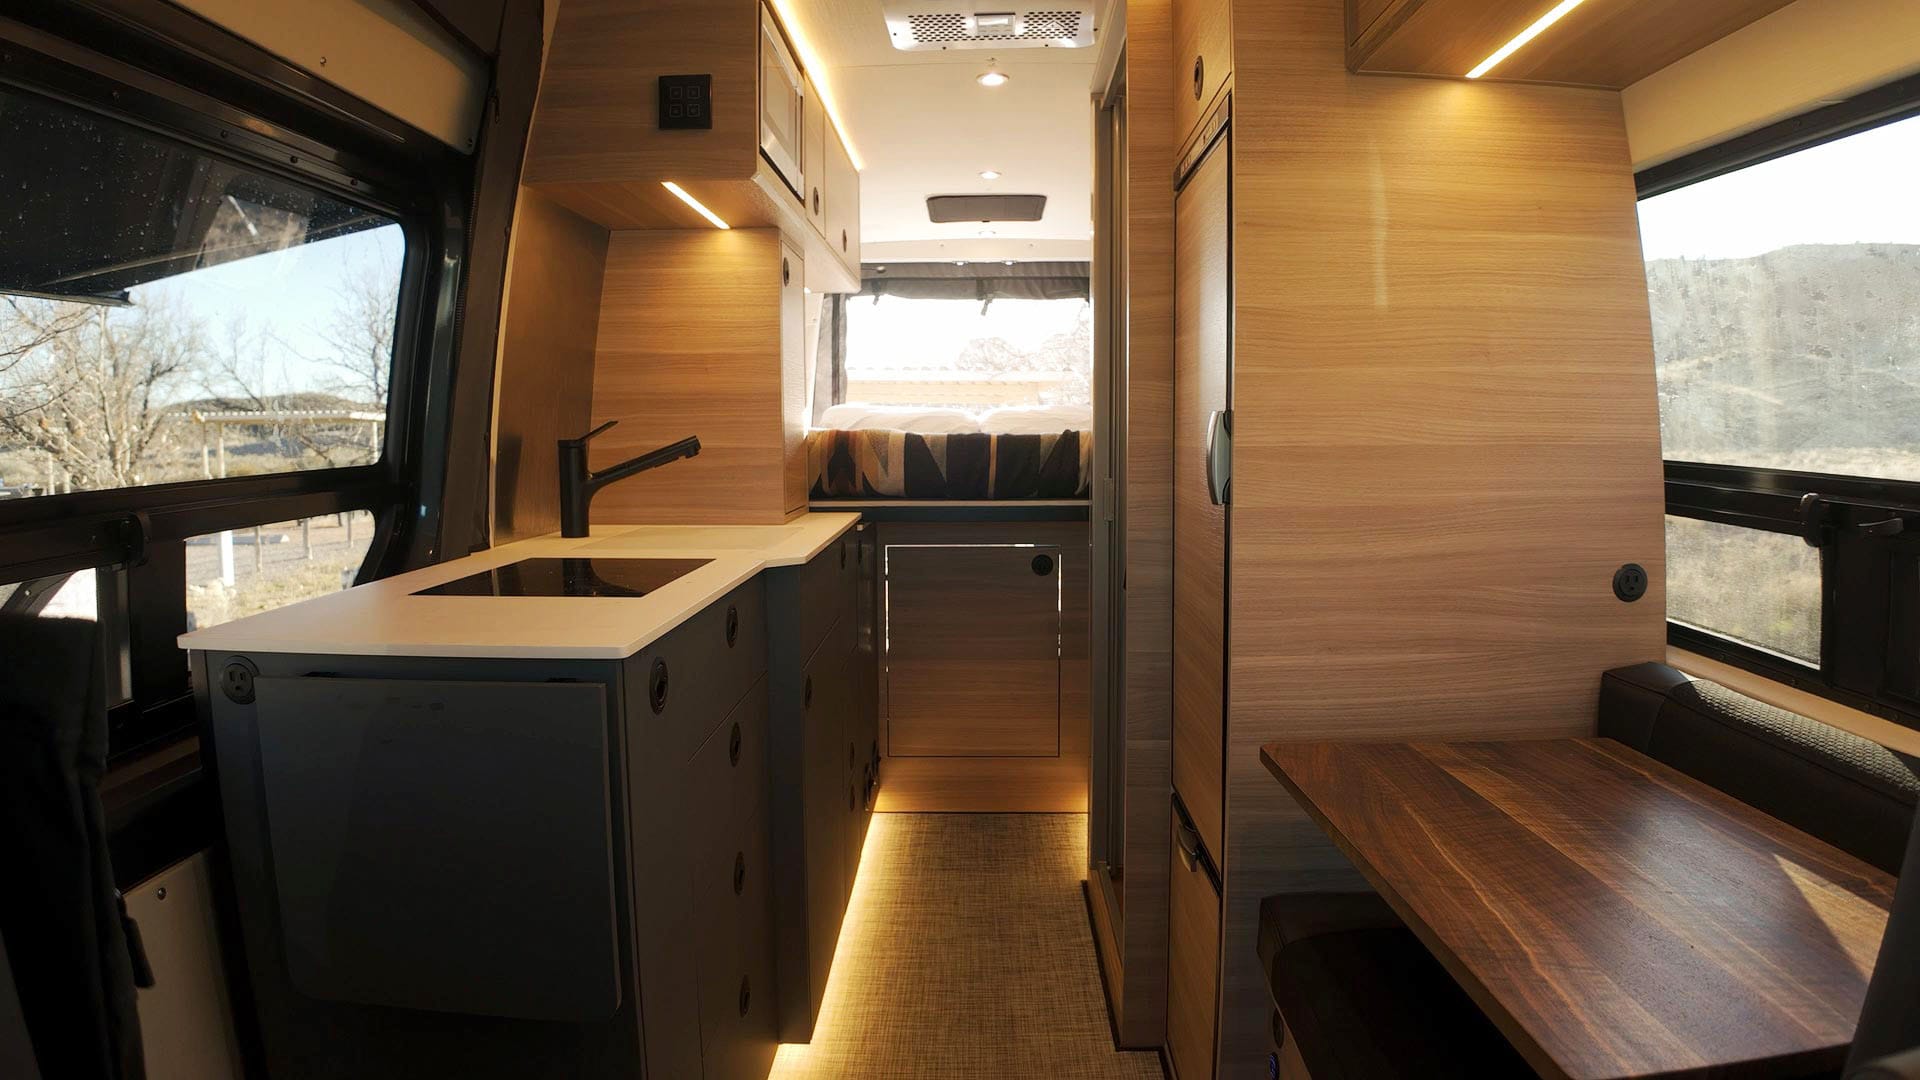
Kitchen
In the kitchen area there's a custom built cabinet for storing a drip coffee maker and grinder, with an interior electrical outlet and sliding drawer. This makes it super easy to make coffee in the morning, then close and put it away thereafter.

The kitchen countertop has a black sink and hardware, with a Guzzle H20 filter for extra filtration. To the left is a single-burner induction cooktop built into the counter. I went back and forth on whether this should be built-in or a standalone plug-in model, but I'm glad I went with built-in.
Above the sink is a custom built wood cabinet housing a low-wattage GE microwave oven. I don't see myself using this that often, but it's nice to have when reheating leftovers. I purposely placed the microwave on this side of the van so it wouldn't be in line of sight when entering the van through the side door.

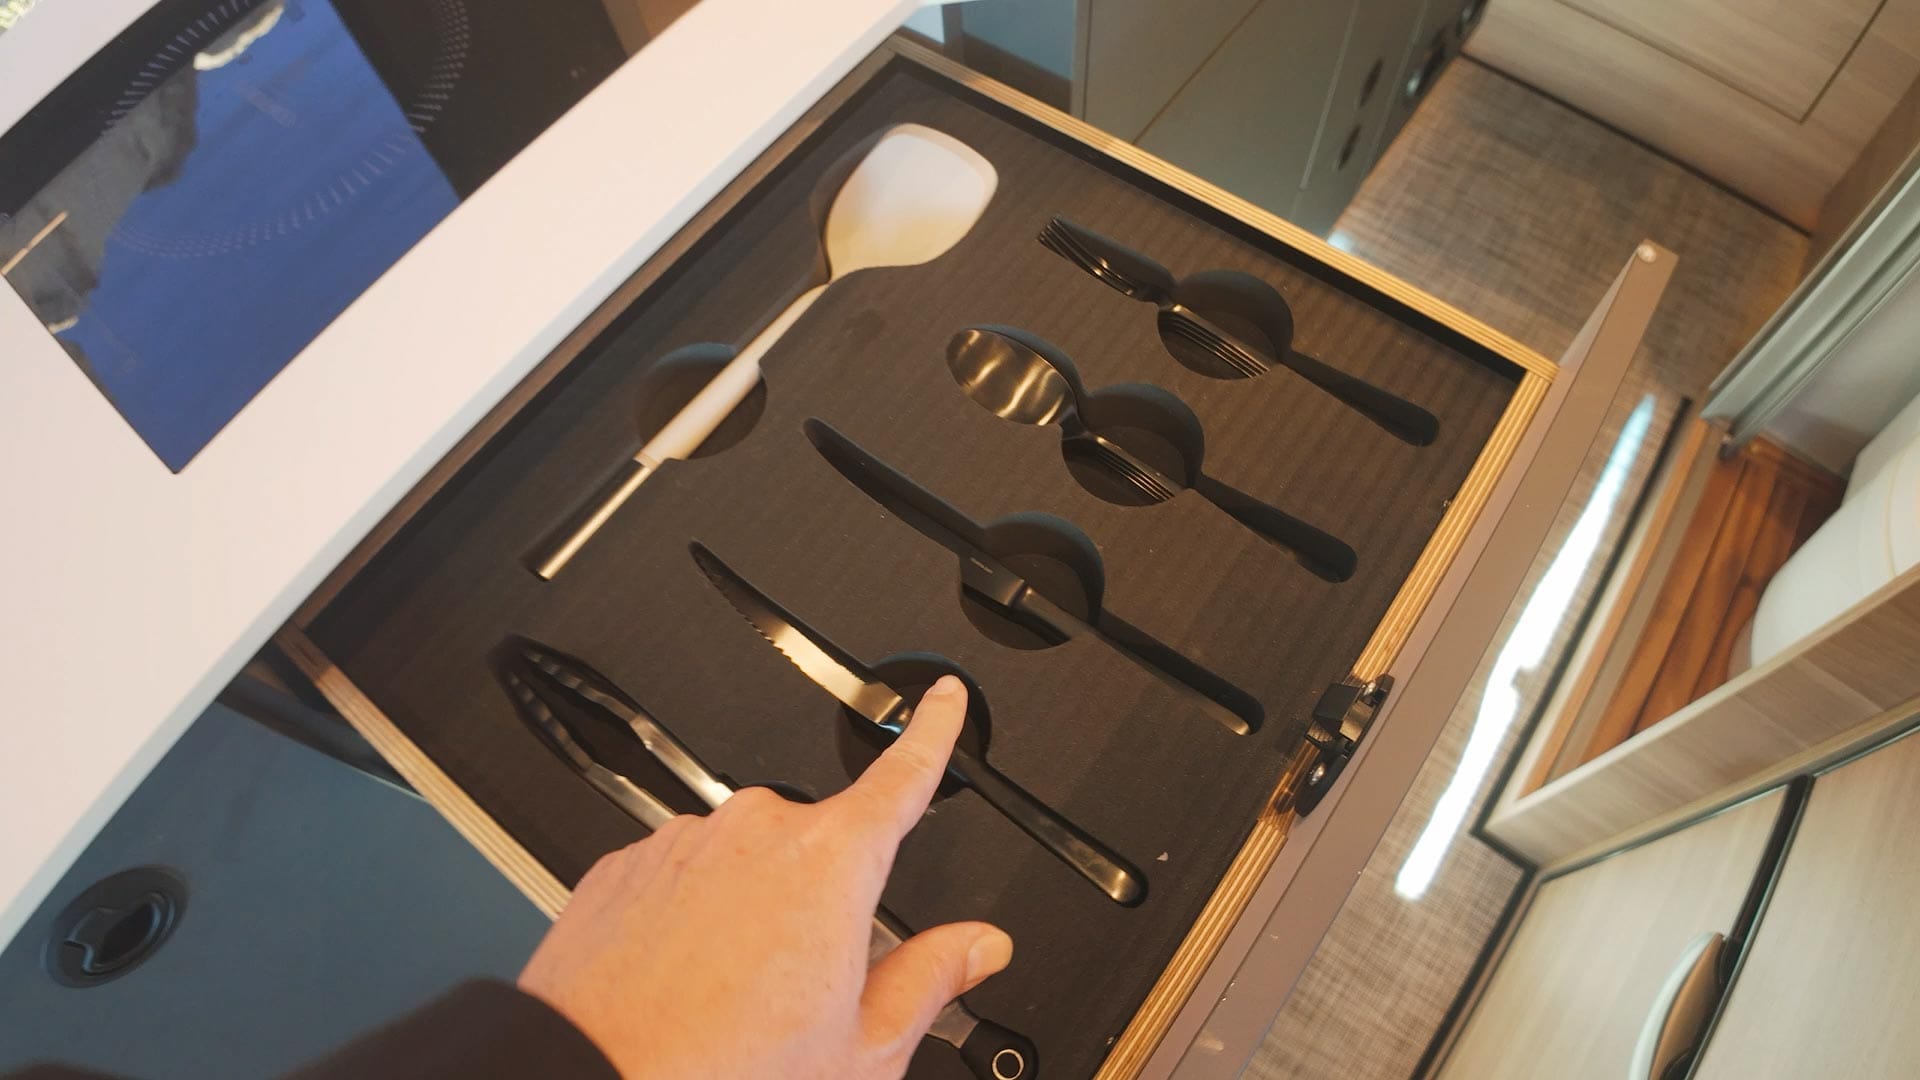
Inside the lower cabinets, Benchmark designed drawers with foam inserts for cutlery, plates, bowls, mugs and cups. The foam negates rattling when driving, while also providing a clear place for everything to be stored when not in use.
Finally, the fridge is a Vitifrigio Slim 150. This is thinner and taller than a standard square fridge, and with more cubic inches of interior space. Benchmark moved the door handle to the right and added a wood veneer to the front to match the cabinets. Also has a roomy freezer. Plenty of space for everything.
Shower and toilet
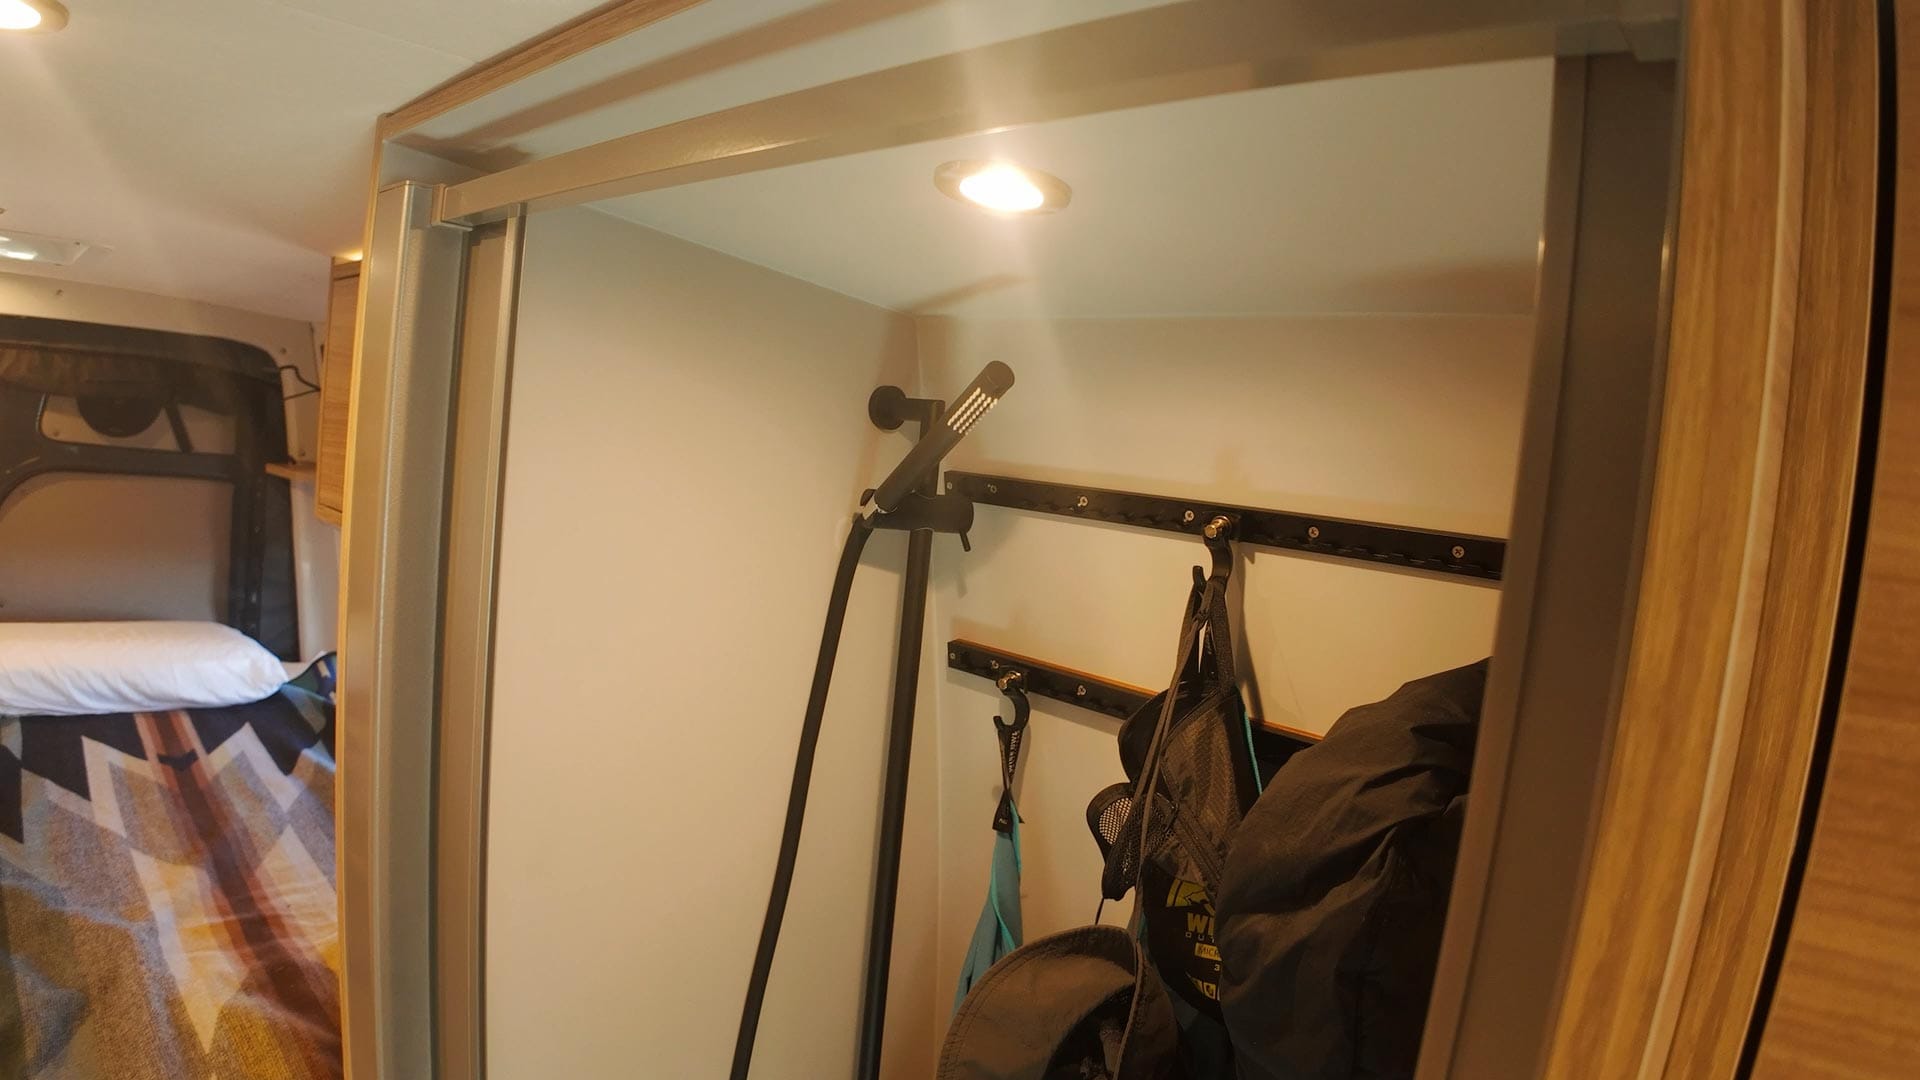
Across from the kitchen is a shower and toilet. The shower doubles as a wet closet with two L-tracks for jackets, hats or other items when not in use. The shower is compact and taps into the general 35 gallon water tank, so it's more of a "navy shower" for quick use. There's another shower in the back of the van which I'll come back to in a minute.
The toilet is a Laveo dry flush toilet. I went back and forth on toilet models (there are many for RVs and vans), but decided on this because it didn't require plumbing or a black water tank. It can also be easily moved out of the shower when not in use. It's basically an adult-sized Diaper Genie which wraps and synches waste in a bag which is then thrown away. This won't be actively used (can usually find bathrooms elsewhere), but it's there for moments when there's no other option.
Work and living area
To the right of the shower is a comfortable custom-built bench underneath the window. Mounted to the side is a Lagun table arm with a custom wood top measuring 18x29". The front of the bench has a 110v power outlet, a USB-C and A outlet, plus another USB-C outlet which connects to a Thunderbolt 4 hub mounted inside the bench.
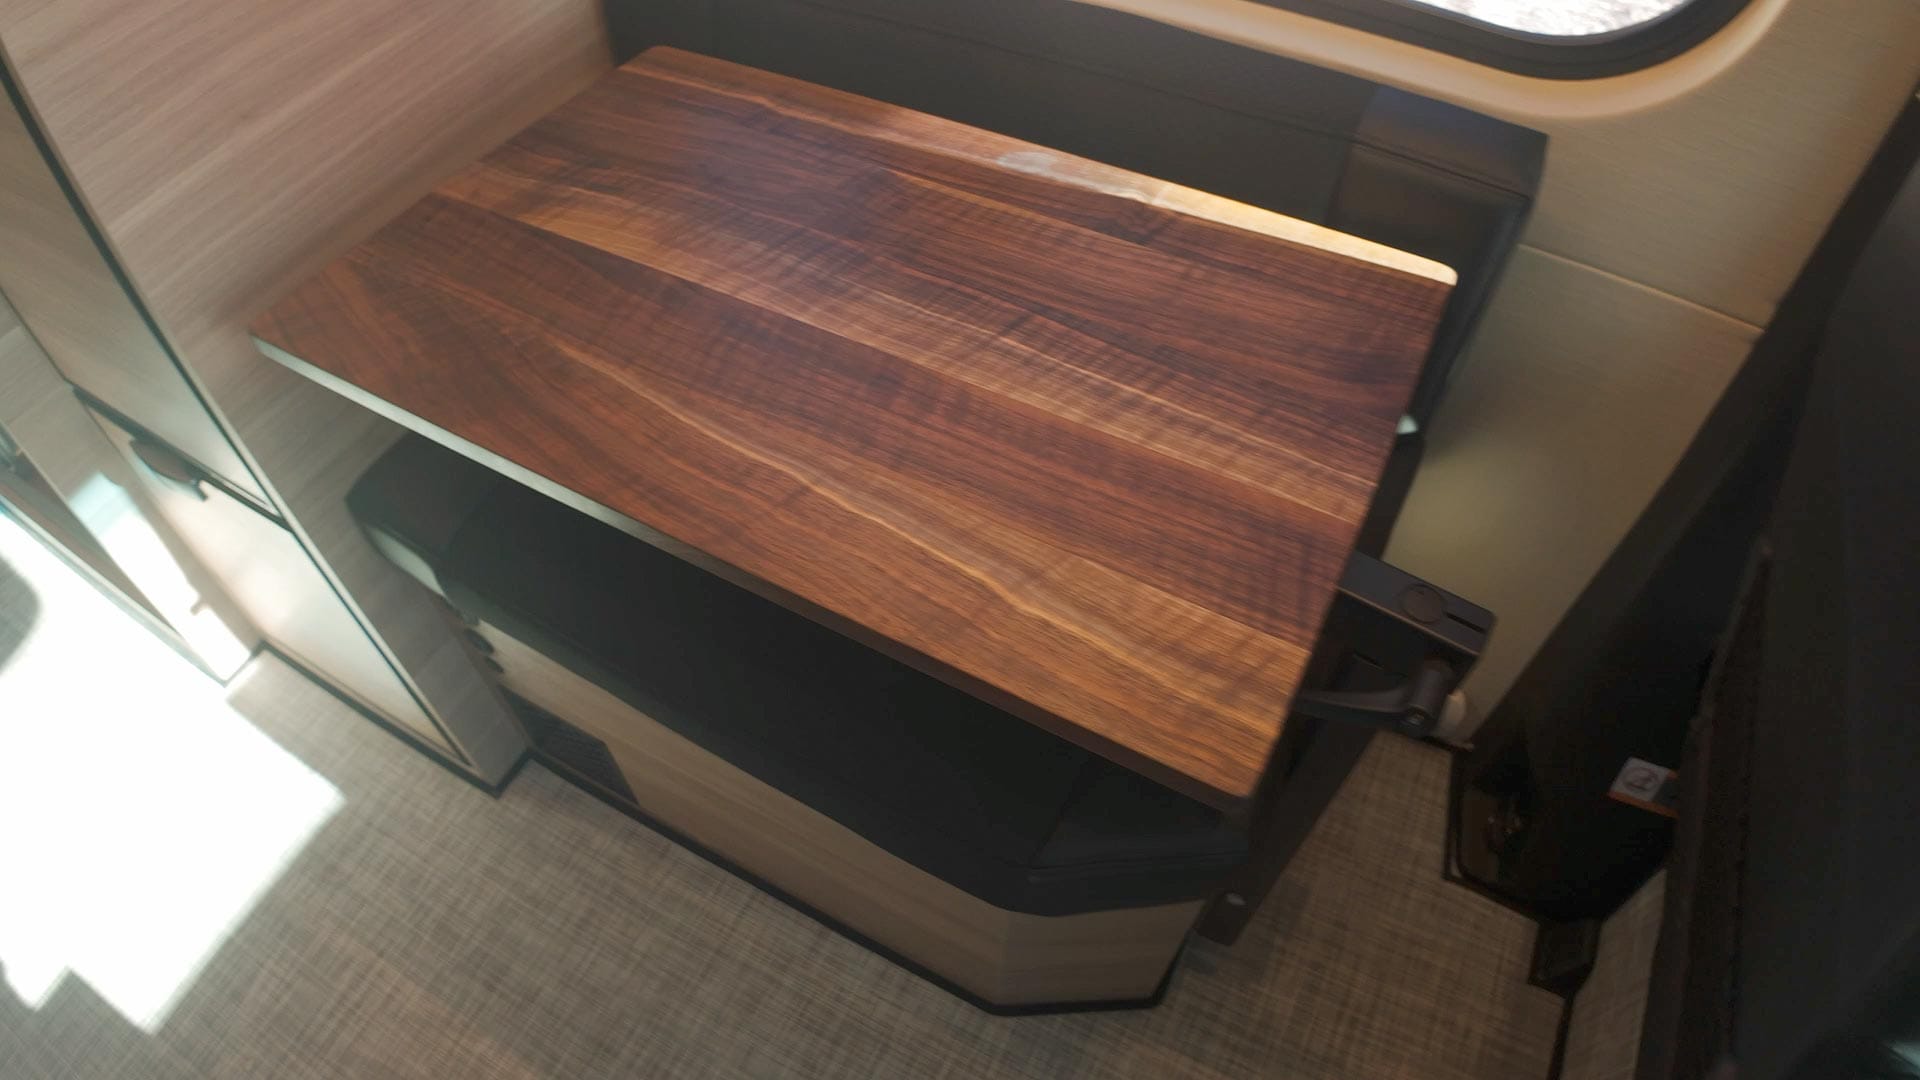
The hub is great, for it allows me to connect a single USB-C cable to my MacBook Pro for power, wired internet, plus SSD drives connected to the hub. This makes the work area on the Lagun table cleaner, with no dongles, drives or power bricks. I could also place my laptop inside the bench and run a USB-C cable from the same outlet to a monitor (plus an external keyboard/mouse) for a desktop-centric setup. For now though, I'm good with the laptop.
Both the driver and passenger chairs from Mercedes were replaced with scheel-mann Vario F XXL seats. Why buy expensive seats when the van already has them? Because scheel-mann seats are far more comfortable when driving long distances. I can drive for hours sitting in these and not feel awful afterwards.

Garage
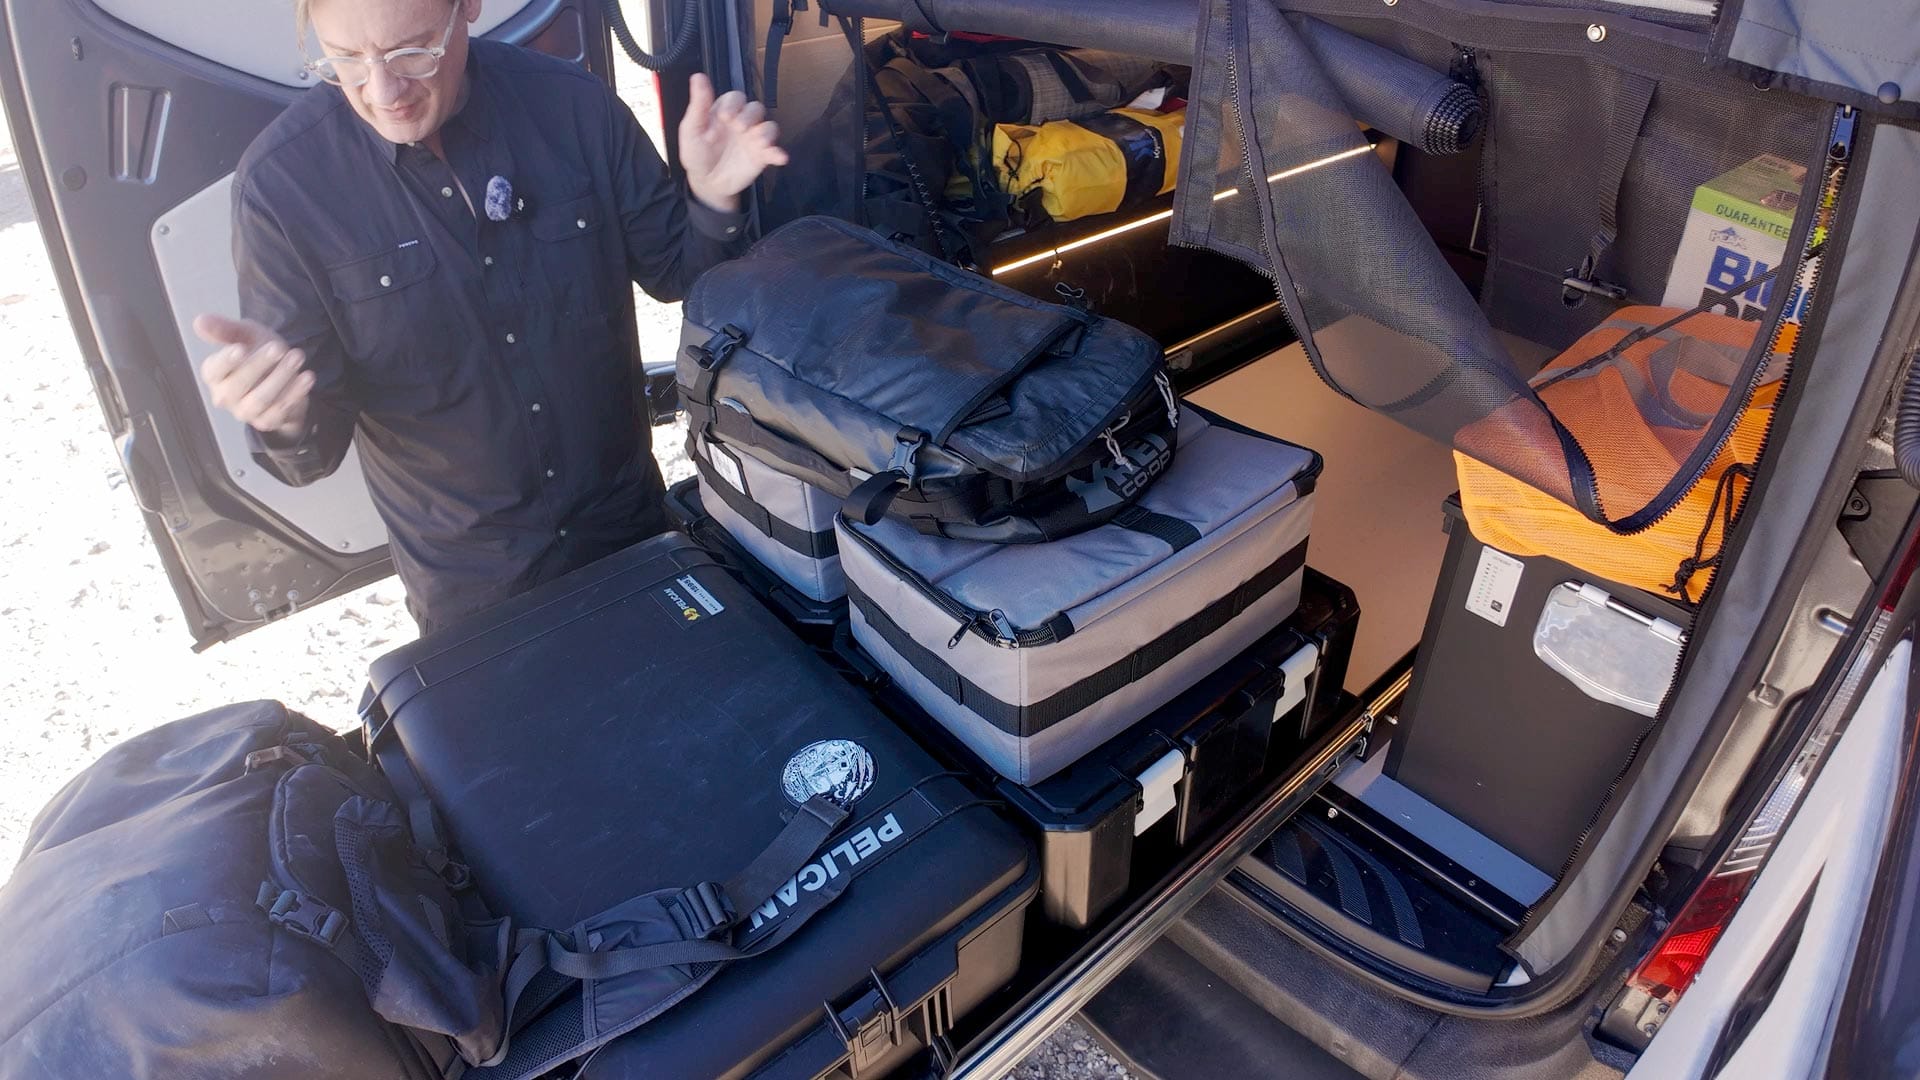
The "garage" is the utility space underneath the bed platform in the rear of the van. This is where the electrical and plumbing hardware is stored, plus extra food, photo/video gear, outdoor chairs and table, and much more. Basically, all the extra stuff you don't want inside your home, just like a regular garage.
The left cabinet contains the two Lithinoncs GTX 320 batteries. Together, they provide 640 amp hours of rechargeable power (from the solar panels above and when running the engine). This provides plenty of power for running the fridge, cooktop, Starlink panel, and other accessories while camping off-grid. The right cabinet contains the water and heating system, plus an electric water heater.
In-between the cabinets is a sliding gear tray. This is super strong, durable, and capable of carrying a lot of weight. I love this tray, for it provides easy access to storage cases that would otherwise be very difficult to access.
On the front of the right cabinet there's a fresh water gauge, temperature control and hand-held shower spray. With this, plus a provided magnetic curtain that mounts between the open rear doors, I can take an outdoor shower. Also handy for cleaning muddy shoes and gear.
More van accessories
Interested in seeing what else I added to the van? Check out my recommended van accessories to help improve safety and security, organize gear, and more.