Sharpening prints: how to find the perfect settings
Taking the confusion and guesswork out of applying sharpening to photo prints in Adobe Photoshop
Every time I prepare a photography print, I question how much sharpening to apply. I know some sharpening is necessary (more typically than sharpening for screen) but determining the ideal amount is tricky because it depends on print size, pixel density (PPI), and viewing distance. When applied correctly, the image should appear neither overly sharp nor too soft, but just right. To help take some of the guesswork out of this confusing process, I built a couple of handy calculators. Here's how they work.
Optimal print viewing distance
First, determine the optimal viewing distance for your print. As a general rule, smaller prints are typically viewed up close, while larger prints are meant to be seen from further away. In practice, the ideal viewing distance is often considered to be roughly equal to a print’s diagonal. We can use the calculator below to find the optimal distance. Here's how to use it.
- Click the "Run Pen" button in the box below
- Select a print size (whichever has the closest long edge)
- Click the "Calculate" button
Optimal Print Viewing Distance Calculator
The calculator will then show the optimal viewing distance for your print.
Optimal print sharpening radius
Now that we've determined optimal viewing distance, we may use that measurement to calculate the optimal sharpening radius we should use when sharpening the print.
- Click the "Run Pen" button in the box below
- Select a viewing distance that’s roughly equal to the value you calculated above
- Input your print’s resolution (300 PPI is most common)
- Select a radius factor
- Click the “Calculate” button.
Optimal Print Sharpening Radius Calculator
The calculator will display the optimal sharpening radius when applying Unsharp Mask in Photoshop. If you want sharpening to be thinner and more subtle, lower radius factor and re-calculate. If you want sharpening to be thicker and wider, raise radius factor and re-calculate. If unsure, just leave this set to Standard (1.0) and you'll be fine.
Practical example using Adobe Photoshop
Let’s say I want to make a print from a landscape image. First, I open the original image in Photoshop, duplicate it to create a new document (flatten it if needed), and then downscale it using Image > Image Size from the top menu. As shown below, I’ll resize a 3:2 image to fit on 11x14” paper with an inch-wide gutter around the outside, keeping the resolution set at 300 pixels per inch and resampling using Bicubic Sharper (best for reduction).
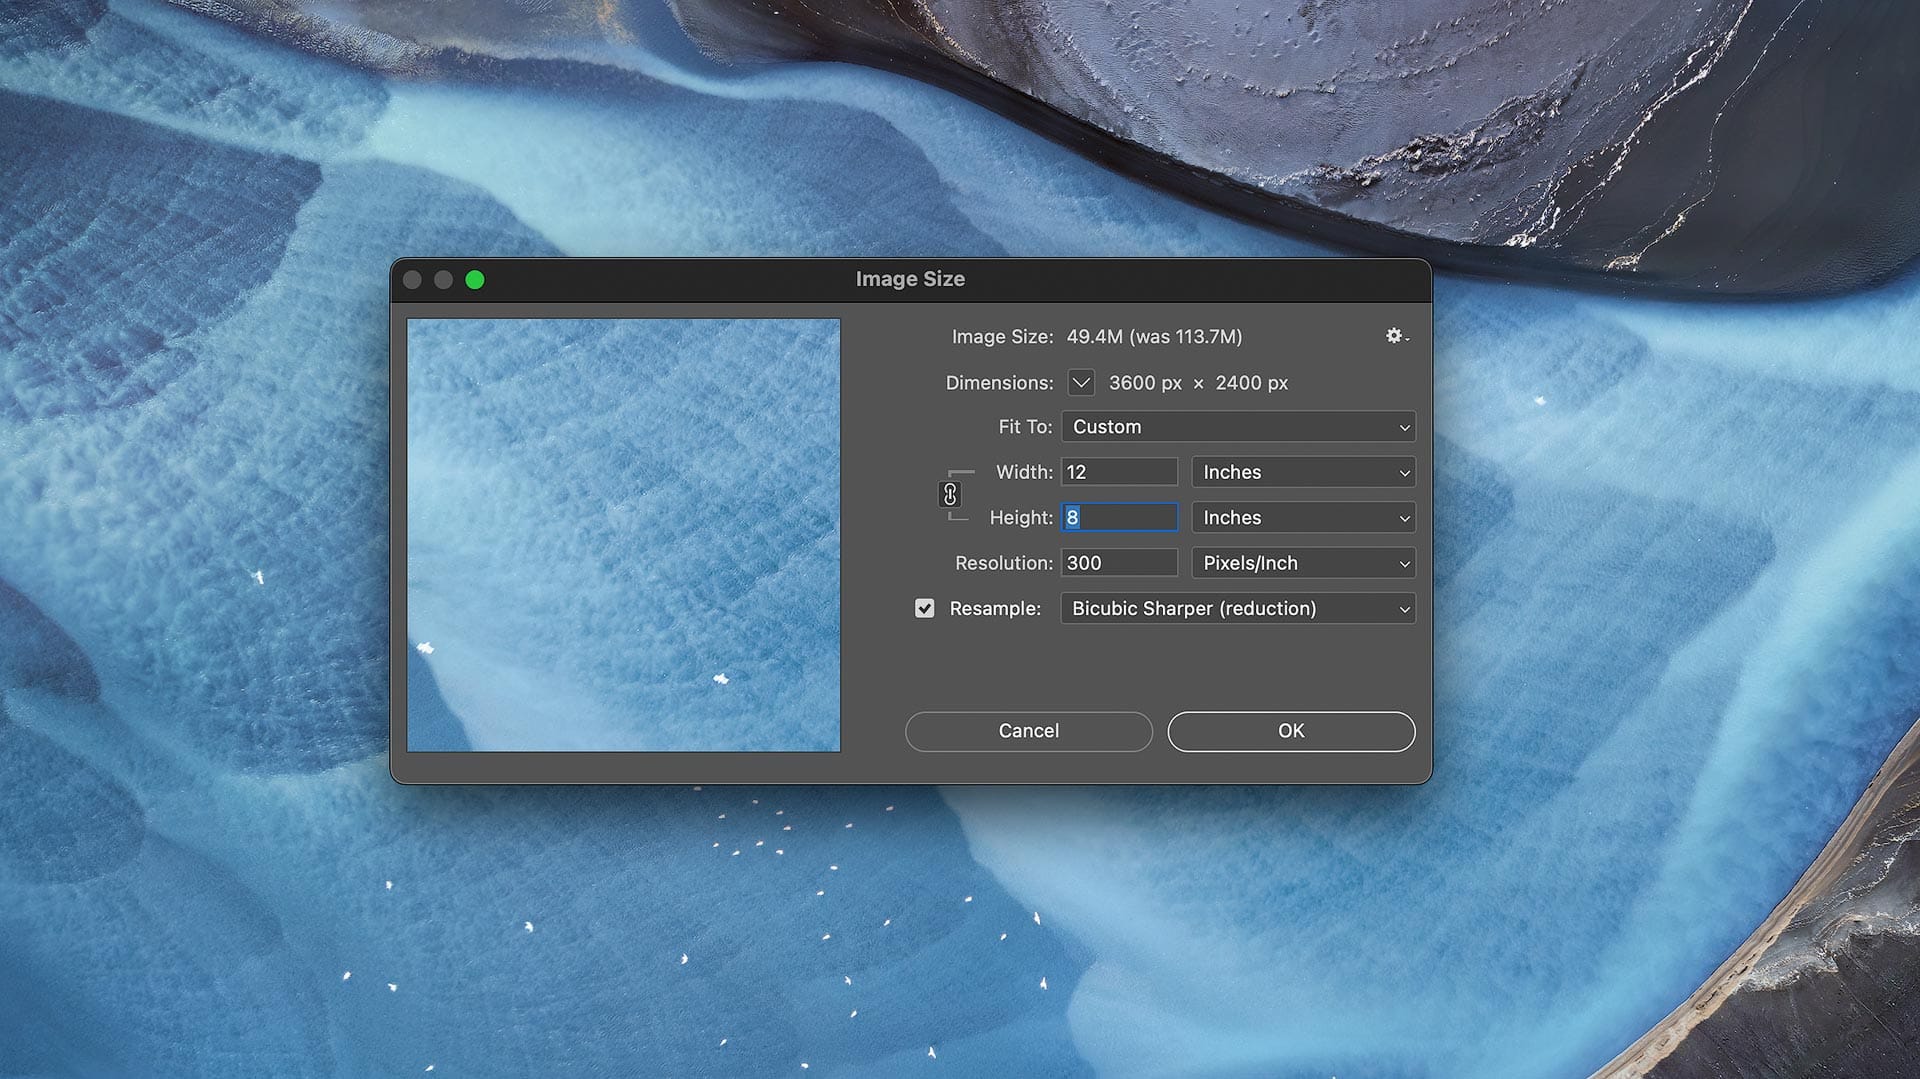
(Note: if I were making a larger print than my original, I'd export the original as a separate TIFF file, then upscale it using Gigapixel AI from Topaz Labs. Check out my review of Gigapixel AI for more, if interested).
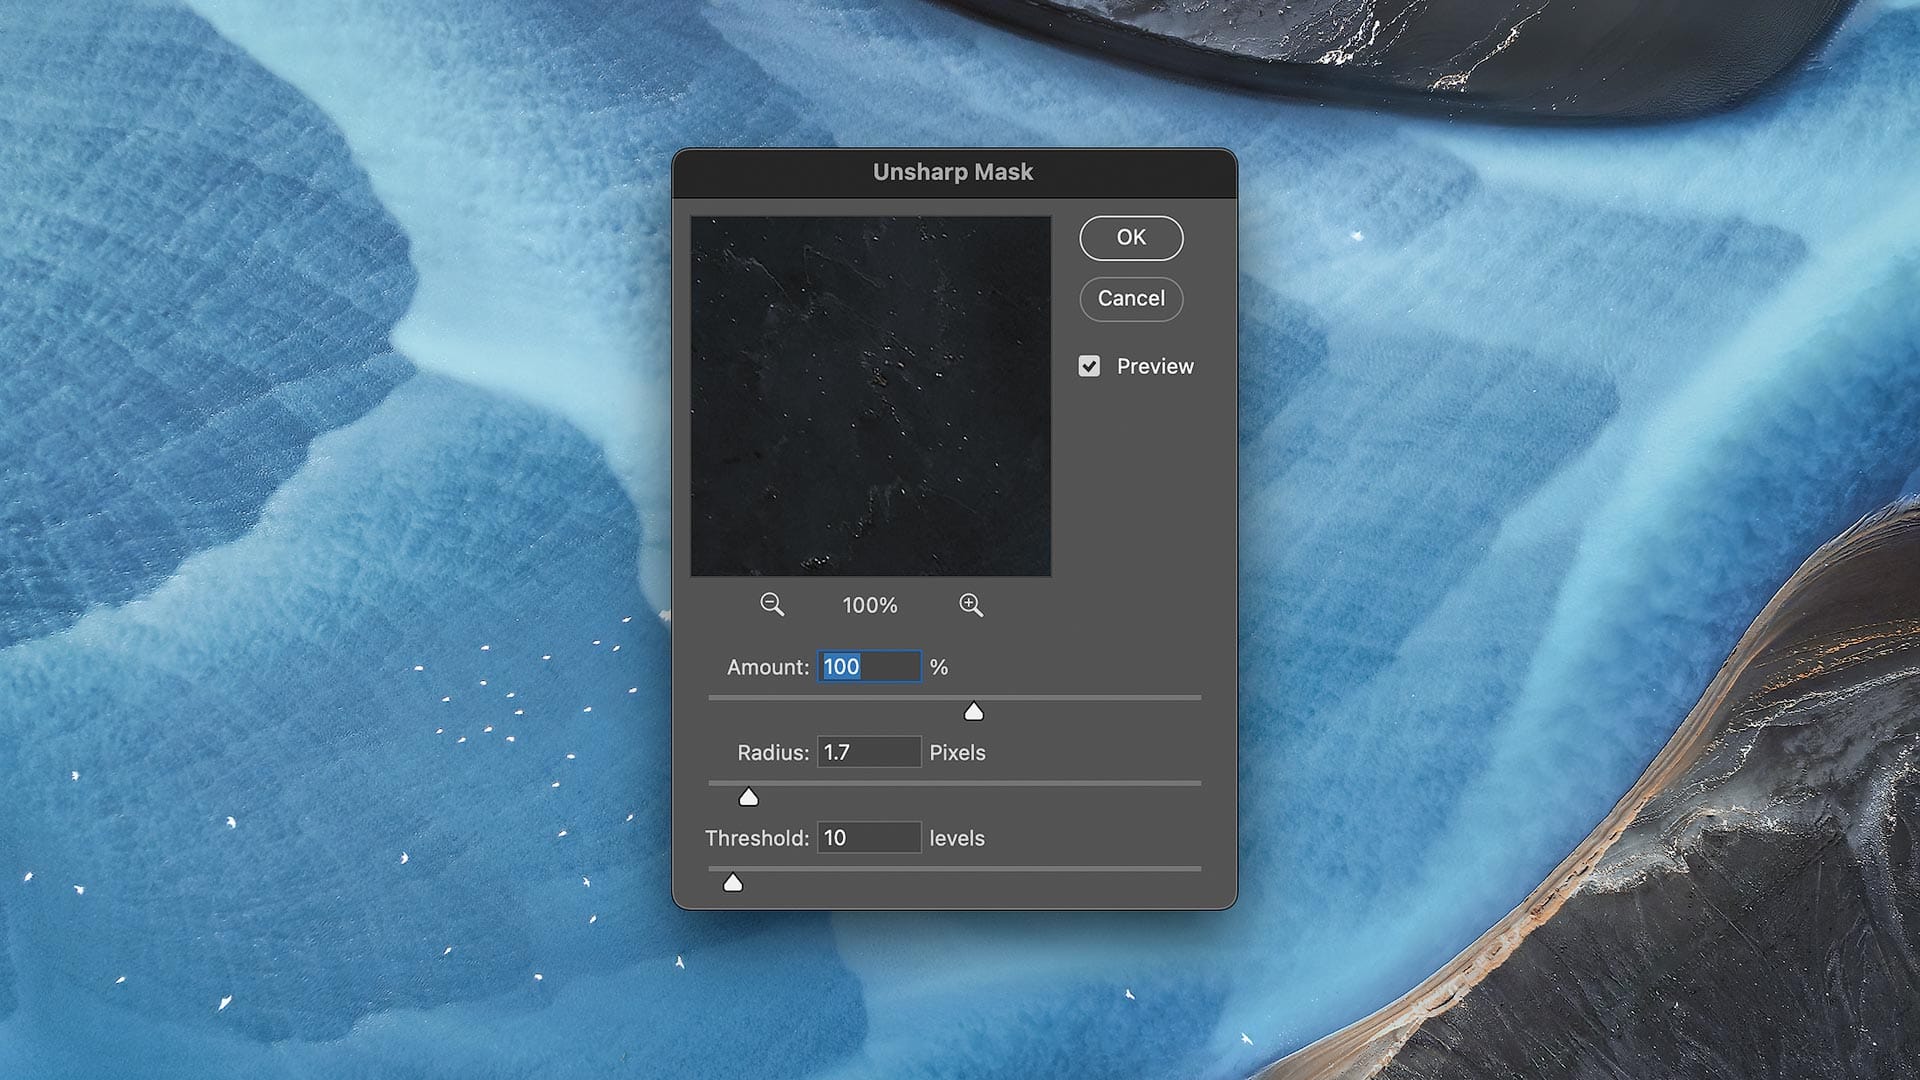
Using the calculators above, the optimal viewing distance for my 8x12" print is 2 feet. I then plug that number into the sharpening calculator, enter 300 for PPI, select "Medium" for strength, press Calculate, and the final optimal sharpening radius is estimated to be 1.7.
Next, I open Filter > Sharpen > Unsharp Mask in Photoshop, then enter 1.7 for Radius. I then adjust Threshold to determine how granular and detailed I want the sharpening to be, then suit to taste with Amount. Make sure the "Preview" button is checked to see the changes. Click "OK" when finished.
Remember to only apply sharpening after an image has been resized for printing! The whole point of this process is applying an appropriate level of sharpening for images at specific sizes and resolutions, so you shouldn't apply print sharpening to your original images.
How this works
In case you're not 100% clear on how sharpening works and what these inputs mean, here's a quick refresher.
Radius controls the distance (in pixels) around an edge where the sharpening effect is applied. It controls how broad or narrow the area being enhanced is.
Threshold specifies how different pixel values need to be from their neighbors to be considered an edge. The lower the Threshold, the finer the details. This can introduce noise if set too low, so as a general rule of thumb, set this to a value that enhances notable edges and shapes, but not every edge and shape in the image.
Amount controls how much light and dark contrast is added to the edges selected by Threshold. For prints you can typically go a little stronger than normal, which is why I set mine in the image above to 100%.
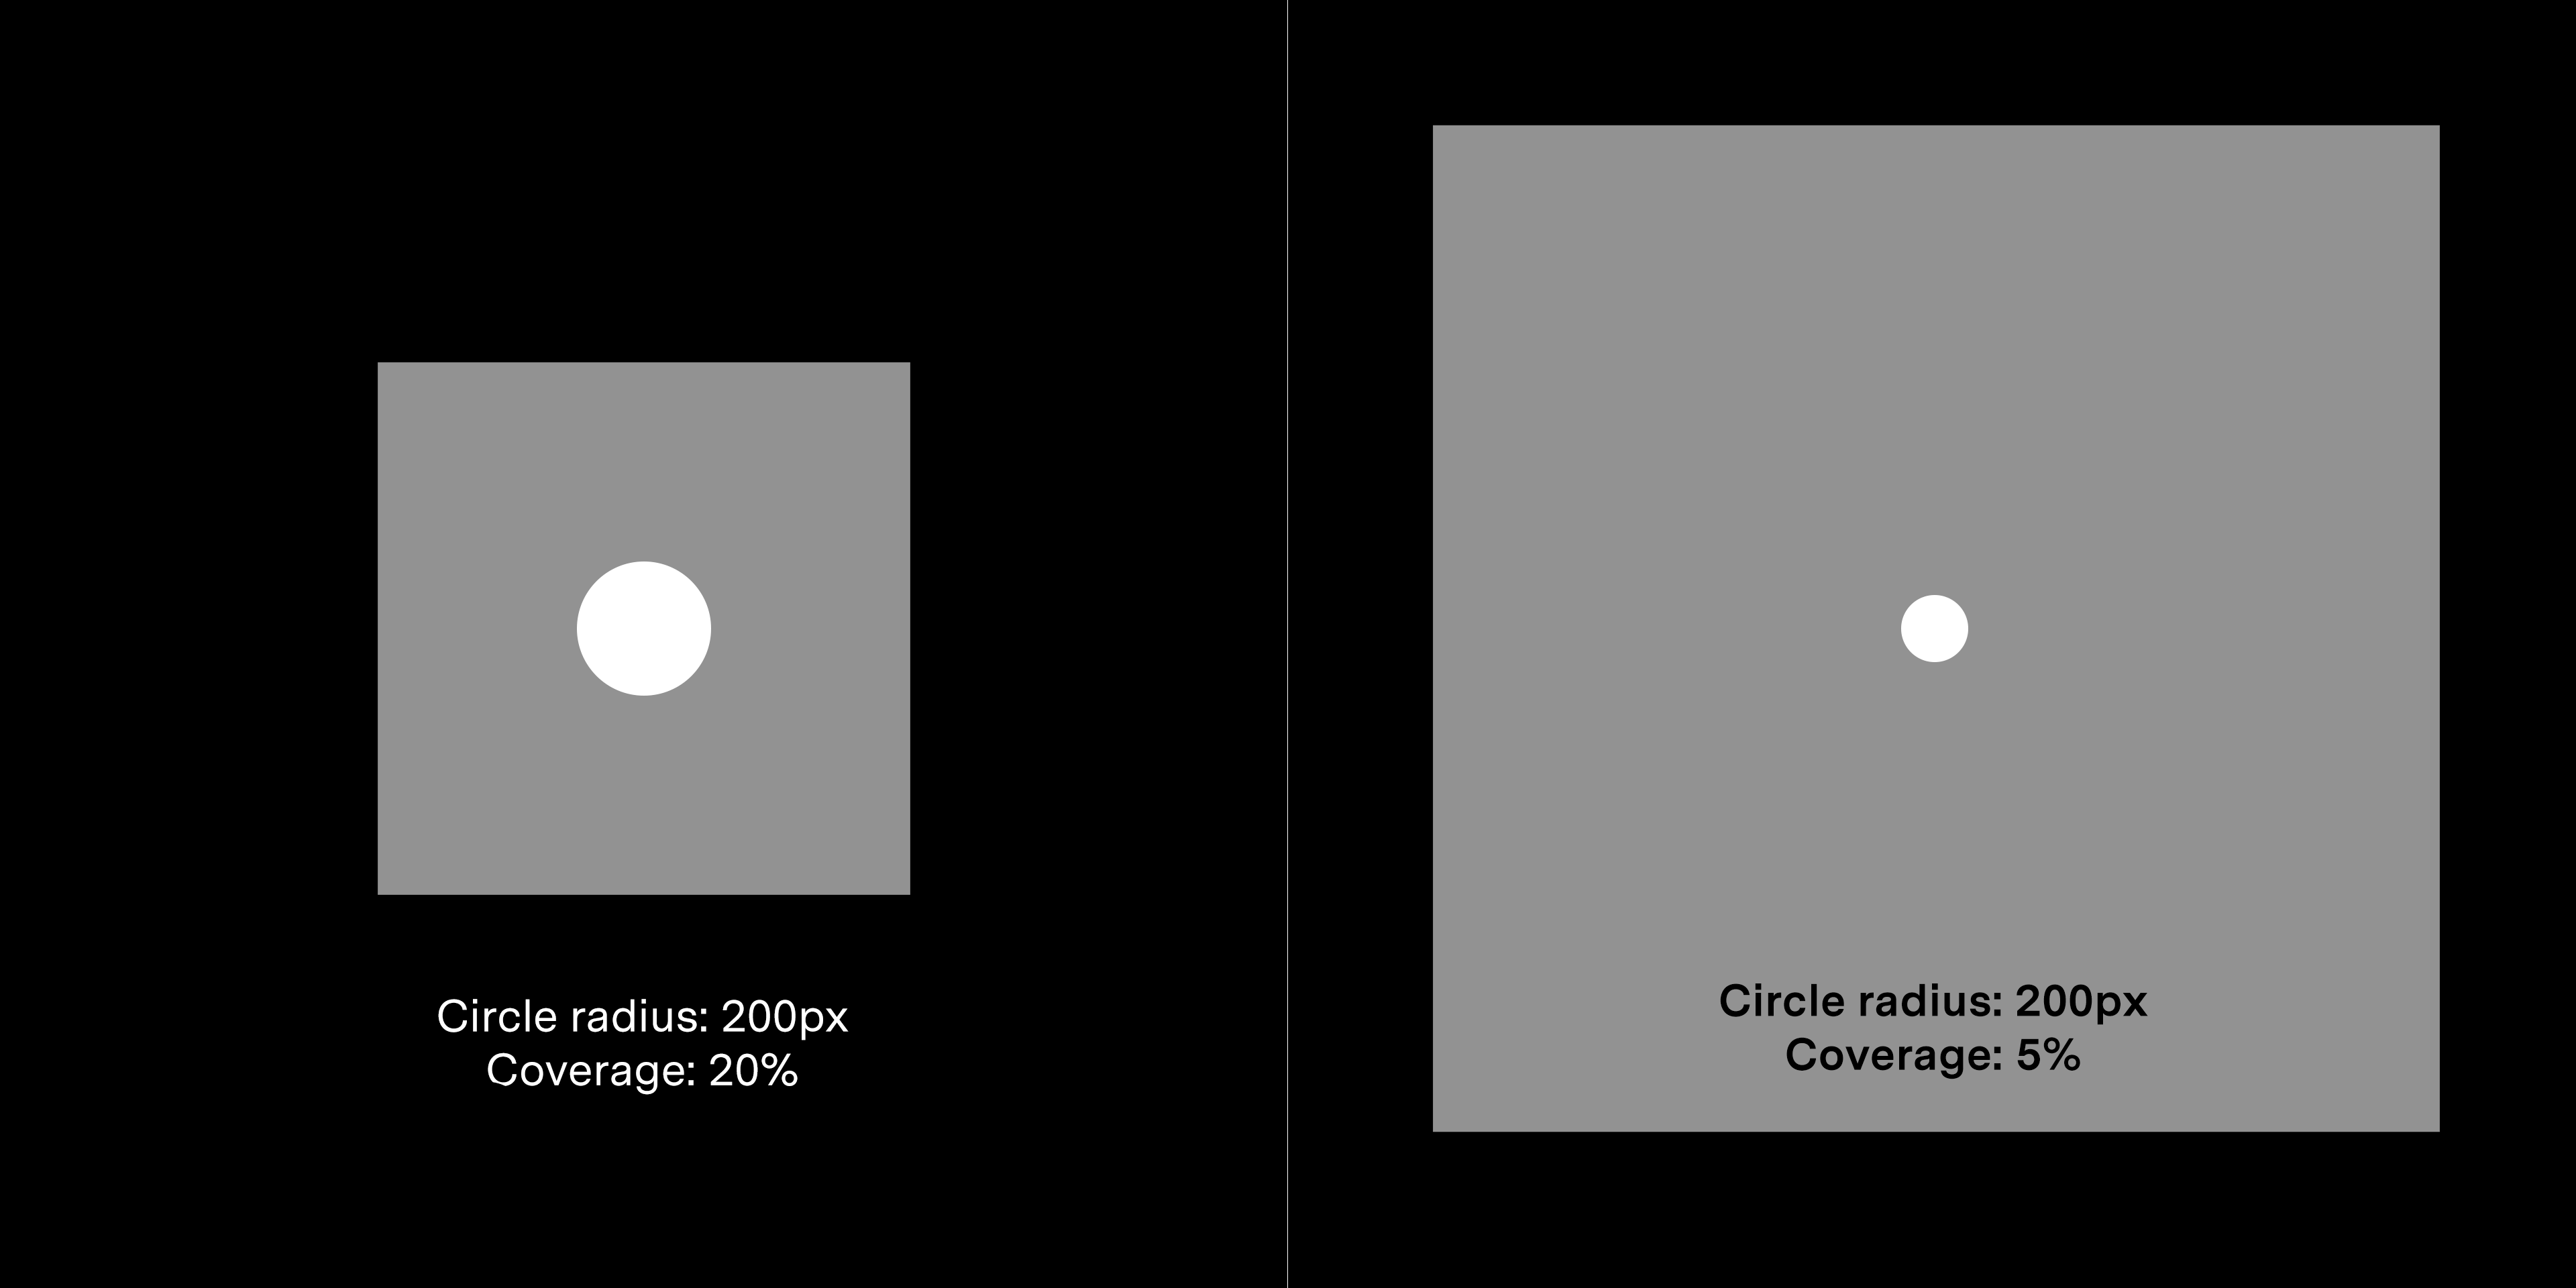
Radius is always relative to image size. For example, take a look at the image below. The 200px white circle on the left covers 20% of the small gray box. But that same 200px white circle on the right covers only 5% of the larger gray box. If these boxes were photographs, the smaller image would have broad sharpening, while the larger image would have smaller, more detailed sharpening. This is why sharpening radius must be adjusted to account for print size.
Final thoughts
These calculators aim to simplify the process of applying sharpening to printed images, though they aren’t an exact science. Sharpening, like many aspects of photography, is subjective and personal—and there’s no assurance that viewers will always see your print from its “optimal” distance. Nevertheless, these tools offer a reliable starting point. I recommend using them in conjunction with your own test prints to determine what best suits your photography style.