Dehancer for iOS: digital film emulation on the go
Getting the look of classic analogue film (Portra, Ektar, Fujifilm) with mobile photos and videos using Dehancer's new iOS app
Dehancer has released a new iOS mobile app that brings all their custom film emulations to the iPhone (version XS and newer). Dehancer for iOS is basically a slimmed-down, compact version of their desktop photography plugin that makes digital photos and videos look like film using emulations based on popular films including Kodak Portra 400, Ektar 100, Fujifilm Pro 400H, Velvia 50, Cinestill 800D, Ilford HP5, motion picture film stocks, plus a number of exotic films with distinctive looks (complete list of Dehancer profiles).
Dehancer for iOS is free to download and try out, but exporting more than ten images requires a paid subscription costing $15 month-to-month or $8.33 per month when purchasing an annual $100 subscription.
Disclaimer: Dehancer provided a one year iOS subscription and helped cover production costs associated with this article and video. Any opinions expressed are my own.
What is Dehancer?
Dehancer got their start a few years ago with a highly regarded film emulation plugin for DaVinci Resolve. Using the plugin, digital filmmakers could get the look of motion picture films (eg, Kodak Vision3) more simply and affordably without the trouble and expense of shooting actual film. Shortly thereafter, Dehancer expanded their product lineup to include a desktop still photography plugin including many of the same film emulations found in the iOS app.
Dehancer claims to have spent years scientifically developing their photo and video film profiles to create the most realistic digital emulations of analogue film available. And after seeing comparison videos like this, it's easy to believe their claims. Nothing of course will ever replace actual film, but Dehancer is most likely the next best thing on the market today.
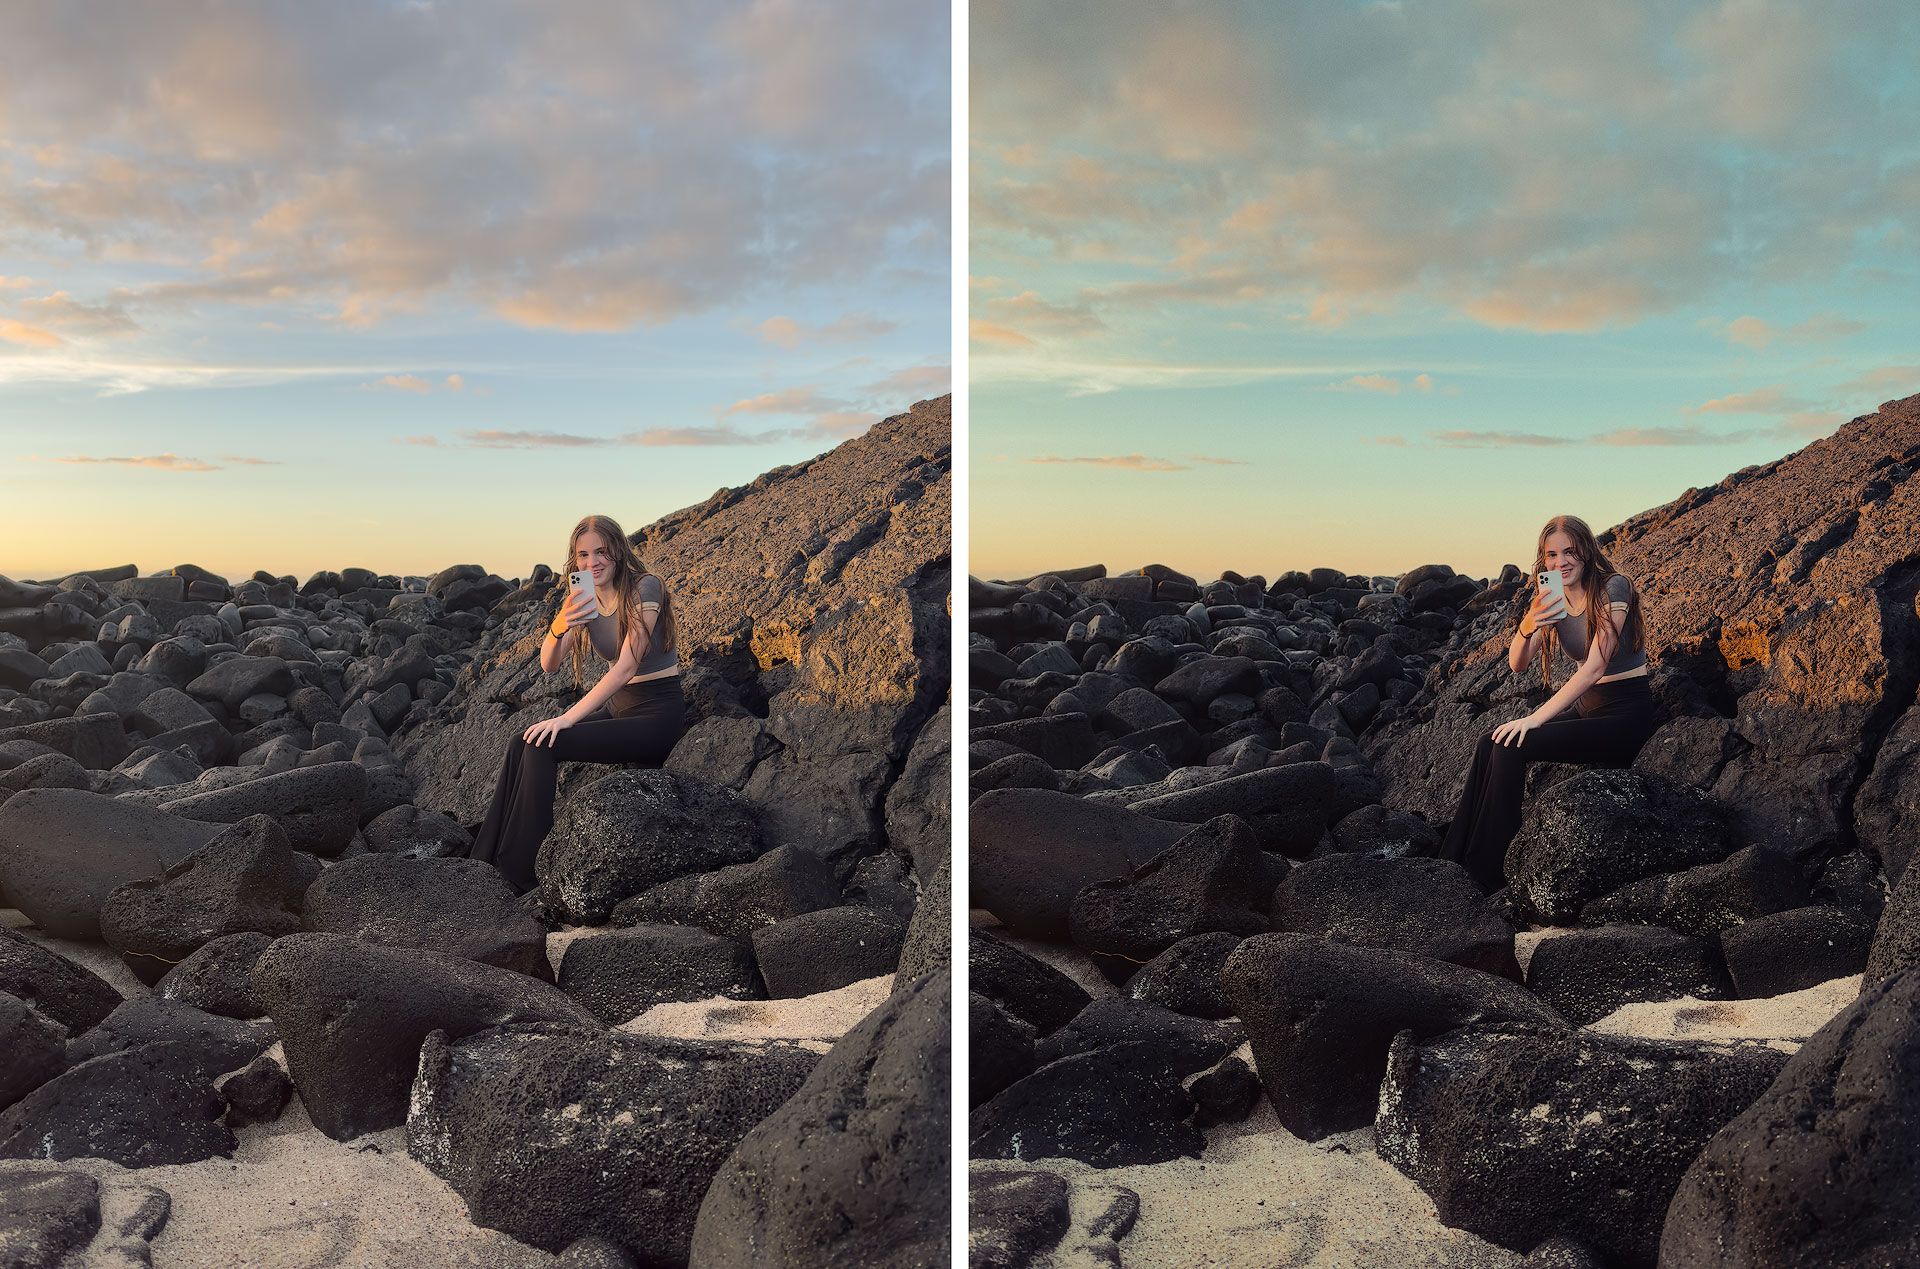
Dehancer is also a full-featured photo editing application, unlike many other film emulation presets and filters. It is a self-contained photo editing and development environment modeled on the tools and practices of darkroom processing and printing. Editing photos in Dehancer feels different, because its tools emulate the unique characteristics and behavior of film.
For example, instead of offering an HSL panel like Lightroom or Capture One, Dehancer has a "Color Head" tool that mimics the practice of adding gels to a photo enlarger to help skew and "thicken" color hue and density.
Also like a darkroom, film emulations in Dehancer may be "pushed" and "pulled" to mimic how the hues and tonality of each film change when under and overexposed in the real world.
Taking realism a step further, Dehancer can also apply the imperfections of film including grain, halation, diffusion bloom and vignette.
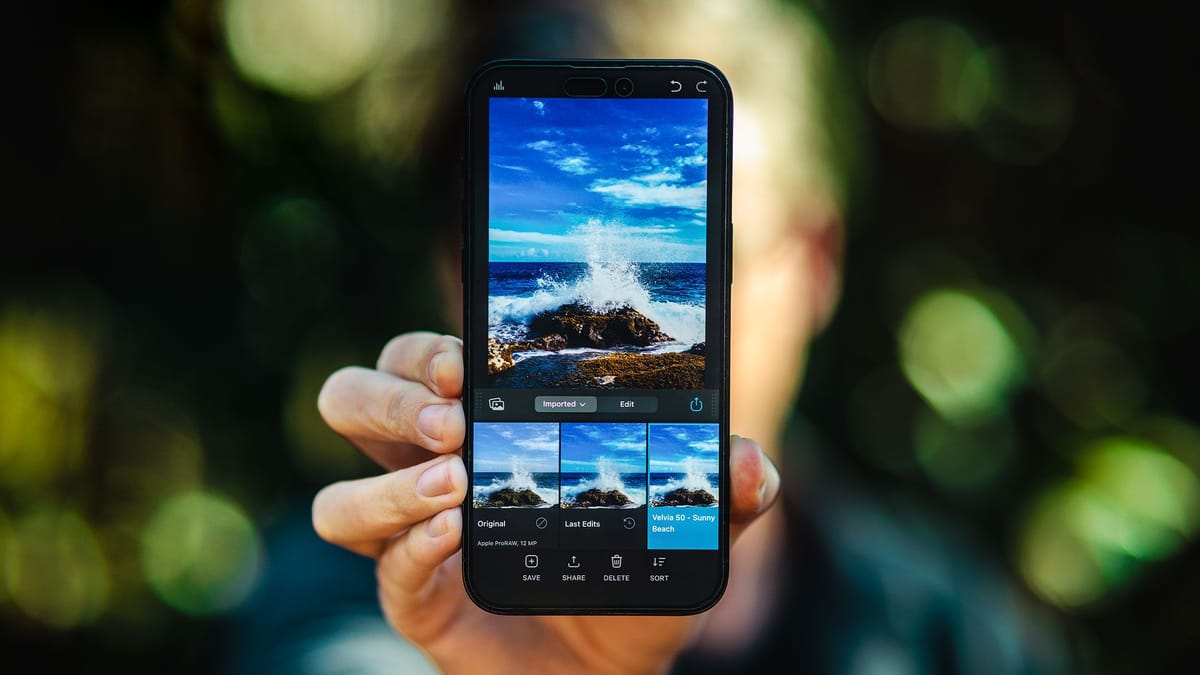
The image below was shot using Apple ProRAW on an iPhone 14 Pro Max, then edited in Dehancer for iOS using one of my favorite films: Fujifilm Velvia 50 — a richly saturated color positive film that (unfortunately) is no longer being manufactured.
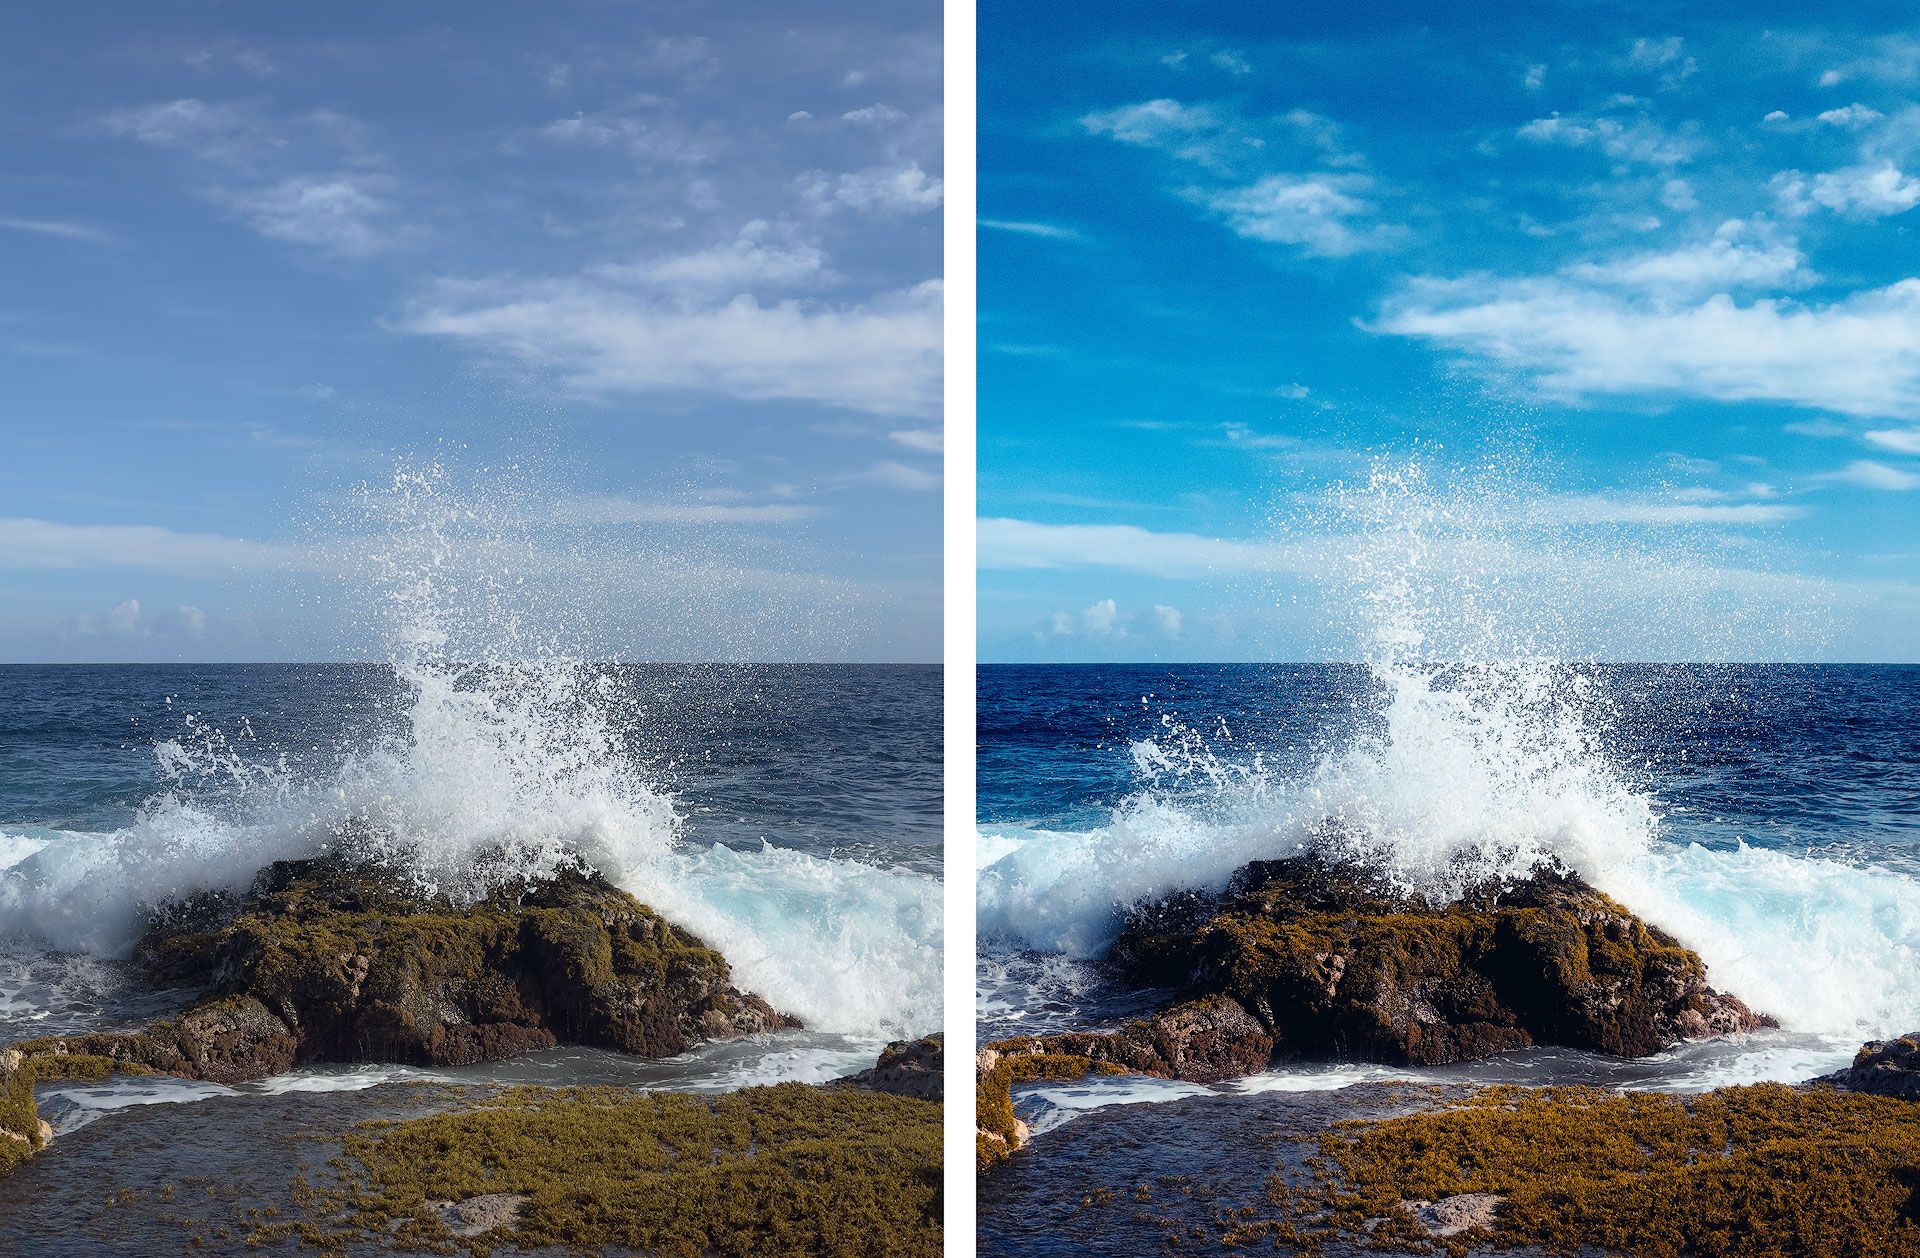
Check out how dense and beautiful the blues are, and how the highlights in the crashing wave give off a diffused glow. The image isn't the same as viewing an actual color slide of Velvia 50 on a light table or through a projector, but the colors and tonality of the digital emulation successfully mimic the visual richness and character of Velvia, with little additional involvement from me. I simply selected the Velvia 50 film emulation, tweaked contrast a bit, added a touch of grain and "bloom" to the highlights, and that's about it.
This kind of look is possible without Dehancer if you are an advanced photo editor, but Dehancer makes creating accurate and authentic-looking film emulations easier and faster for all photographers regardless of experience.
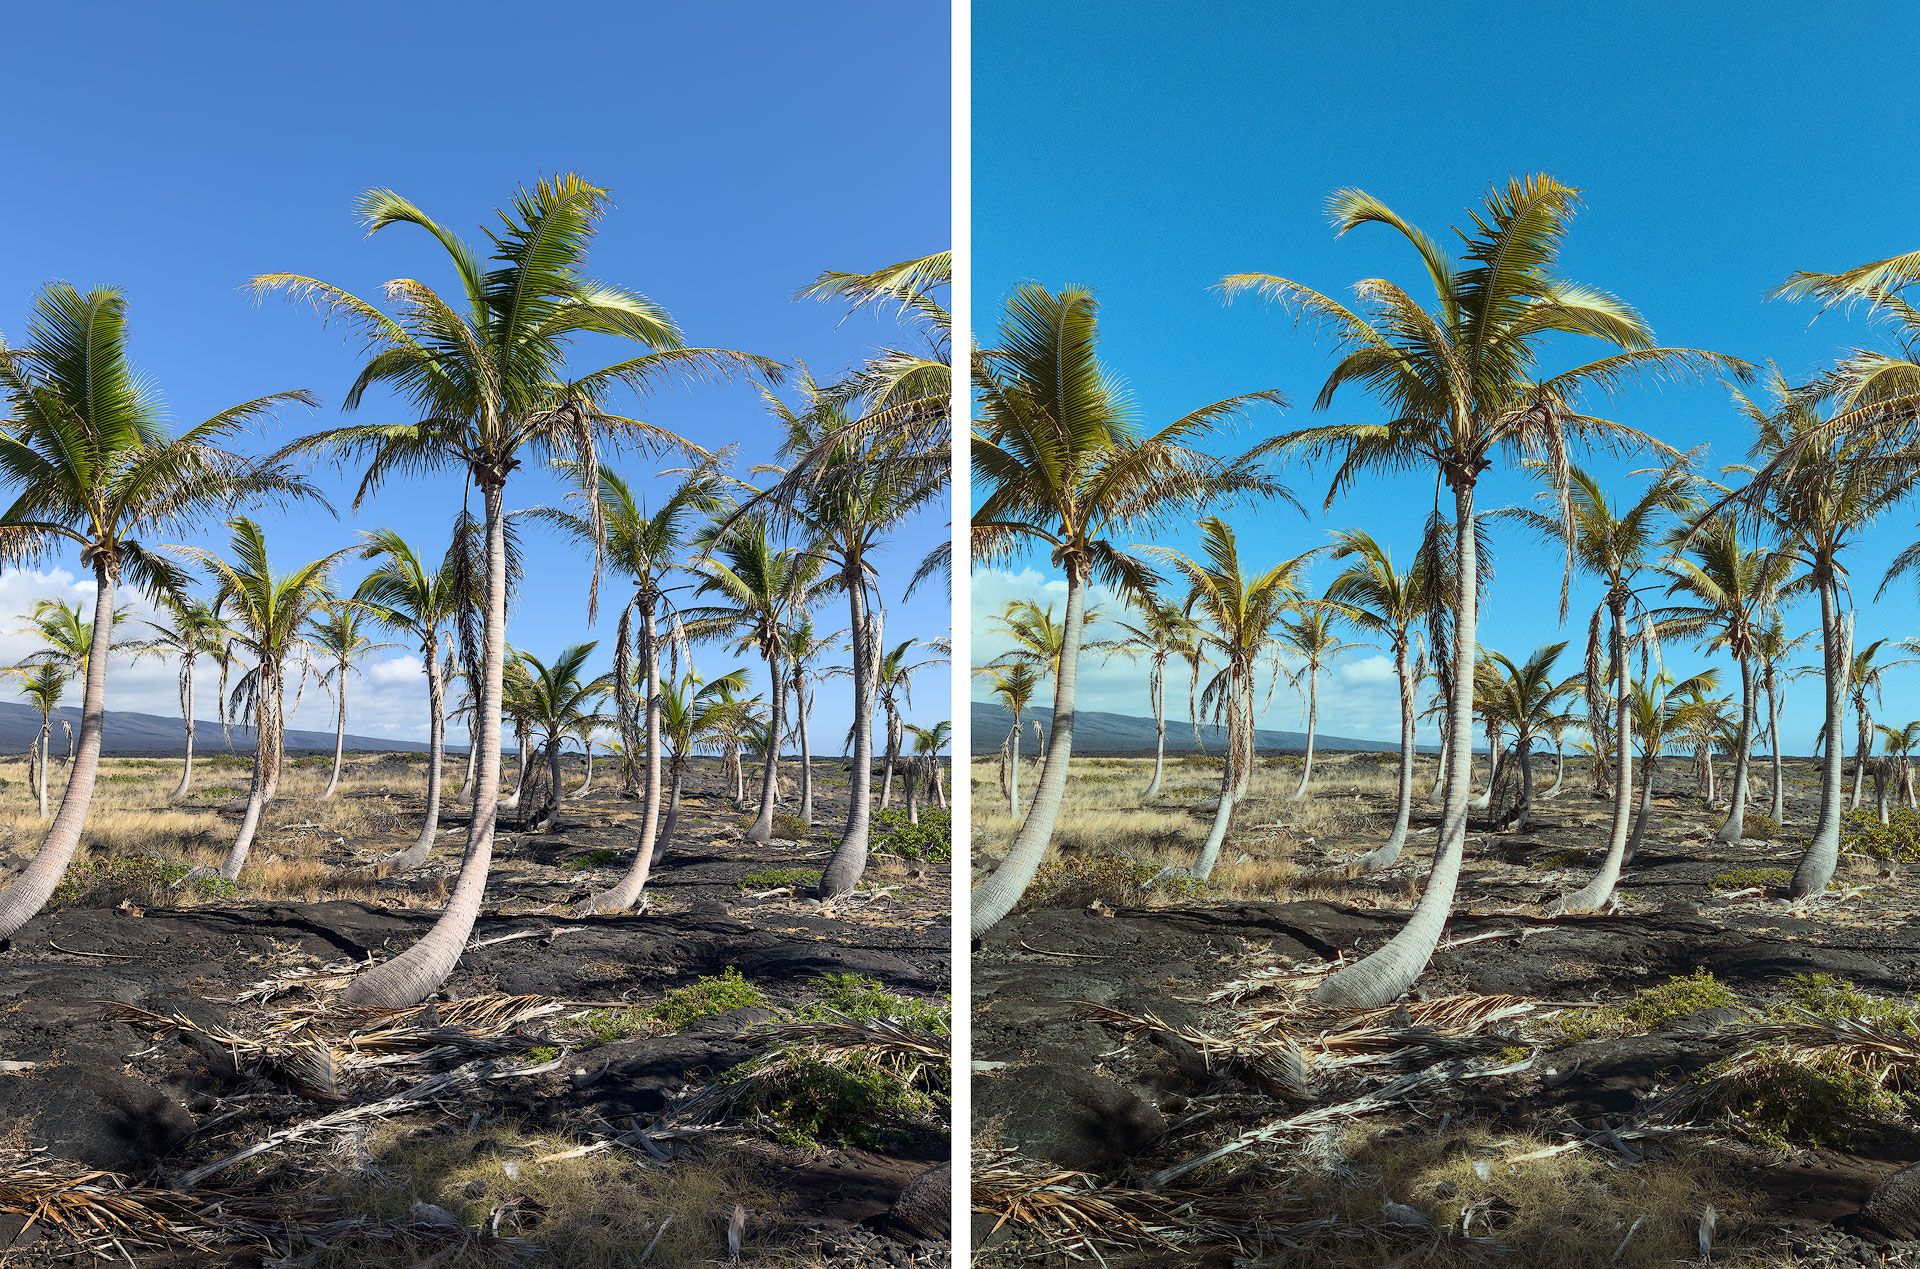
Using Dehancer for iOS
When Dehancer for iOS first opens, film emulation profiles and presets are remotely downloaded and installed. Dehancer maintains their profiles separately from their editing tools so films may be independently updated and expanded without reinstalling the core application.
Dehancer for iOS imports JPG, HEIC and RAW images from the iOS camera roll and Photos app. If the image is in a RAW file format (DNG or Apple ProRAW), Dehancer automatically generates a rasterized preview of the RAW image, then uses the preview image for editing. This is the same as their desktop photography plugin which also cannot edit RAW files directly.
Despite Dehancer's lack of support for non-destructive RAW editing, it's still best to capture images in RAW or (even better) Apple ProRAW to expand dynamic range and capture the greatest amount of tonal information the iPhone's camera sensor is capable of. If a RAW file exhibits color cast, it's best to first edit the RAW file using a non-destructive editor (like the iOS Camera app), then open the RAW file in Dehancer thereafter for creative color processing.
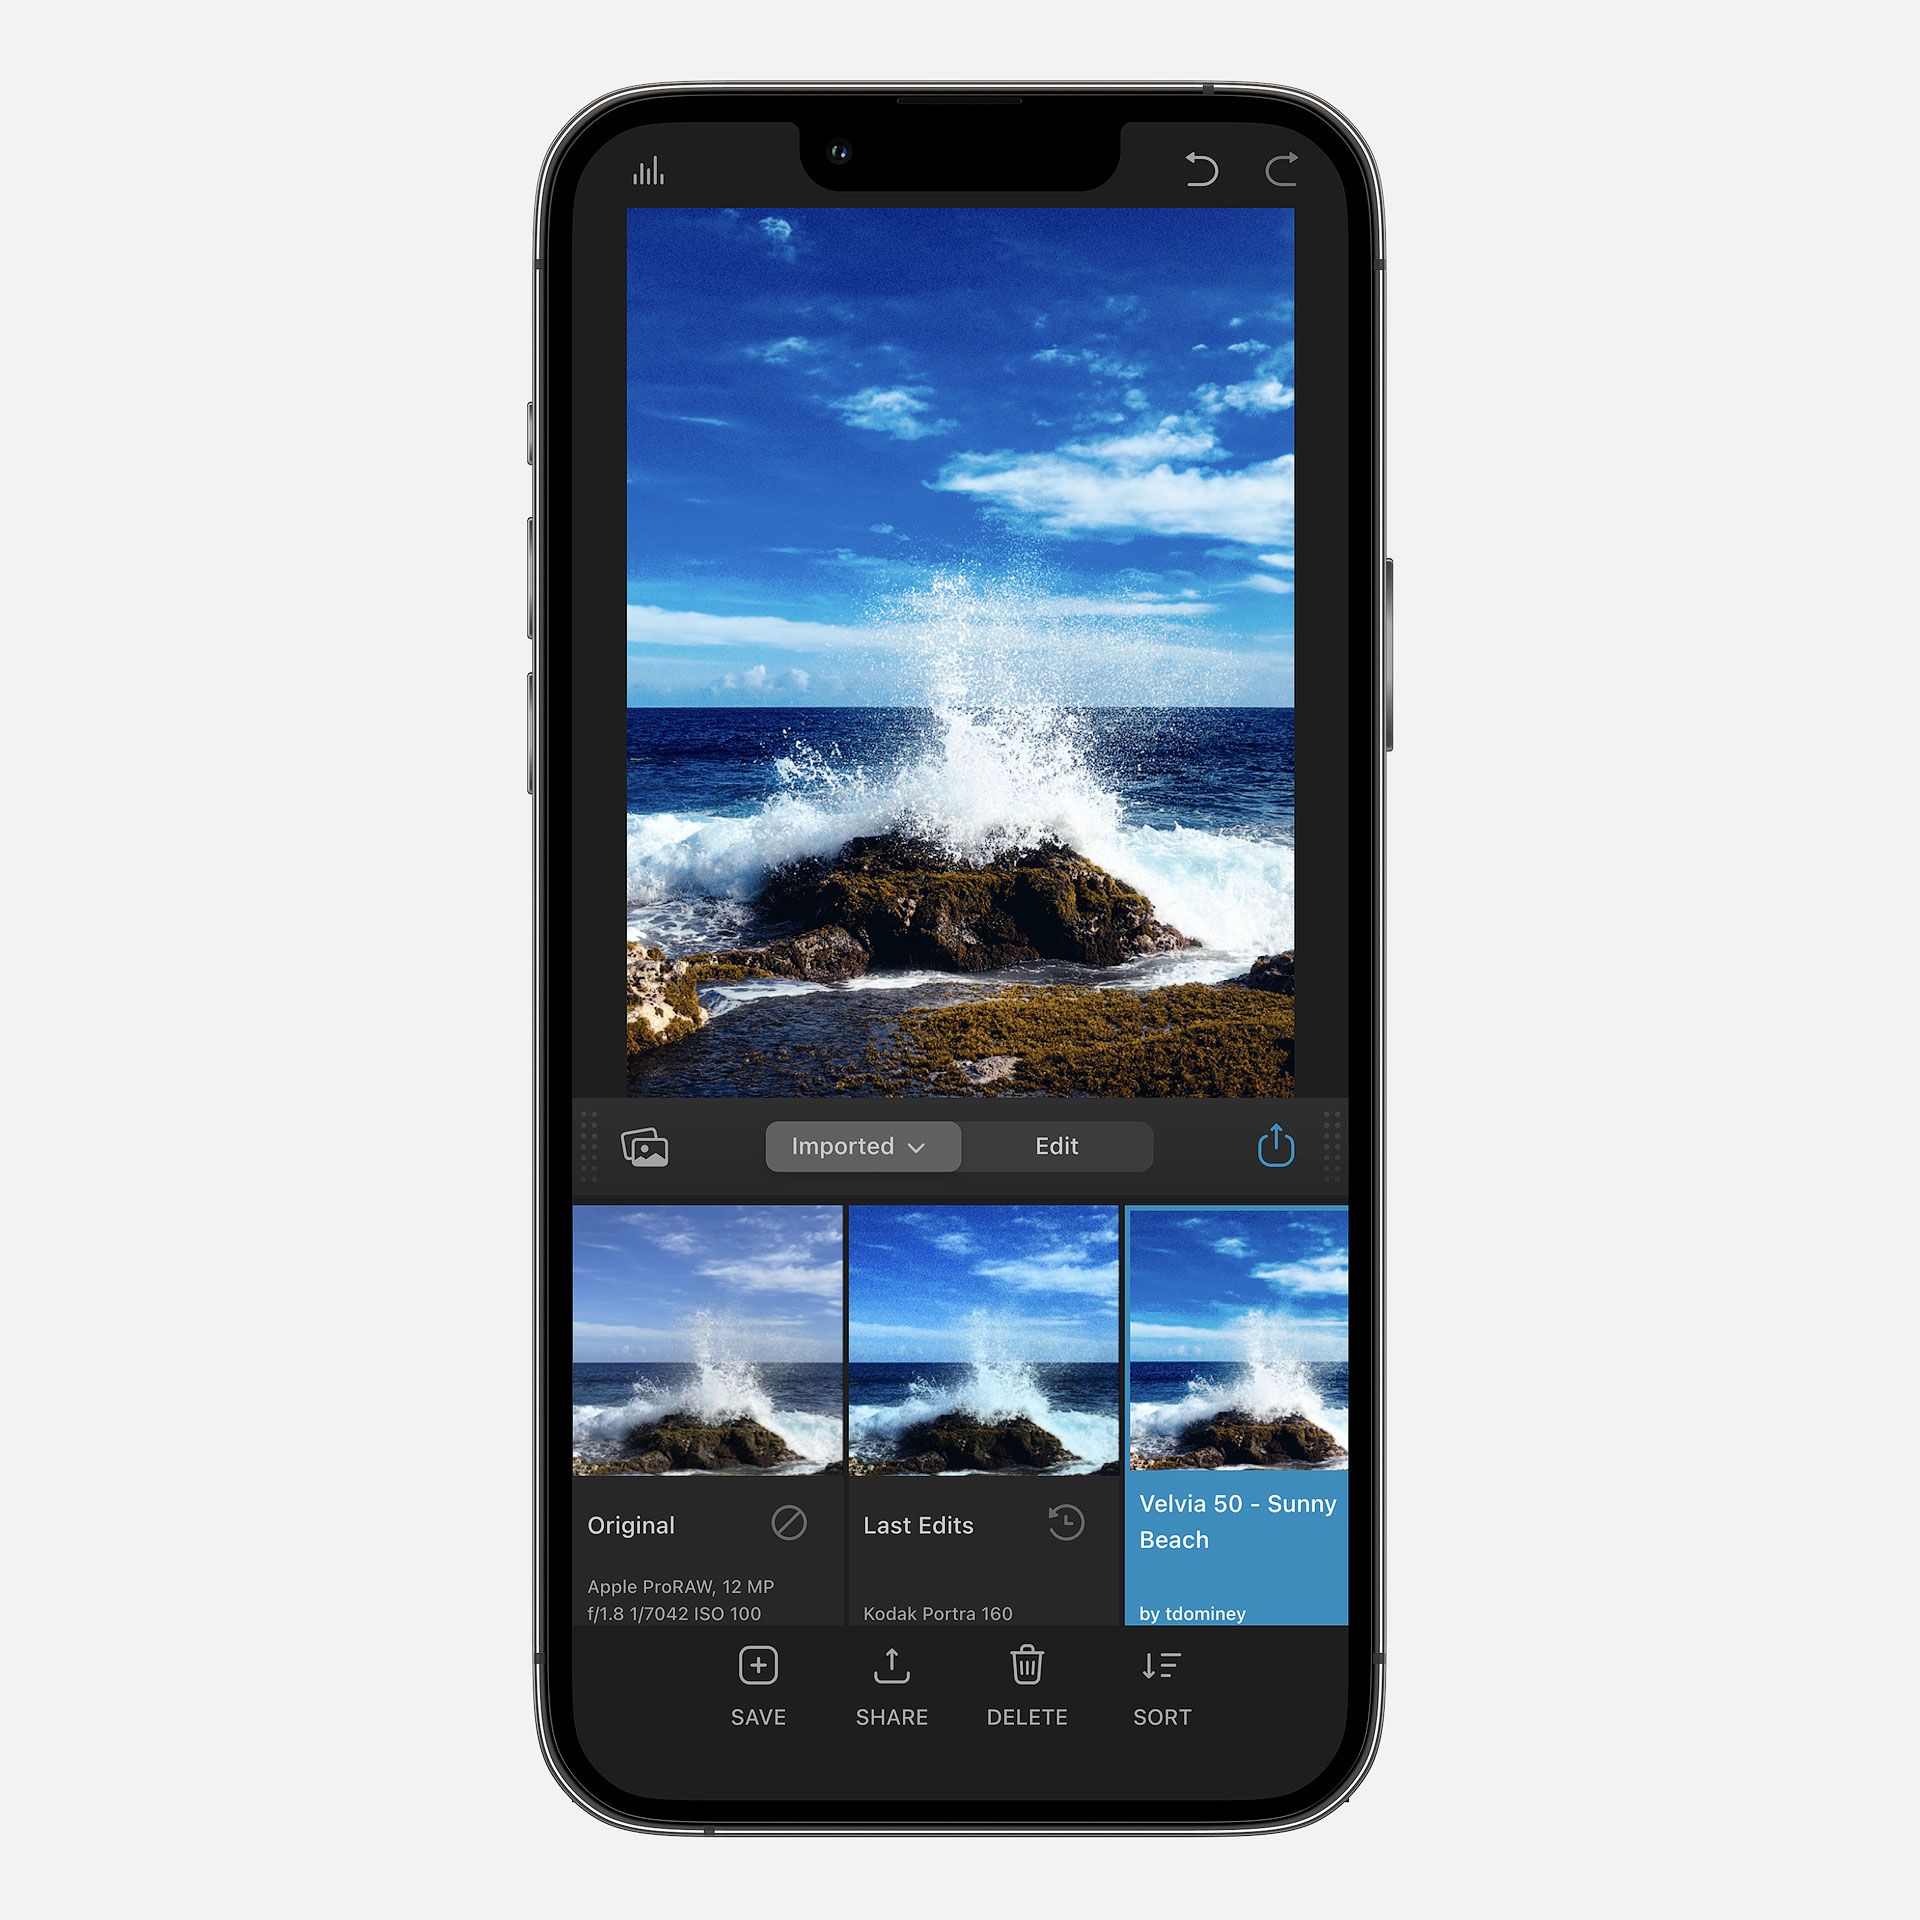
After importing an image, Dehancer begins with Presets. For speed and convenience, Dehancer automatically applies the same preset and/or edit settings from the previously edited image. If you don't like how an image looks, you may horizontally scroll the presets and select a different one. You may also save your own presets, favorite the ones you like, and import/export presets from other Dehancer users or even the desktop version of the Dehancer photo plugin.
If you'd rather edit an image from scratch without a preset, swipe right and select the "Original" preset. This will revert the image back to its imported state.
When ready to take the wheel and edit an image yourself with or without a preset, tap "Edit" in the toolbar to explore Dehancer's full suite of editing tools.
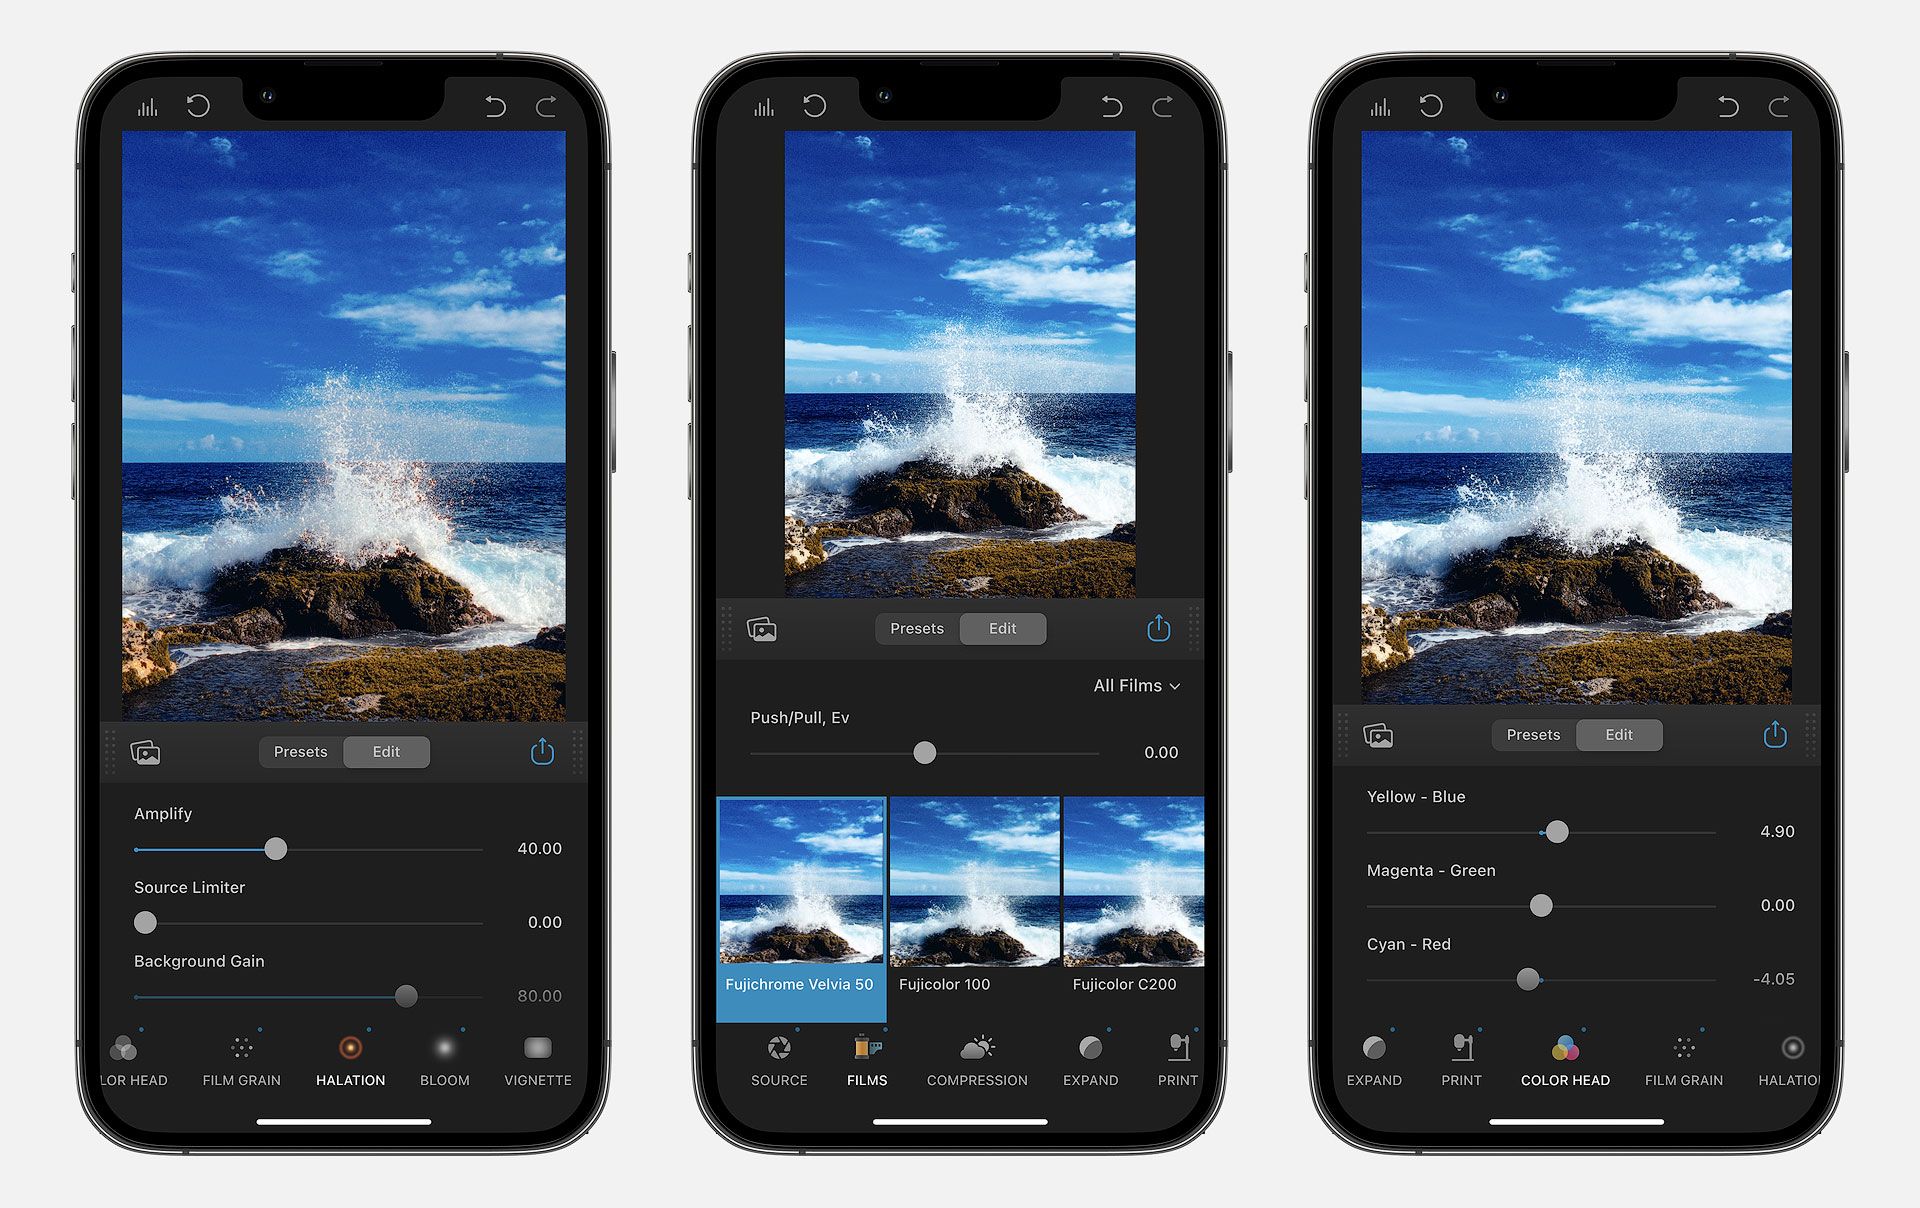
Users of Dehancer's desktop plugins should feel right at home, for the mobile editor is organized almost exactly the same way. Edits begin with technical corrections to white balance, tint and exposure in "Source" (if not edited already in a RAW file), followed by selecting a film emulation profile in "Films". Film selections are non-destructive, so you're free to experiment with different looks to find just the right one.
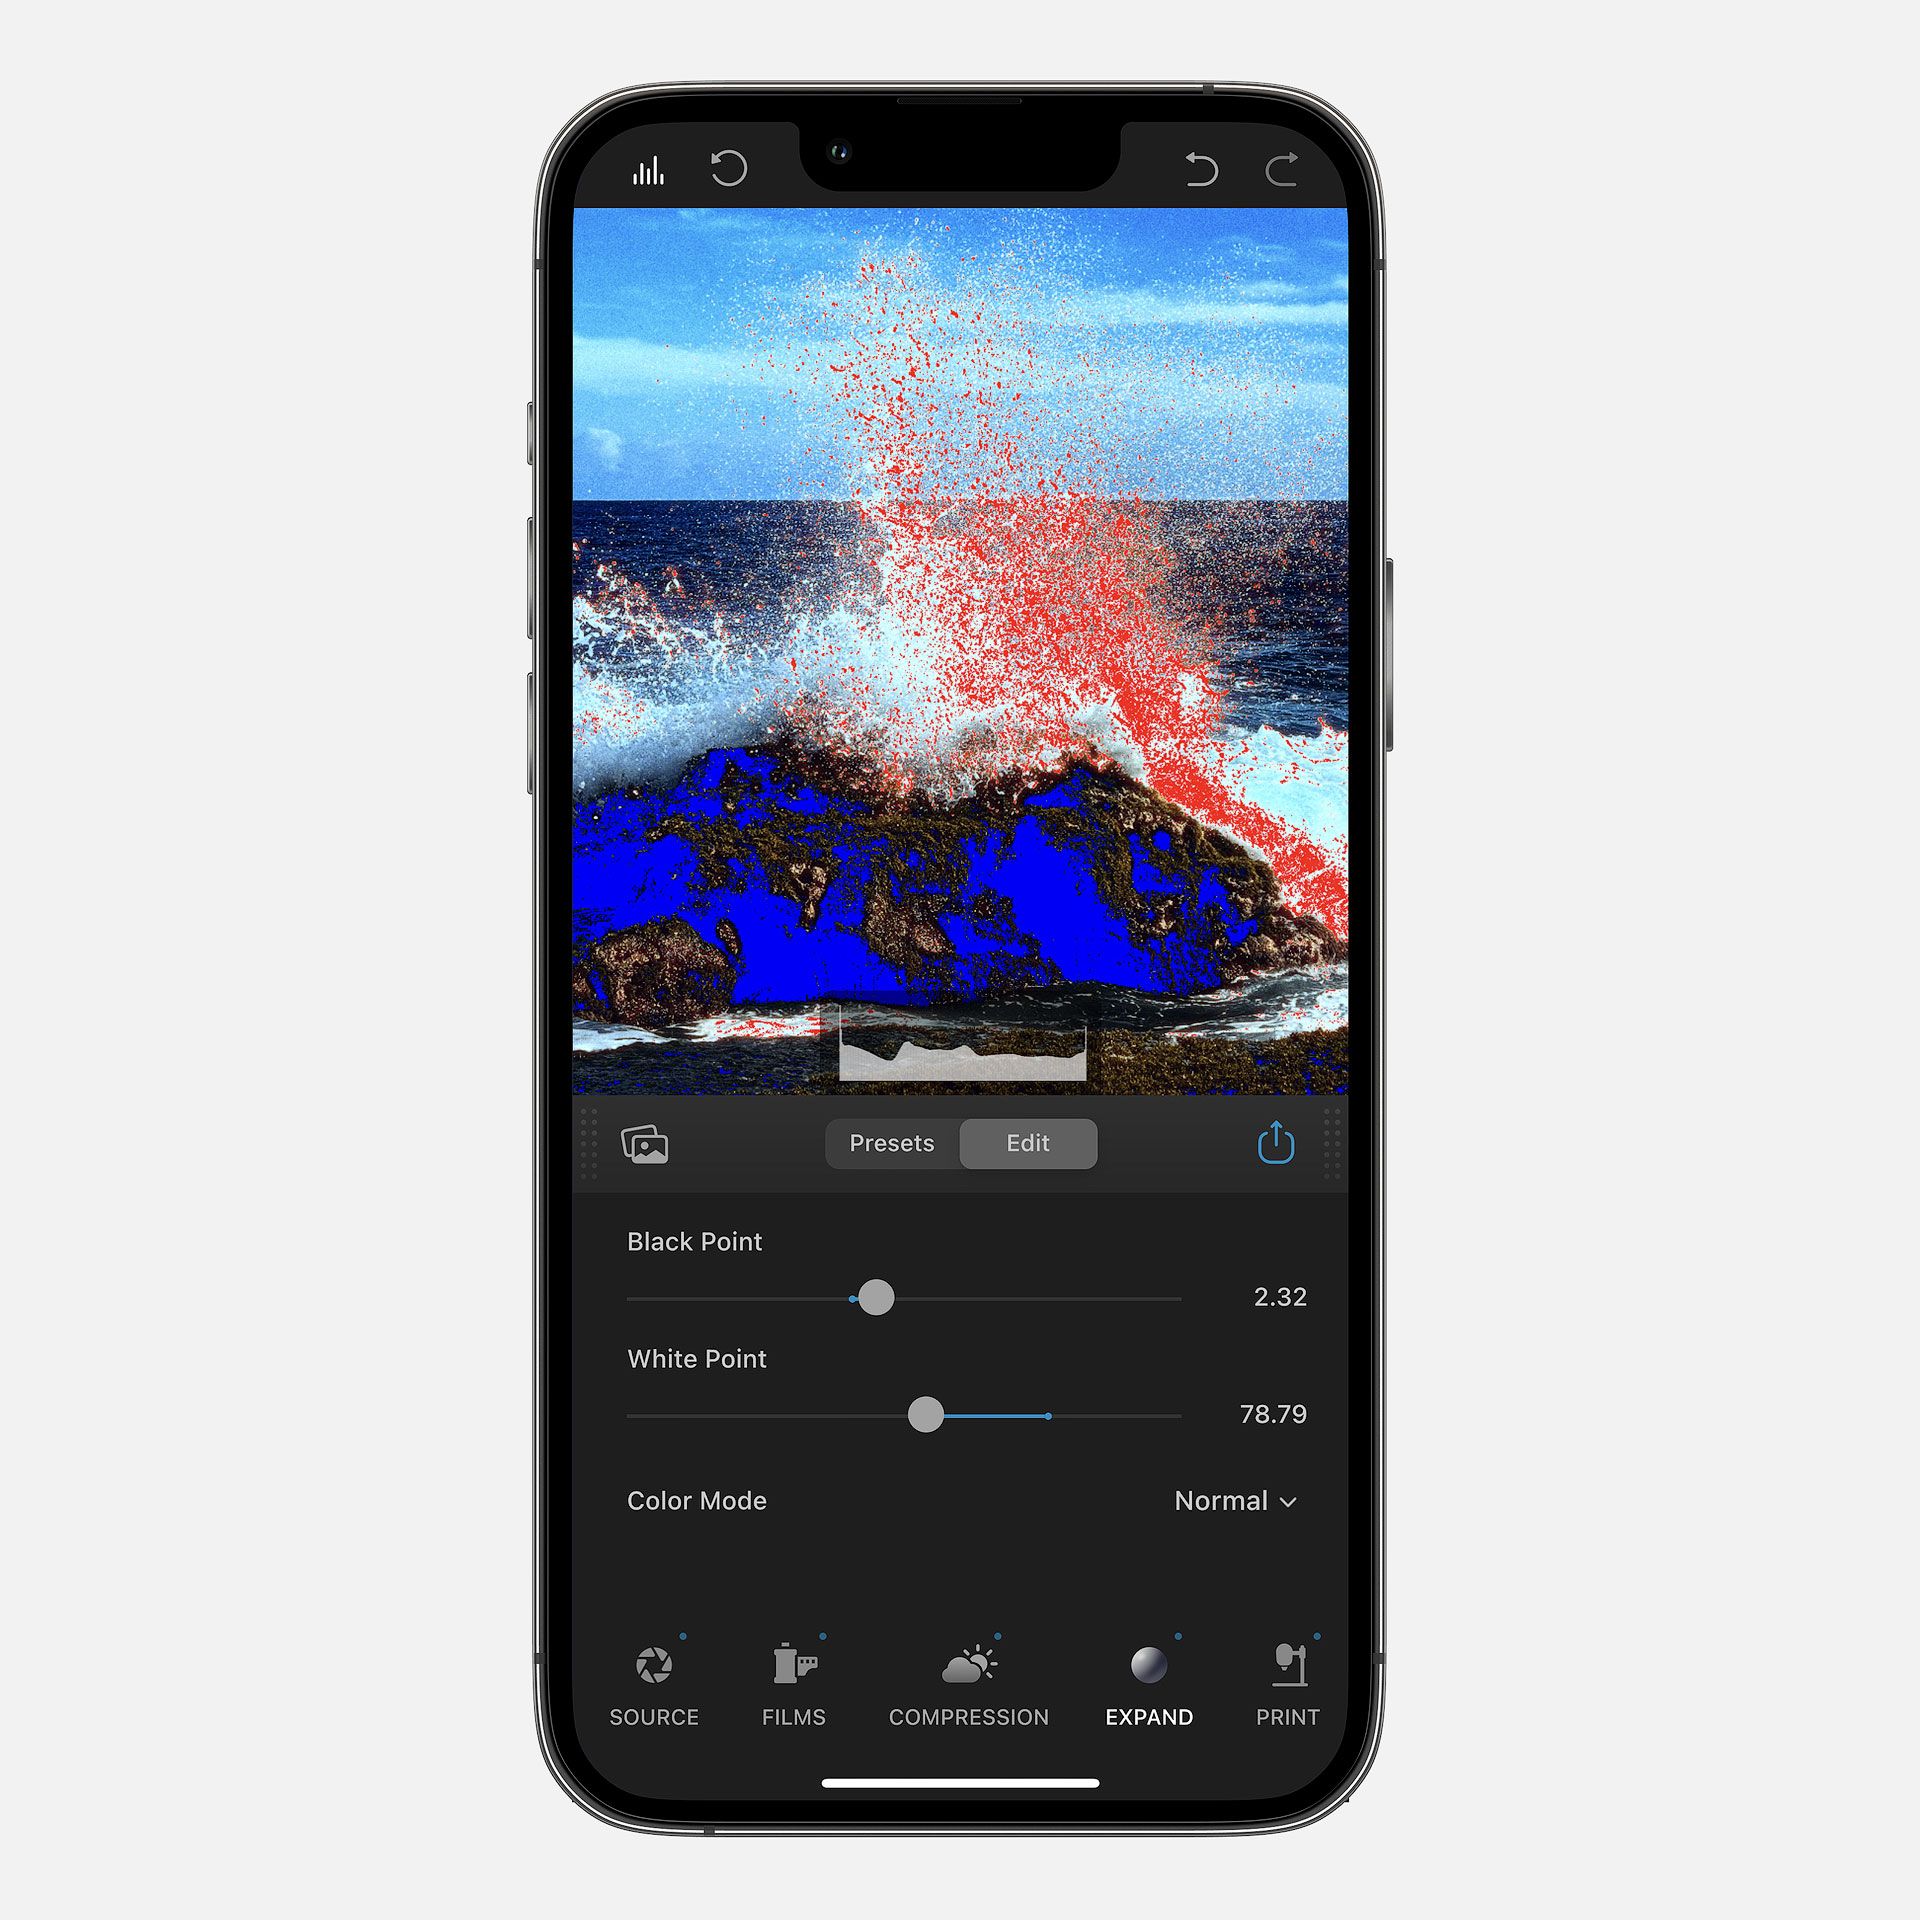
After correcting exposure, white balance, and selecting a film, the next steps are adjusting the white point, black point, and contrast using the "Compression", "Expand" and "Print" tools. To better understand the difference between these, I recommend reading the Dehancer for iOS Quick Guide (PDF).
When editing the black point, white point and contrast, I recommend enabling Dehancer's histogram by tapping the vertical bars in the top left corner. This displays a small, luminosity histogram below the image and visualizes clipped white and black pixels in red and blue, respectively. Together, these tools help create maximum tonality and contrast but without destroying detail in the darkest and brightest pixels.
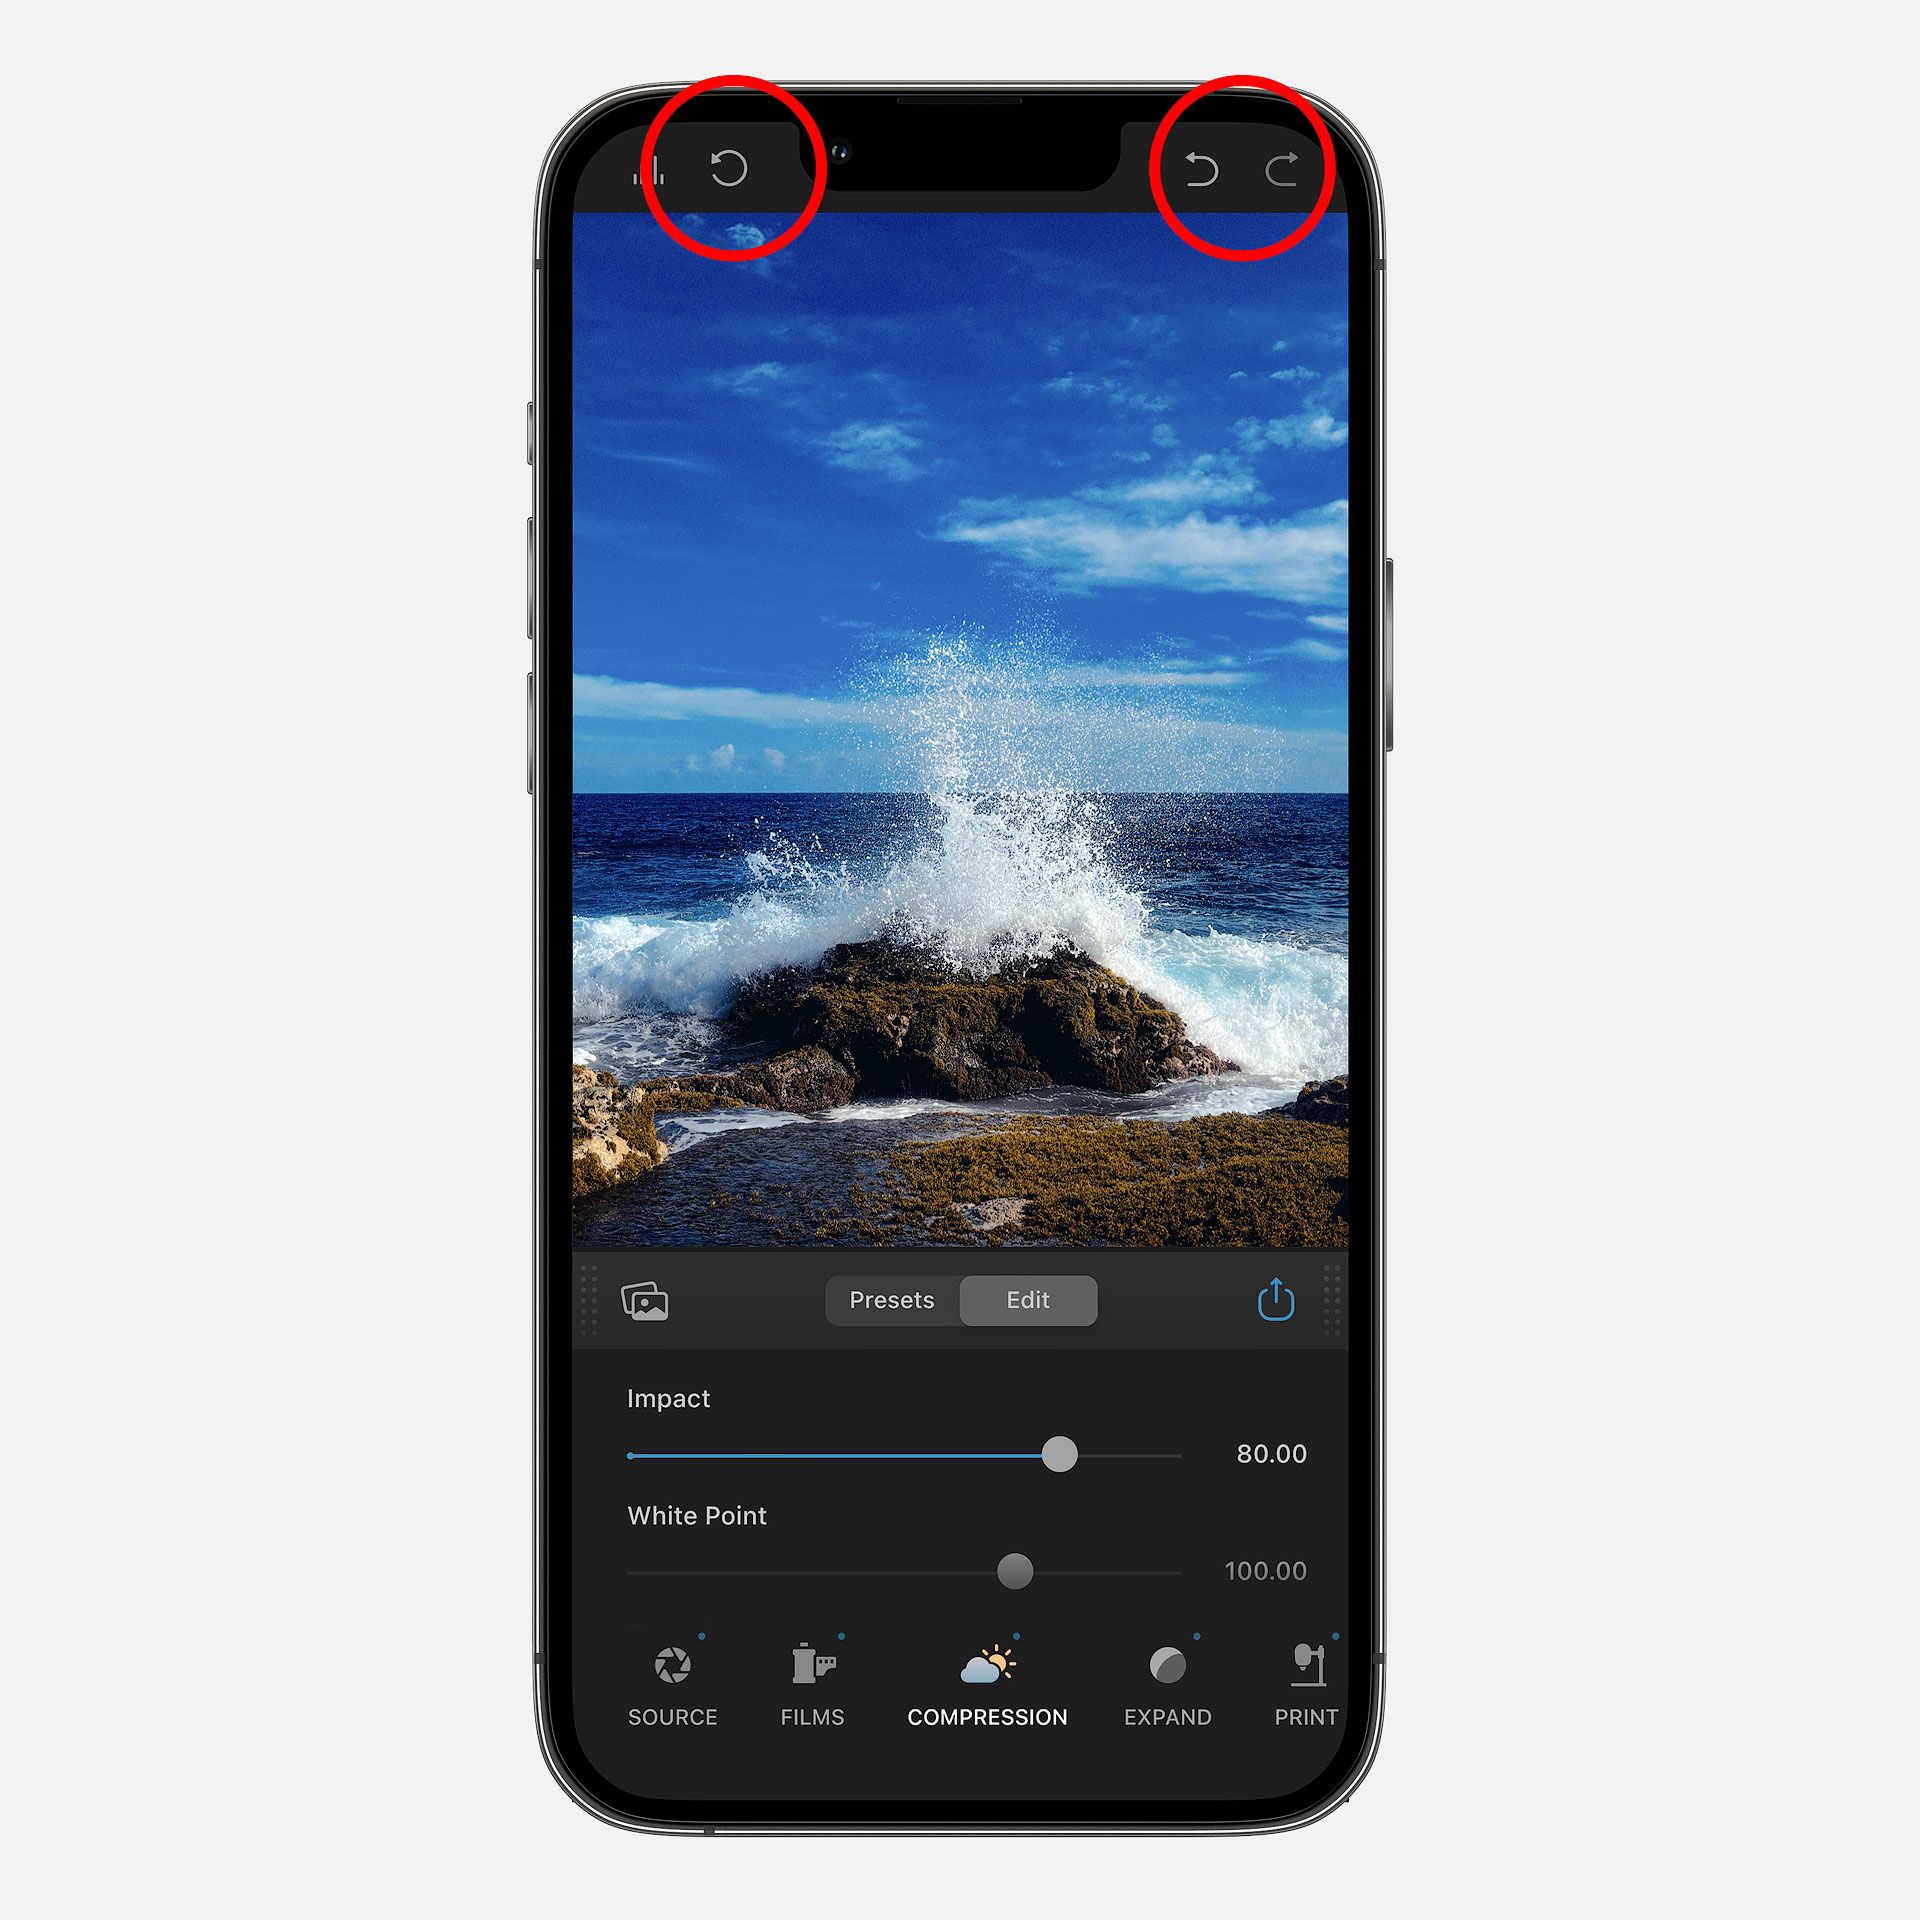
Alongside the histogram toggle are two history state buttons to step forward and backward through edits, plus a revert button that wipes the slate clean to restart an edit from scratch.
When satisfied with the general look of an image, the finishing step is applying "Film Grain", "Halation", and/or "Bloom". These emulate natural aberrations that occur when shooting and processing film, increase realism, and make digital images look less digital. To avoid applying too much of these effects (which can happen when editing a small thumbnail), I recommend upscaling the preview image to 200% by double-tapping the image, or pinch/zoom to your preferred scale.
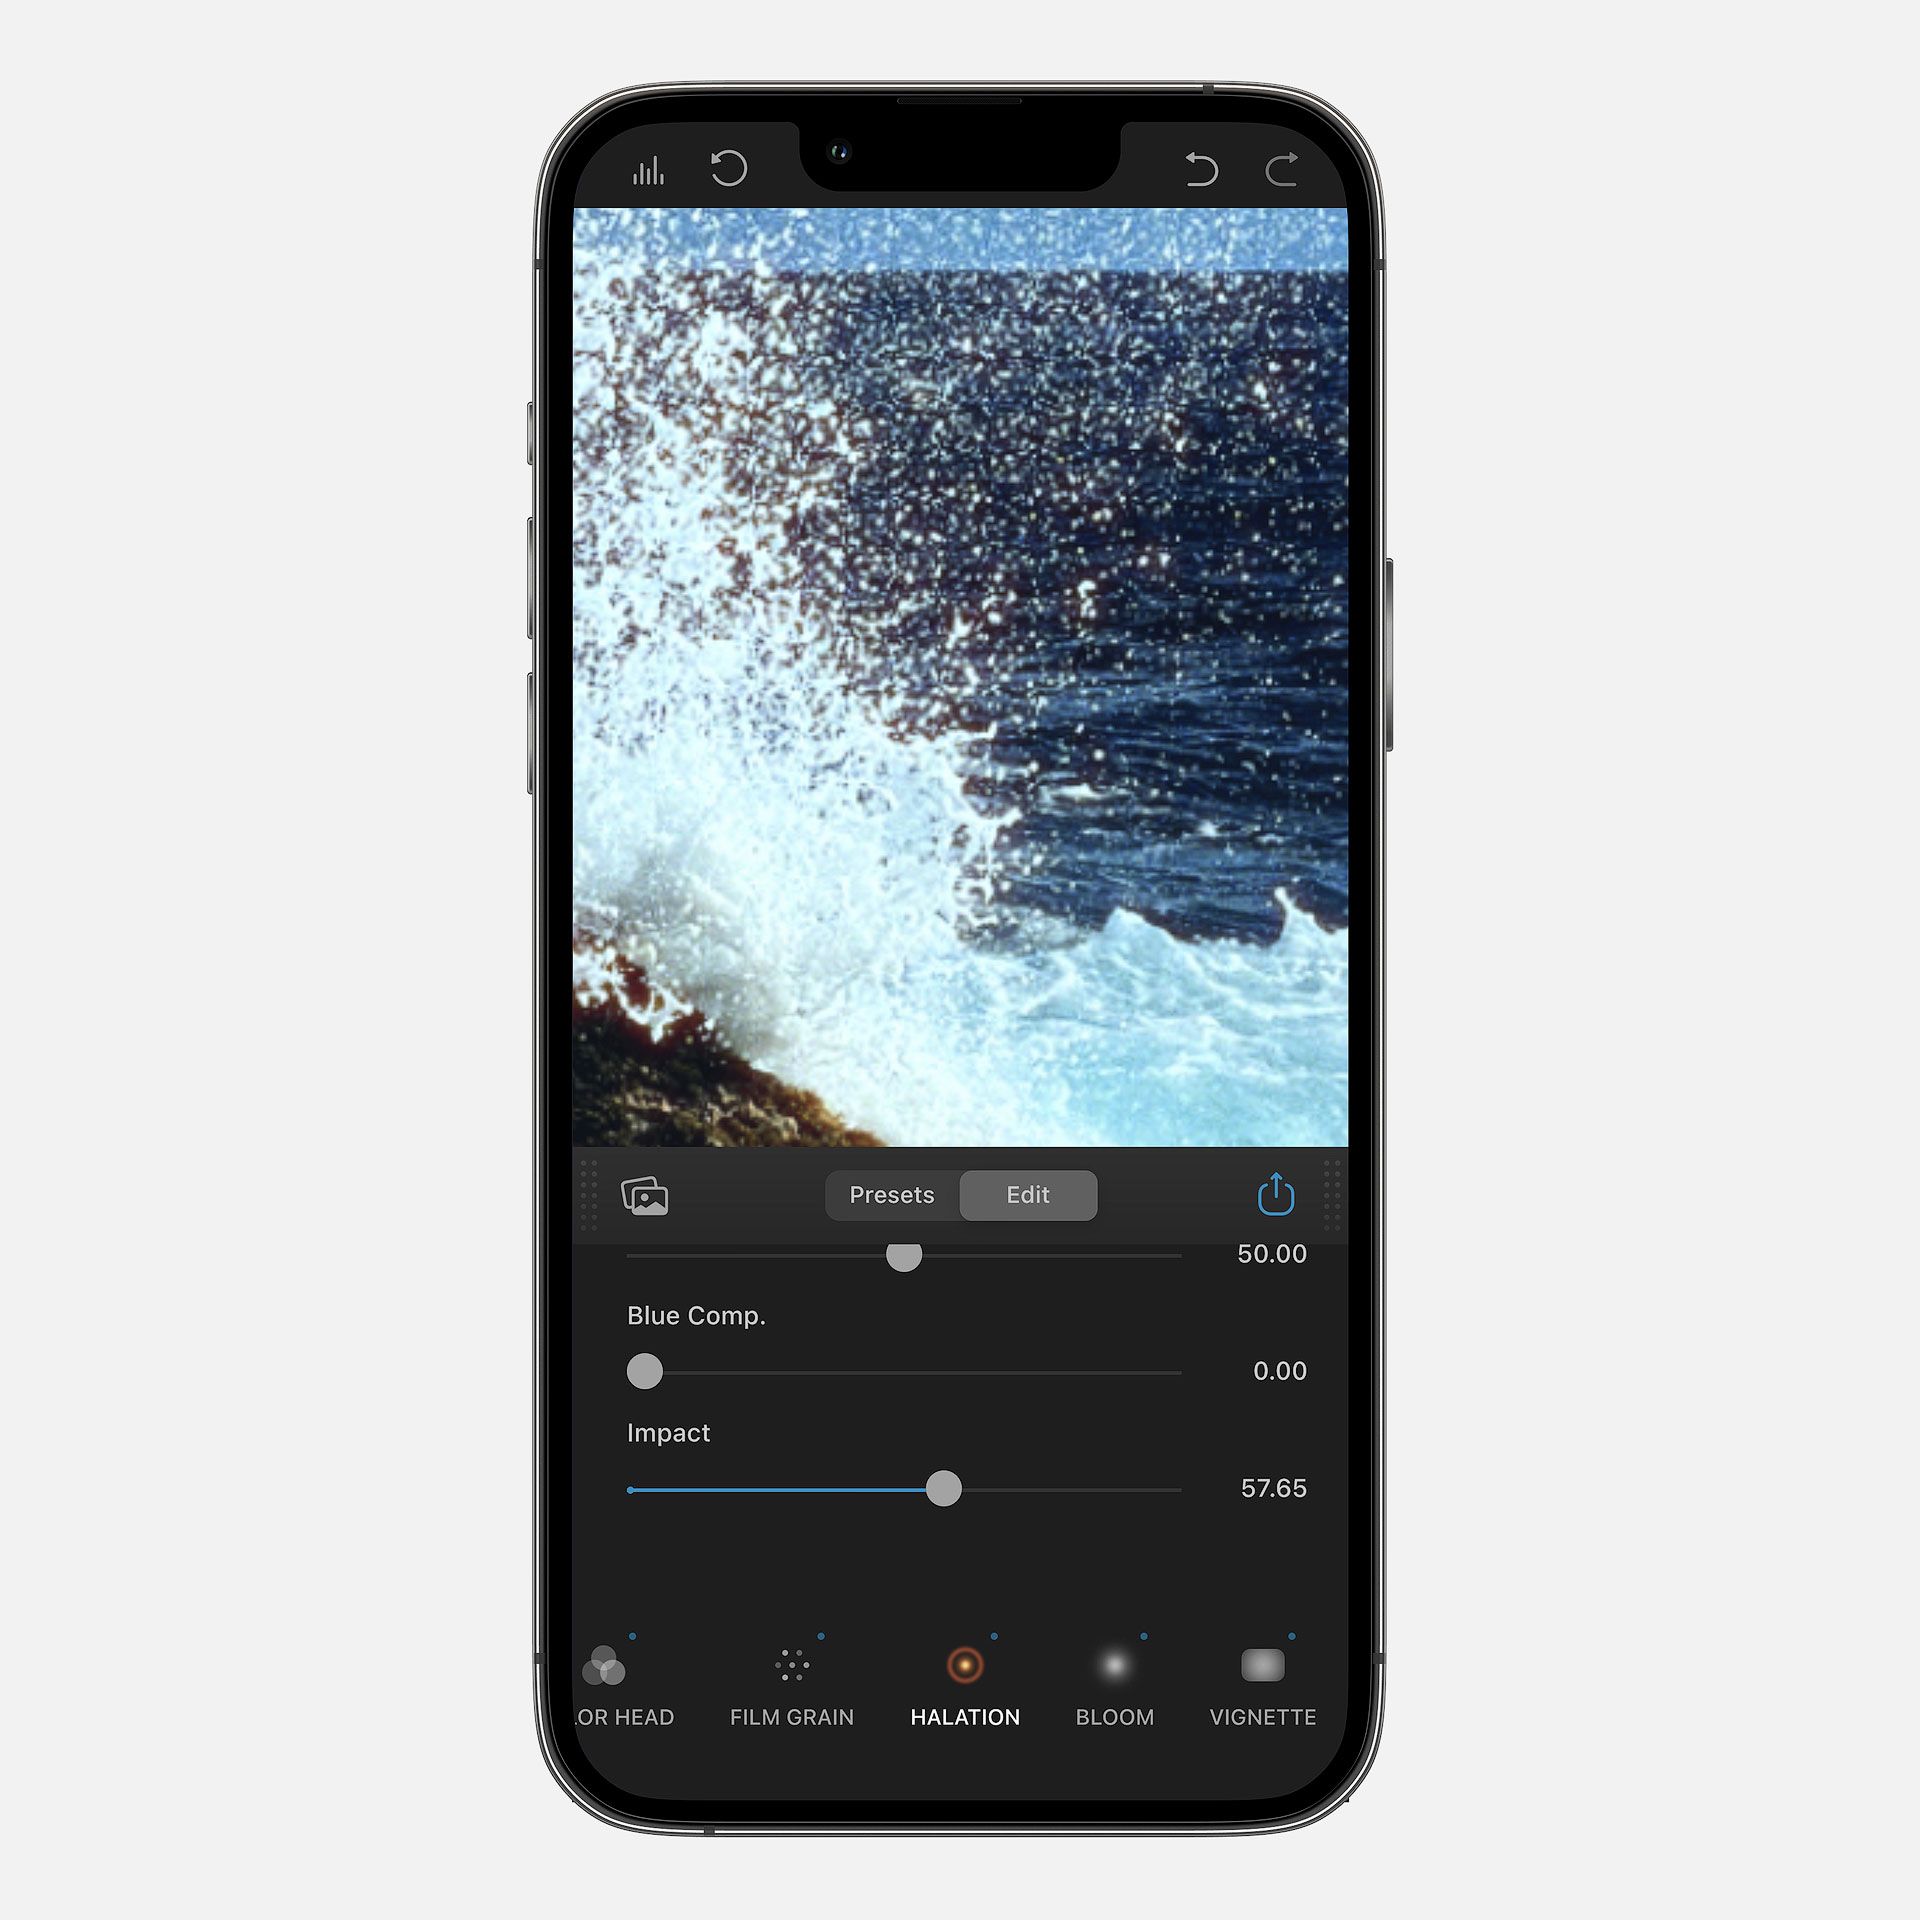
Finally, there's "Vignette". This darkens the corners and edges of the frame, similar to optical vignette using a traditional camera. Vignette also draws a viewer's eye towards the center of the frame, and further helps mobile images look less "mobile".
When finished editing, tap the blue share icon at the right side of the toolbar. This displays options for saving a newly edited JPG to the iOS camera roll or sharing the image elsewhere (eg, Airdrop to a desktop, save to cloud storage, post to social media, etc).
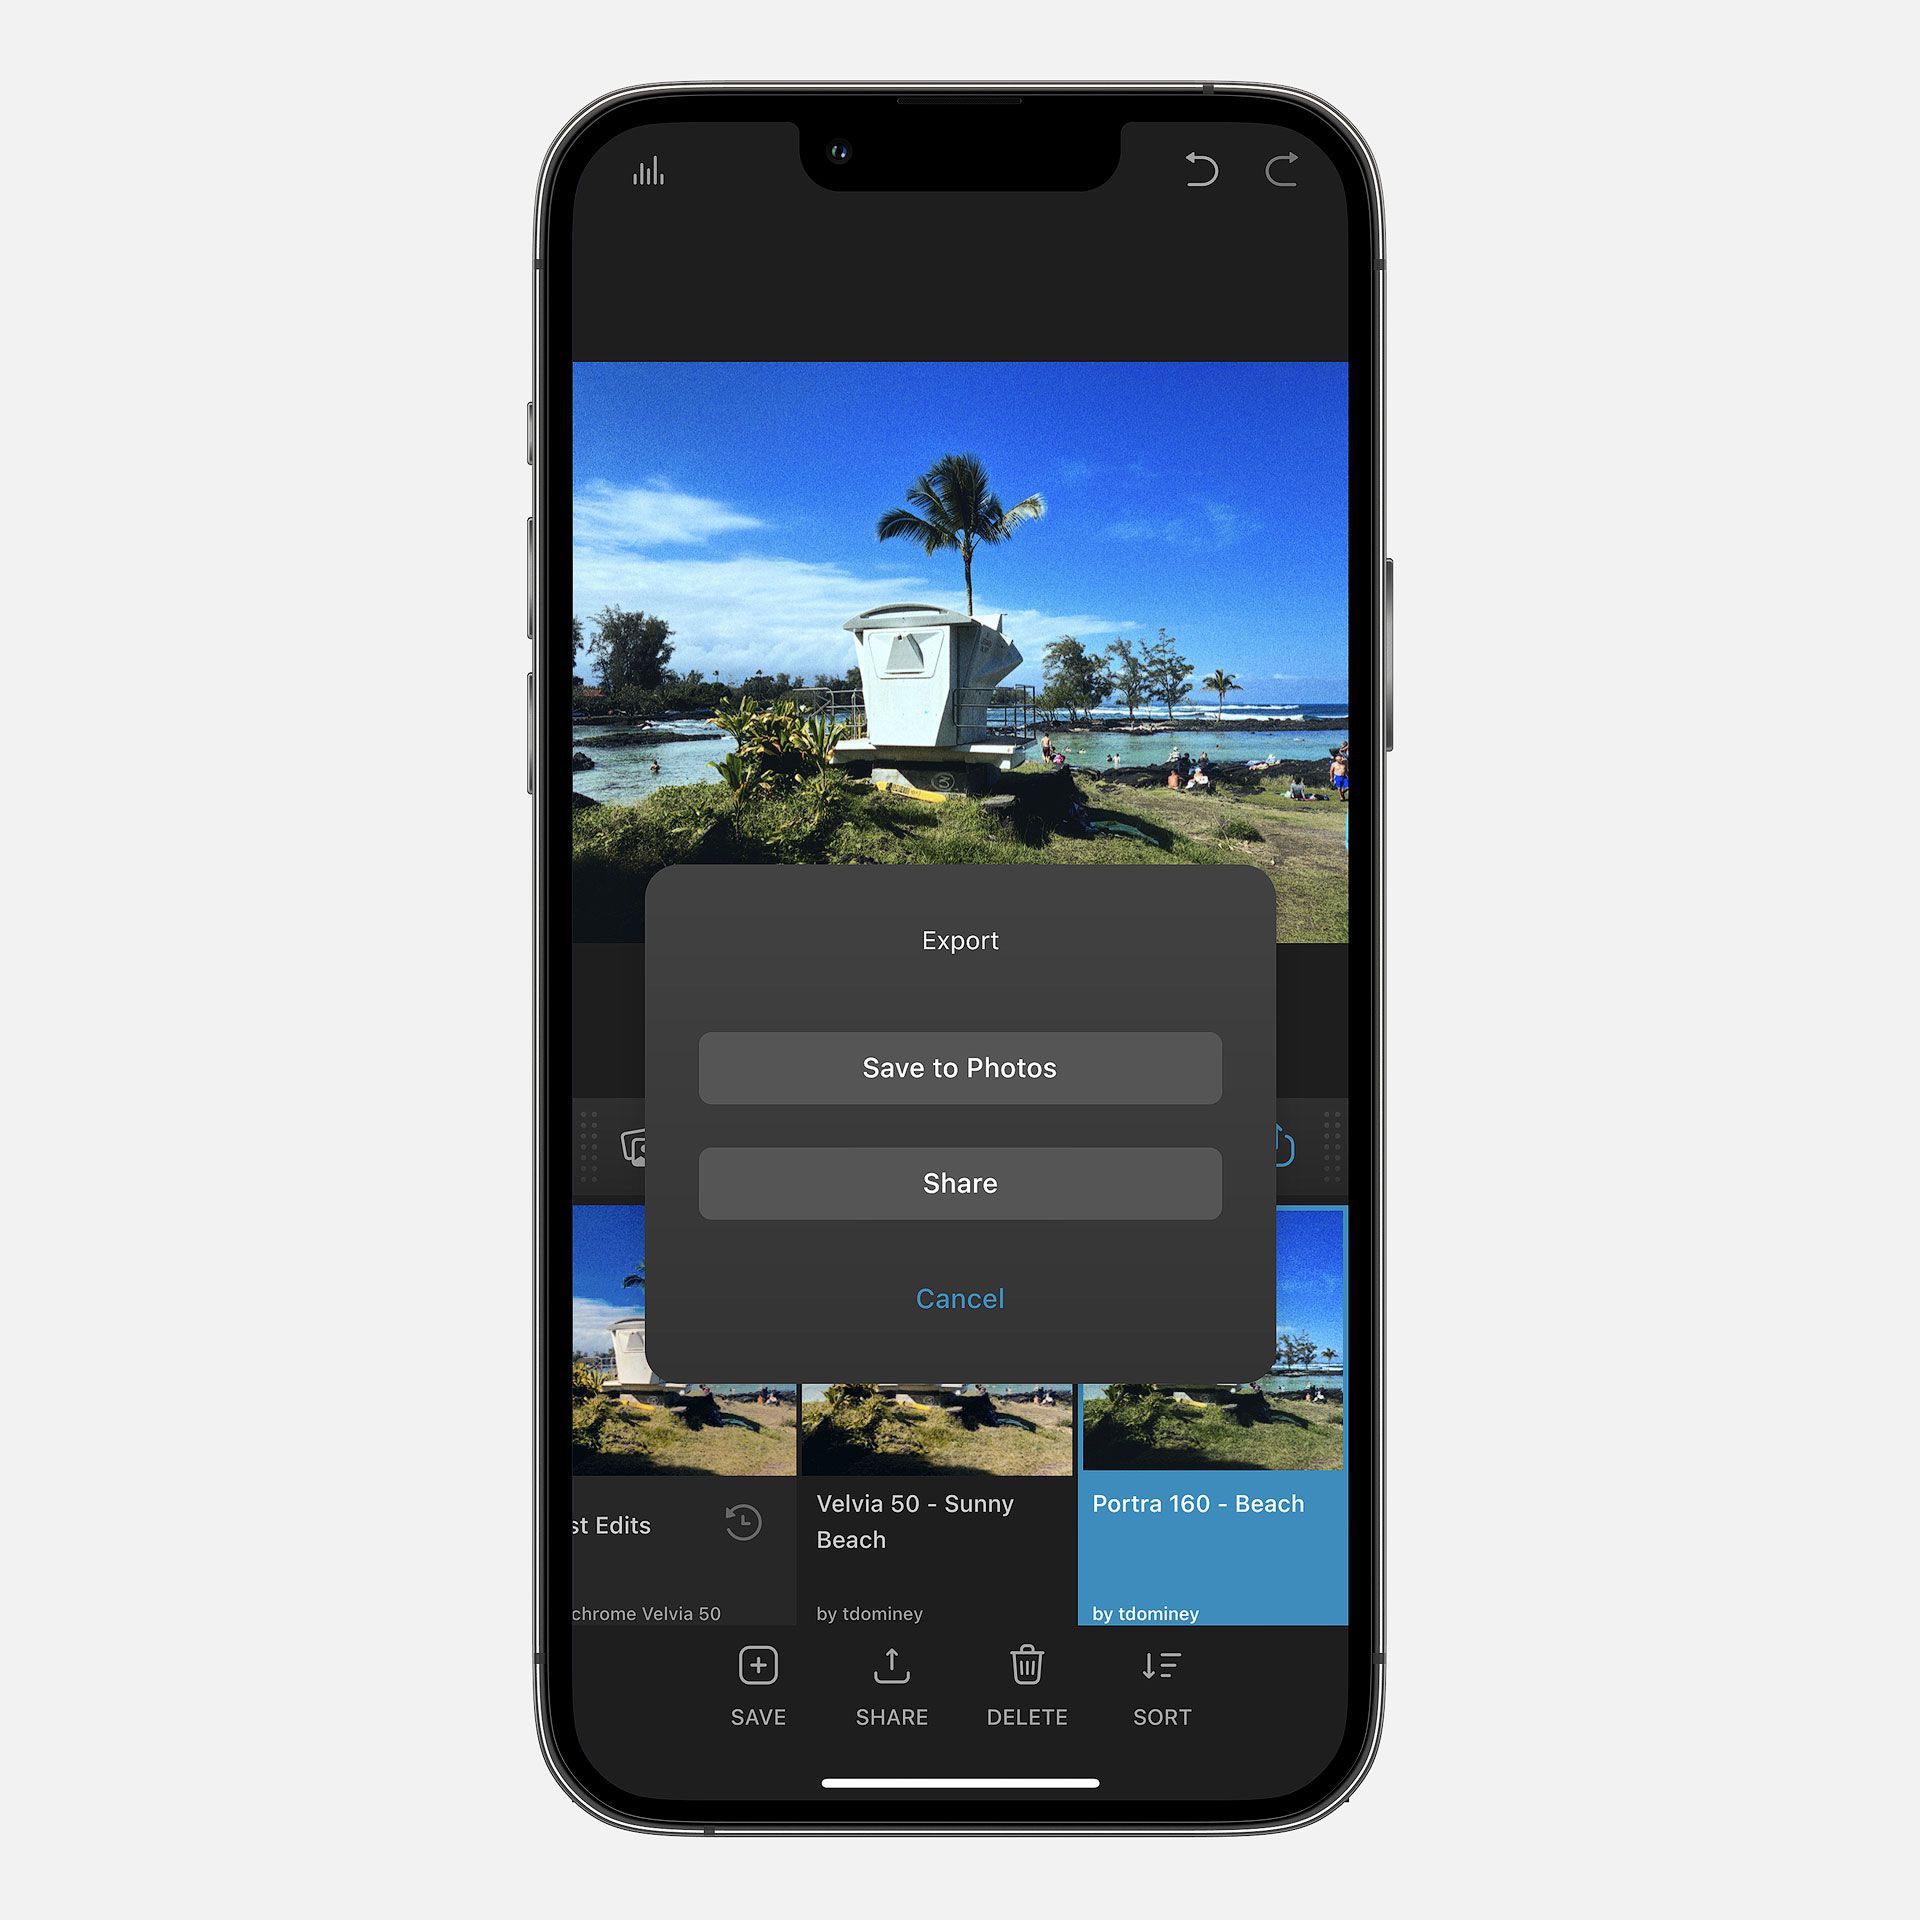
Dehancer automatically exports images as 12 megapixel, 4032 x 3024px JPGs, without options for alternate formats or resolutions. 12 megapixels is plenty large for social media and most websites, but could be a bit small for making large prints or any use case requiring high resolution images.
If the latter is important to you, I recommend checking out the desktop version of Dehancer, for it can edit and export higher resolution mobile images without downsampling resolution to 12 megapixels.

Video color grading
Dehancer for iOS can also color grade video. This feature went live while publishing this review, so I didn't have as much time to test it, but the video below should give you a good sense of what it is capable of. This clip was recorded using the Cinematic mode on an iPhone 14 Pro Max, then color graded using Dehancer's Kodak Vision3 500T color negative and Kodak Vision 2383 positive print film emulations (a combination used in countless motion pictures).
All told, the results are certainly promising for mobile videographers and filmmakers who'd like to shoot and edit cinematic-looking video on their iPhones.
Final thoughts
Mobile photographers and videographers who frequently use their iPhones will get the most value from Dehancer for iOS. The app makes capturing, editing, and sharing film-like images faster than transferring files to a desktop, editing, then transferring finished images back for posting to social media.
I can also see Dehancer for iOS being useful to photographers (like me) who use the desktop version of Dehancer Photo. I like that I can build a custom preset on my desktop, then transfer that preset to Dehancer for iOS for quick edits of mobile images when traveling without a laptop.
But above all else, Dehancer's film emulations are simply beautiful. Wonderful color science with great hues and tonality, right out of the box. And best of all, you don't need to be a photo editing expert to get great looking images that embody the look of classic analogue film.


The see what Dehancer for iOS can do with your own mobile photos and videos, download a free trial by clicking the button below. Everything in the trial is fully functional, and you may export up to ten images to help figure out whether the app is right for you.
Video
Check out the video version of this review.

