Nik Silver Efex v8: one big new feature
What's new and what's important about the latest version of the black and white photo editor in Nik Collection 8
A couple of years ago I reviewed Nik Silver Efex, a powerful black and white photo editor that is part of DxO's Nik Collection bundle of photo editing apps. Nik Collection has been around for many years (longer than nearly all photo editing apps used today), and includes a number of helpful apps for editing color, sharpness, perspective, and other tasks.
For me however, the crown jewel of Nik Collection has always been Silver Efex, for there simply isn't another editor on the market that does what it can do.
If you're new to Silver Efex and want a more comprehensive overview of the app and its features, I recommend checking out my previous review, for today I'm going to focus on what's new in Silver Efex v8.
The latest release includes the usual round of design and user interface optimizations, a new filter interface which brings Silver Efex closer to the UI of other Nik Collection apps, an original color image viewer, and other small improvements and changes.
But there is one notable feature that makes this update stand out: Photoshop mask importing.
Photoshop mask importing
Without question, Adobe Photoshop is the most robust tool for creating and applying masks to an image. Adobe's raw photo editors (Lightroom, Camera Raw) have steadily improved over the past few years with fantastic new AI driven masks for simple, quick local adjustments, but when a photographer needs more flexibility and precision, there's no substitute for Photoshop, especially if you use a luminosity mask plugin (like TK9, which is what I use).
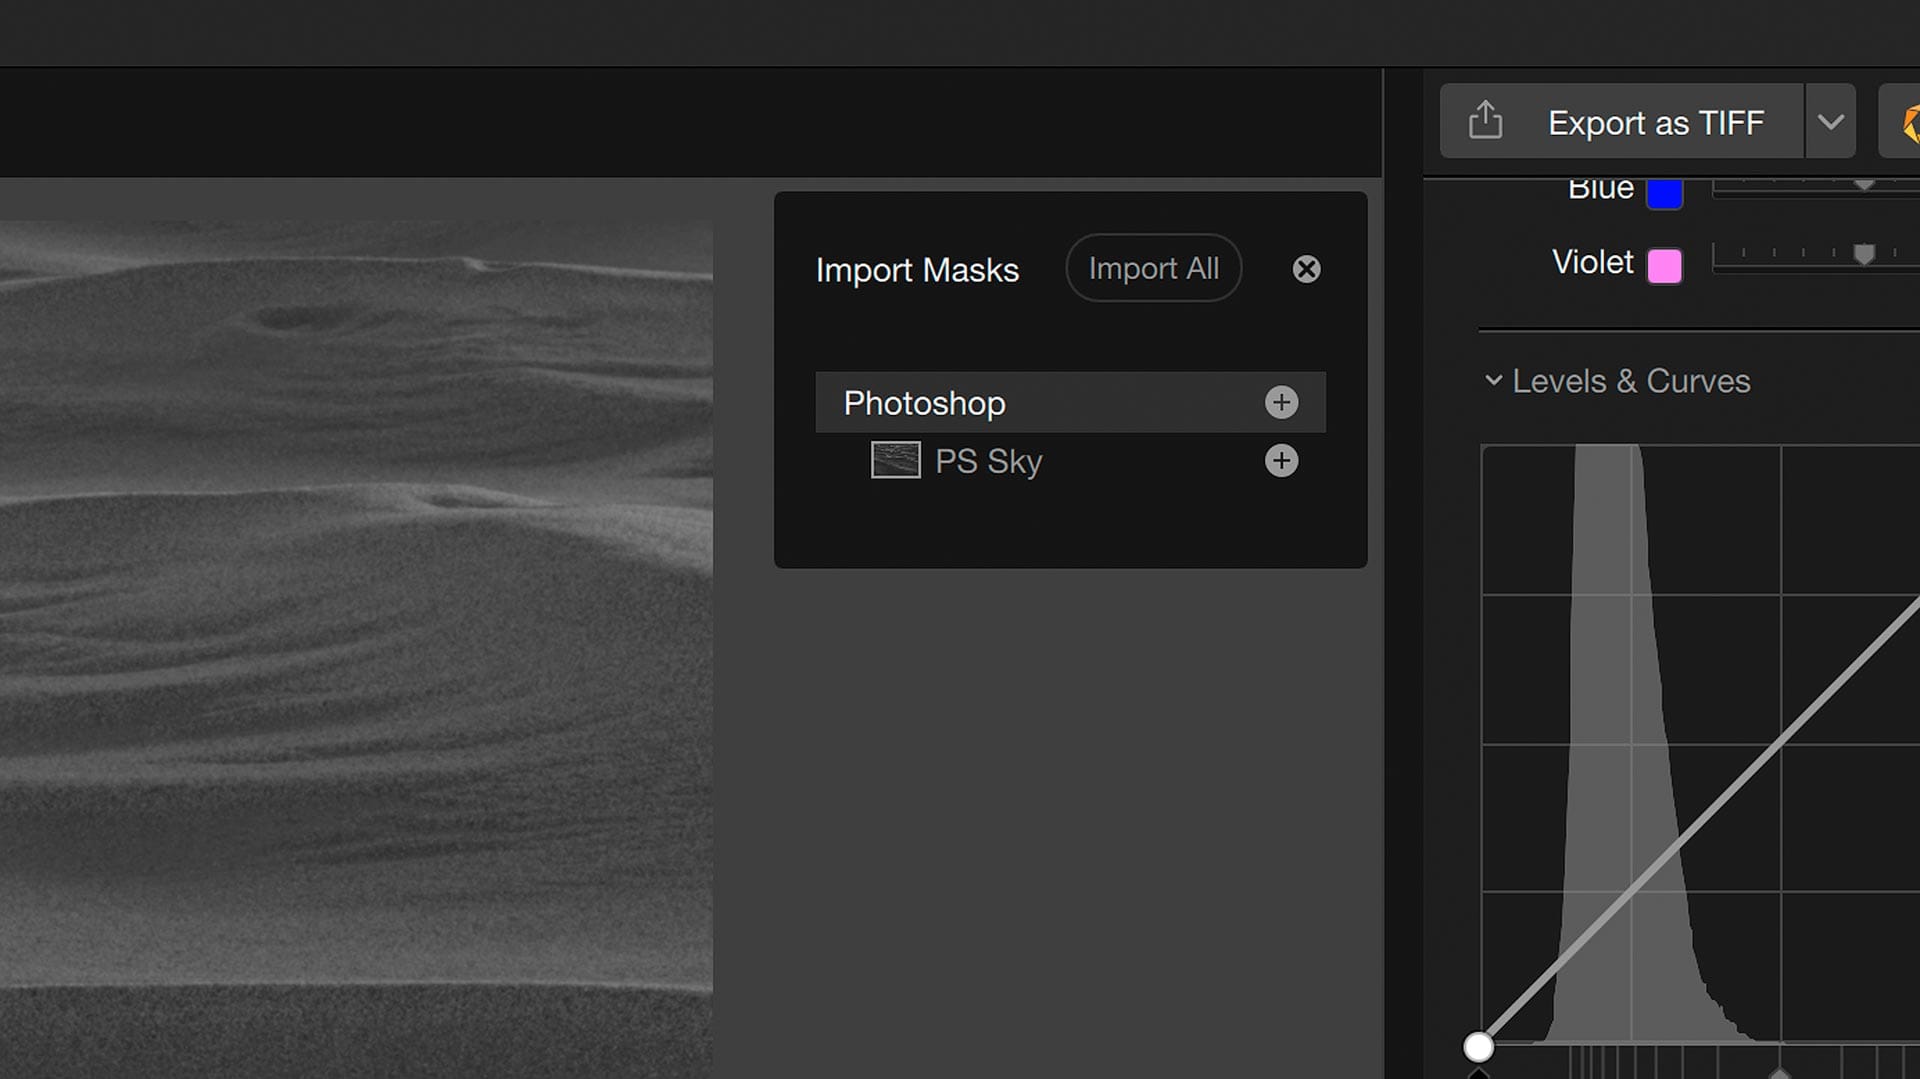
To use a Photoshop mask in Silver Efex, you first need at least one mask applied to a layer in the Layers panel. Next, click on the Silver Efex plugin icon, and a fly-out menu will appear containing quick instant-process presets, plus an Open button.
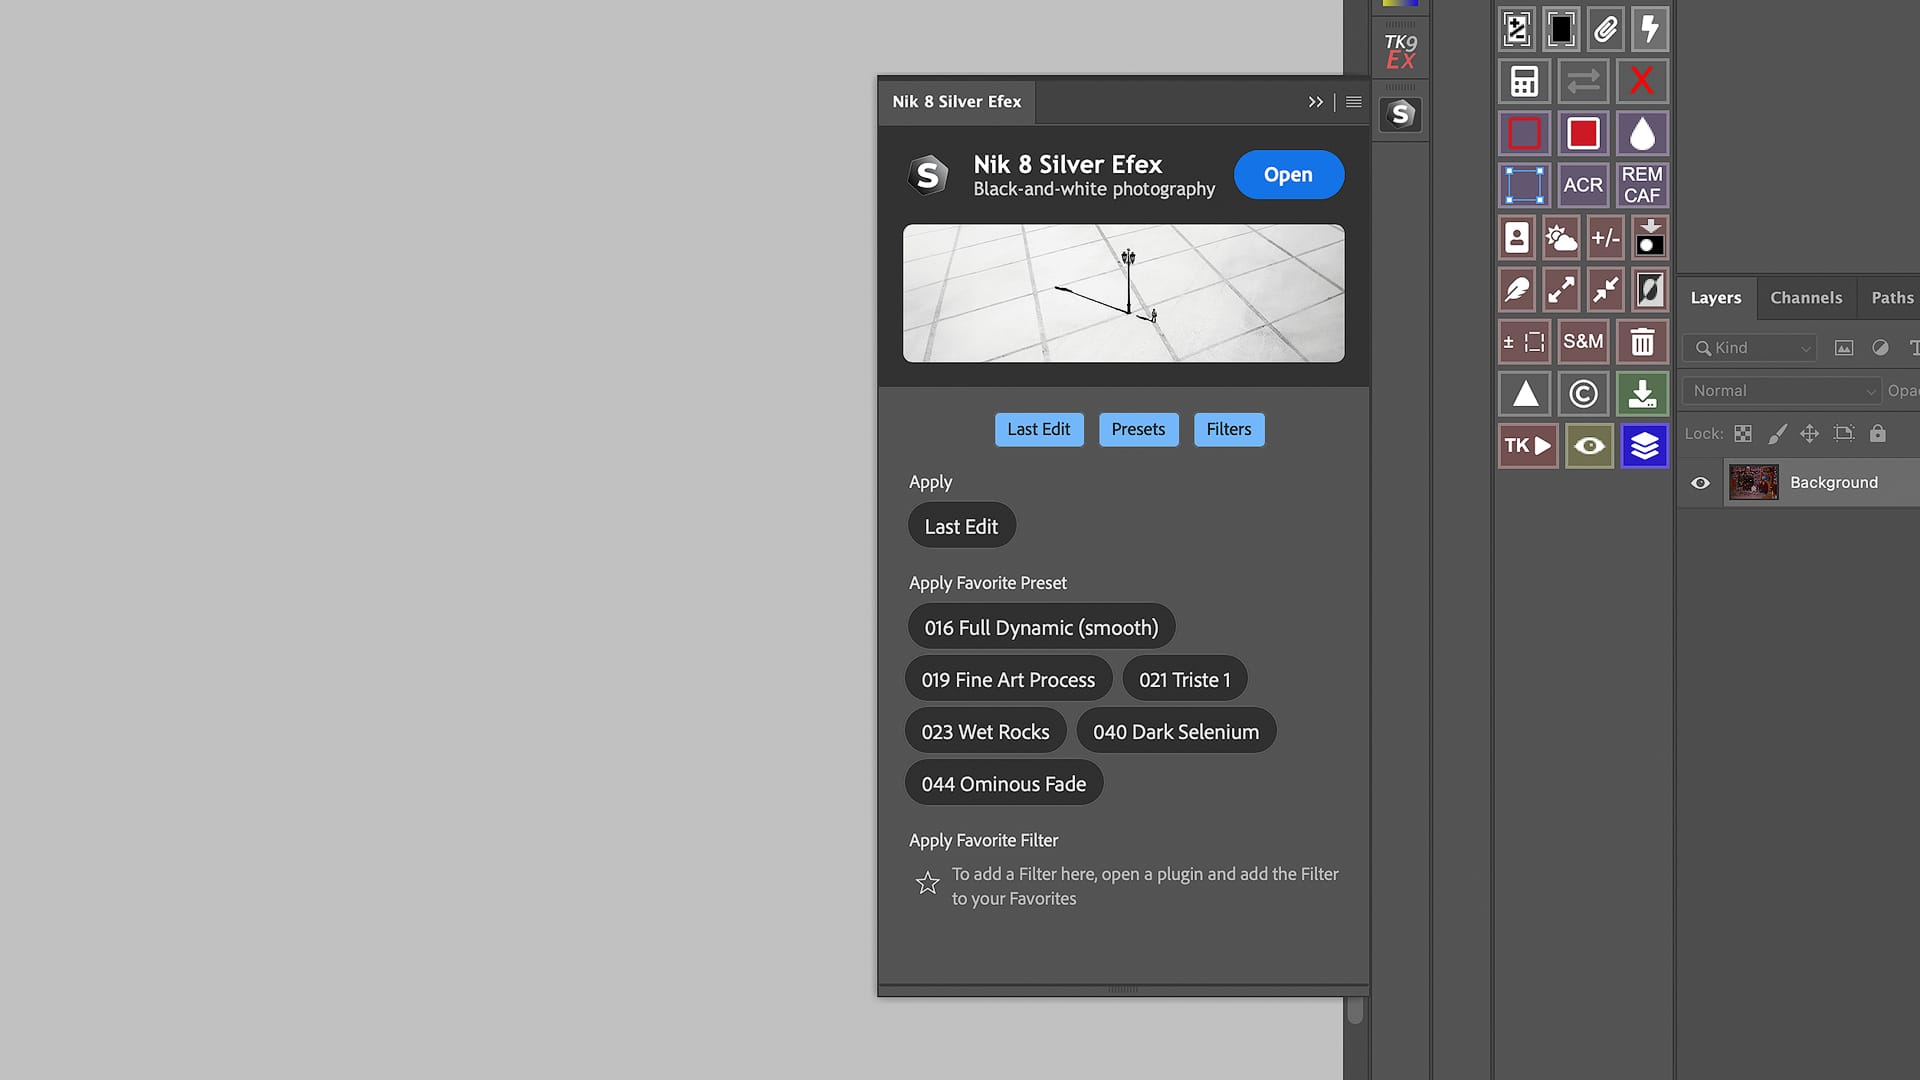
Click Open, and a new panel displays containing any masks the plugin finds applied to layers in the Layers panel. If you're editing a Photoshop document with lots of layers and masks, this panel will list them all and allow you to choose which masks you want to import. Personally, I'd like to see Silver Efex add the option of importing custom channels in addition to layer masks, but for now a mask must be assigned to a layer for Silver Efex to import it.

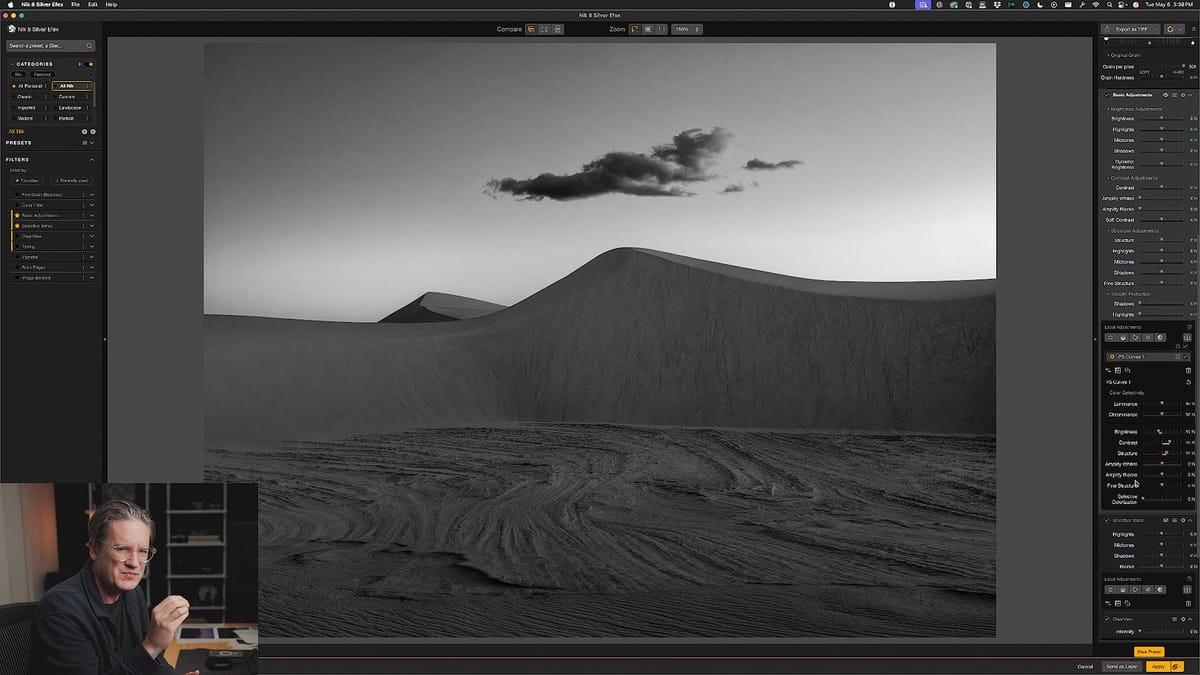
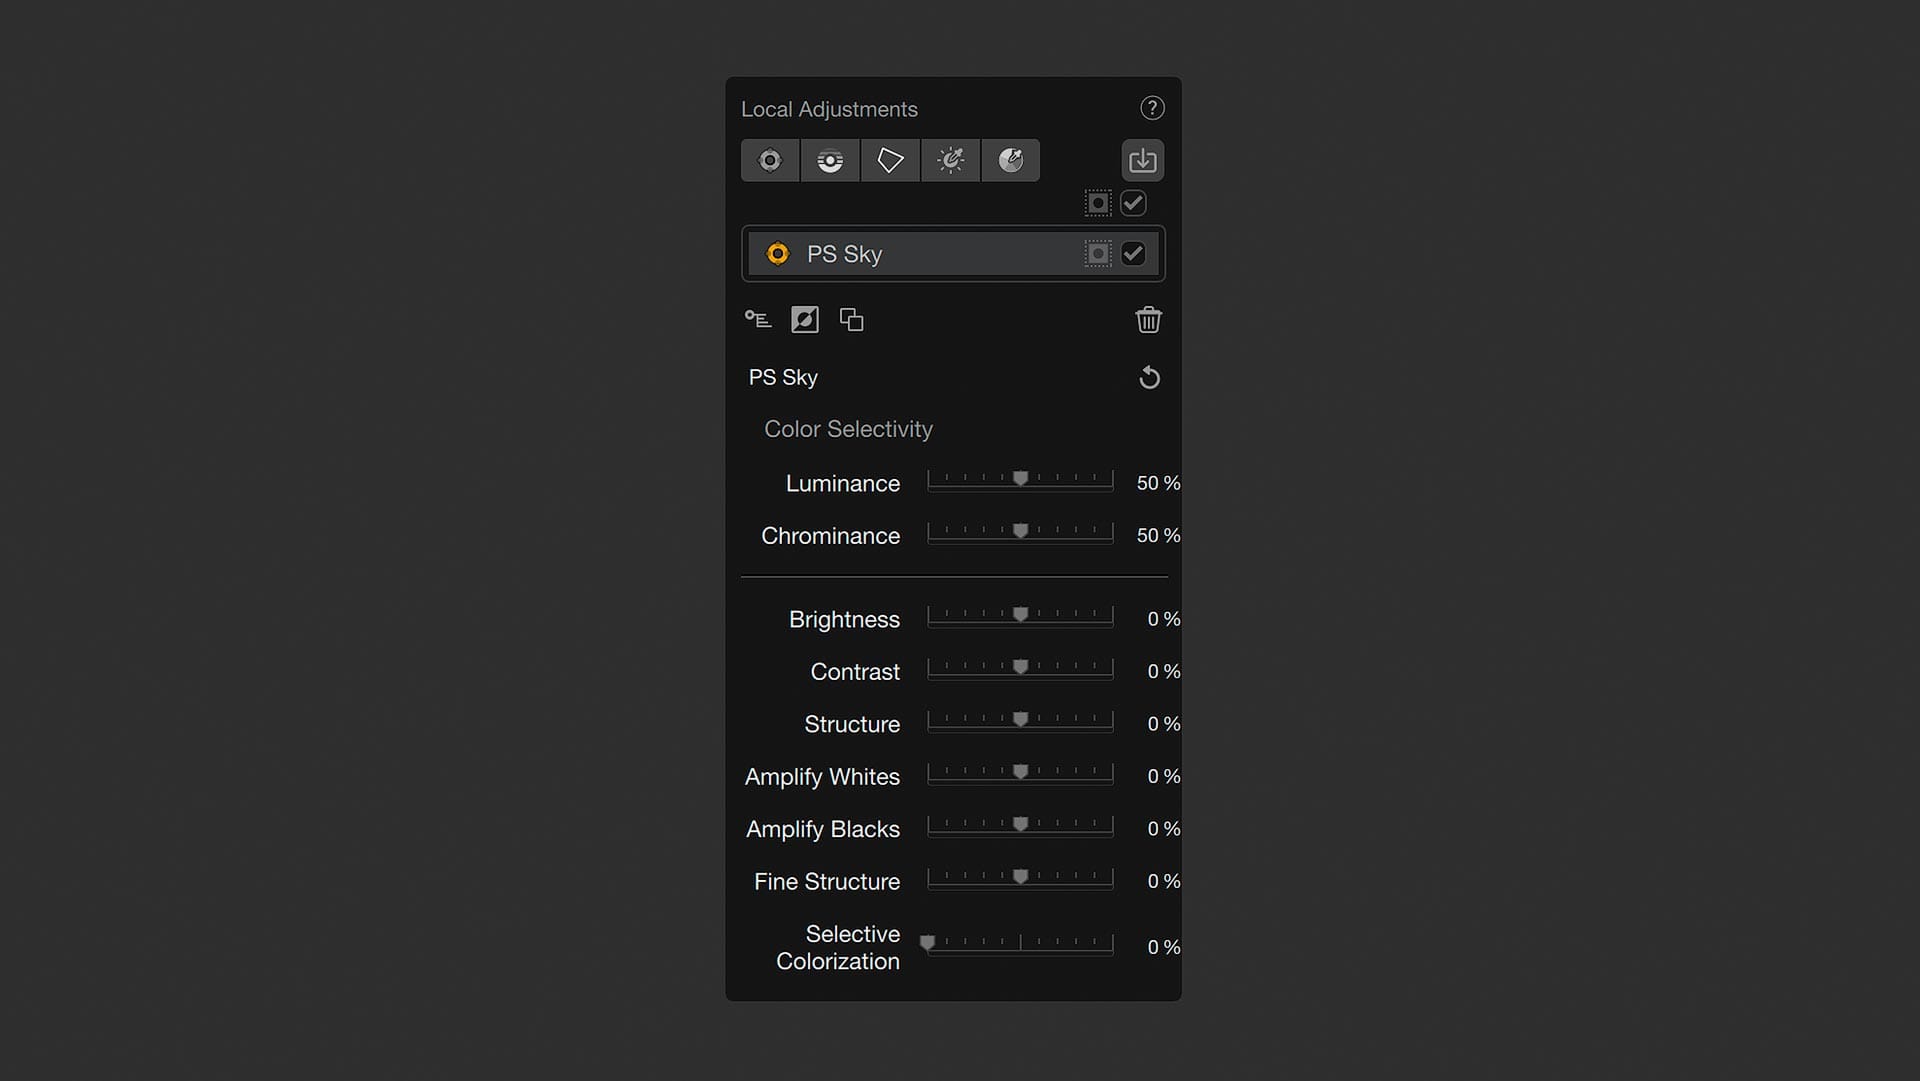
Once Silver Efex opens, head to any Local Adjustments panel in the right column (there's one in Basic Adjustments, ClearView and Selective Tones). There you will see a button at far right with an arrow on it. Click that, and a menu appears showing all the masks imported from Photoshop.
Select one or more masks from this menu, and they are added to the Local Adjustments menu. Click on a mask, and a menu of sliders will appear relevant to the filter you're using.
This functionality is helpful, for it allows photographers to apply localized edits and adjustments to specific subjects and areas of an image in Silver Efex without compositing images or using Nik's awkward, love-it-or-hate-it U-Point local adjustment tool. It also doesn't force photographers to learn a new masking interface. You simply create masks as you've been doing in Adobe Photoshop, then import and use them as part of the black and white conversion process.
Downside of imported masks
Overall, mask importing from Photoshop is a notable improvement to Silver Efex, but there's one downside I'd like to see addressed: too few adjustments options. Take another look at the menu above, and you'll see what I mean. Silver Efex offers only a handful of very basic tools with local adjustments.
I don't think Silver Efex needs to try and replicate the entire suite of filters, but mask importing and local adjustments could be considerably more powerful and useful if more options were provided. I also think the interface would be clearer and easier to use if Local Adjustments were a separate, dedicated panel instead of appearing multiple times within different filters.
Because local adjustments can only do so much, it's best to apply most of your edits to an image globally using the full suite of filters Silver Efex offers, then layer-on small tweaks and adjustments as needed using Local Adjustment masks.
Summary
Is Silver Efex v8 a worthwhile upgrade? Is it worth buying the full suite of Nik Collection plugins to use it?
In my opinion, Silver Efex could easily be sold on its own as a separate app for the price of the entire Nik Collection. So in that sense, it's a bargain. And like other DxO apps (including PureRaw, which I recently reviewed), you're not locked into paying a monthly subscription. Instead, you buy it once, and use it for however long you want.
Sure, you can edit black and white images in Lightroom, Photoshop and other applications, but there's something special and unique about "the look" of a Silver Efex image. The app comes loaded with a ton of useful presets and black and white film emulations to get the look you want. And if you're a fan of authentic looking grain, Silver Efex grain looks better and more authentic compared to the precise, digital grain typically applied by other apps.
I primarily shoot color images, but when an image works best in black and white, there's something really special about editing in Silver Efex. If you're a fan of black and white photography and have never tried the app, it's worth downloading a free trial of Nik Collection 8 and giving it a go.
Is the new mask importing feature worth upgrading for? If you work in Photoshop and create masks as part of your editing workflow, the new functionality is a solid improvement. Definitely simpler and more straightforward than creating two or more black and white images and compositing them together (with masks) inside Photoshop to apply local adjustments. With version 8, you can now more easily apply global and local edits in a single file. I just wish the range of editing controls and options for local adjustments in Silver Efex were more extensive and useful.